Introduction 00:00
An essential aspect of every creative project is to be able to tweak it easily. The developer (you) and other actors working on the project (like designers or even the client) must be able to change as many parameters as possible.
You have to take this into account for them to find the perfect color, speed, quantity, etc. for the best experience. You might even get unexpected results that look great.
First, we need a debug UI.
While you can create your own debug UI using HTML / CSS / JS, there are already multiple libraries:
All of these can do what we want, but we will use lil-gui because it’s popular, maintained, and easy to use.
From dat.GUI to lil-gui 02:33
Initially, Three.js Journey exercises were all using dat.GUI.
For some time now, this library hasn’t been updated and NPM started to trigger vulnerability warnings when installing it. Those vulnerabilities have been fixed since then, but alternatives have started to show up and that’s how lil-gui has become increasingly popular as a drop-in replacement for dat.GUI. The added bonus is that it even has better features.
All Three.js Journey exercises are now using lil-gui, but you might notice references to dat.GUI in the videos. Just ignore them and use lil-gui the same way.
By the way, GUI stands for Graphical User Interface.
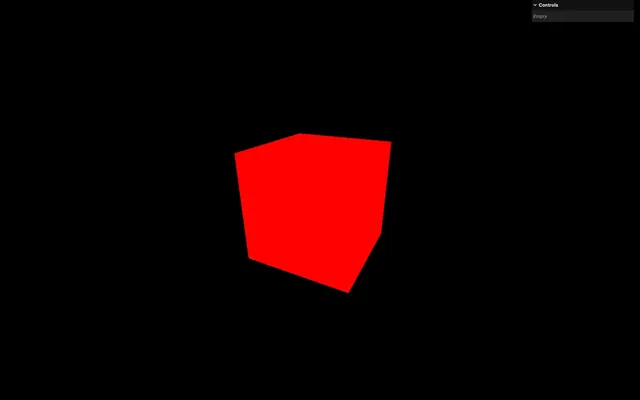
Example 04:05
You can find a pretty good example of debug UI in my portfolio. This UI only shows up when you add #debug to the URL.
https://bruno-simon.com/#debug
You can tweak the gravity, the colors, the speed, the elements’ position, etc.
While it took me a lot of time to create all those tweaks, the game would appear less balanced without it.
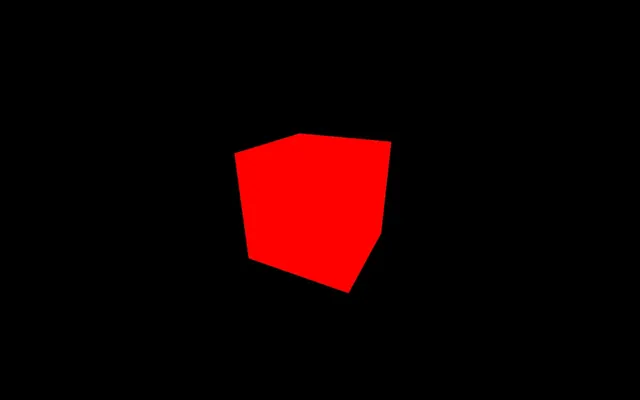
Setup 05:27
In the starter, we have our cube, but the dependencies don't include lil-gui. We will add it and create some tweaks.
Instantiating lil-gui 05:52
To add lil-gui to our project, we can use the dependency manager provided with Node.js called NPM (just like we did for GSAP in a previous lesson).
In your terminal (while the server is not running or by using another terminal window in the same folder) run npm install lil-gui
lil-gui is now available in the node_modules/ folder and we can import it into our script.js. Don't forget to relaunch the server:
import './style.css'
import * as THREE from 'three'
import { OrbitControls } from 'three/examples/jsm/controls/OrbitControls.js'
import gsap from 'gsap'
import GUI from 'lil-gui'

// ...
You can now instantiate lil-gui in a gui variable and we can do that at the very beginning, right after the imports:
/**
 * Debug
 */
const gui = new GUI()
In the rest of the course, you might see something more like this:
import * as dat from 'lil-gui'

// ...

const gui = new dat.GUI()
It basically boils down to the same thing. Feel free to use whatever solution you prefer.
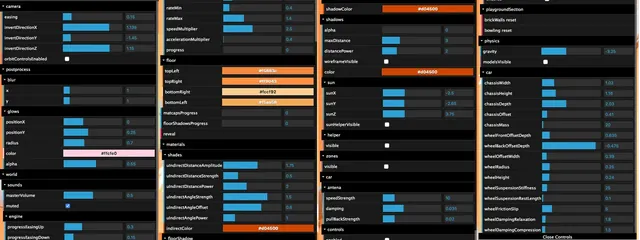
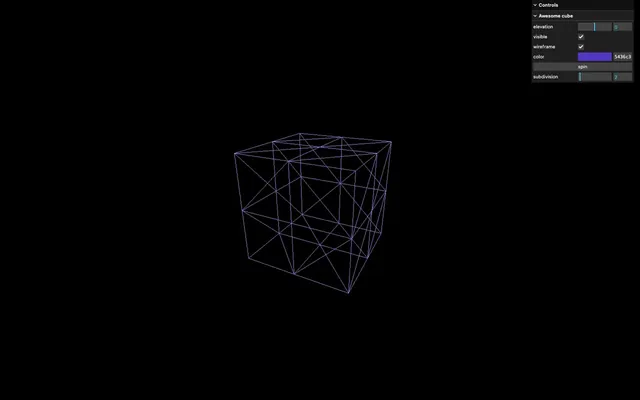
The different types of tweaks 08:04
On the top right corner of the experience, you can see an empty panel. There are different types of tweaks you can add to that panel:
- Range —for numbers with minimum and maximum value
- Color —for colors with various formats
- Text —for simple texts
- Checkbox —for booleans (
trueorfalse) - Select —for a choice from a list of values
- Button —to trigger functions
Let's cover some of these tweaks.
Range
The first tweak we are going to add is the range.
Most of the tweaks can be added using gui.add(...). The first parameter is the object and the second parameter is the property of that object you want to tweak.
You need to add the gui.add(...) after you’ve created the object and its property. Otherwise, you will ask lil-gui to tweak something that doesn’t exist yet.
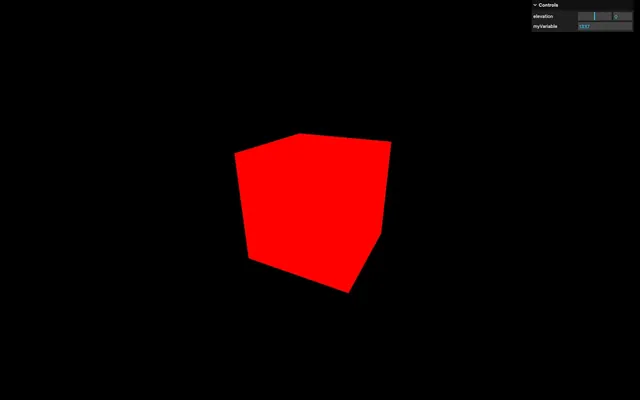
Let’s try with the mesh.position.y:
const mesh = new THREE.Mesh(geometry, material)
scene.add(mesh)

gui.add(mesh.position, 'y')
An input should appear in the panel. Try to change it and watch the cube move accordingly.
To specify the minimum value, the maximum value, and the precision, you can set them in the parameters:
gui.add(mesh.position, 'y', - 3, 3, 0.01)By doing that, we get a handy range input that we can drag and drop.
If you don’t like to have that many parameters, you can use the methods min(...), max(...), and step(...) by chaining directly after the add(...) method:
gui.add(mesh.position, 'y').min(- 3).max(3).step(0.01)And if you don't like having too many methods chained in one line, you can simply add line breaks:
gui
.add(mesh.position, 'y')
.min(- 3)
.max(3)
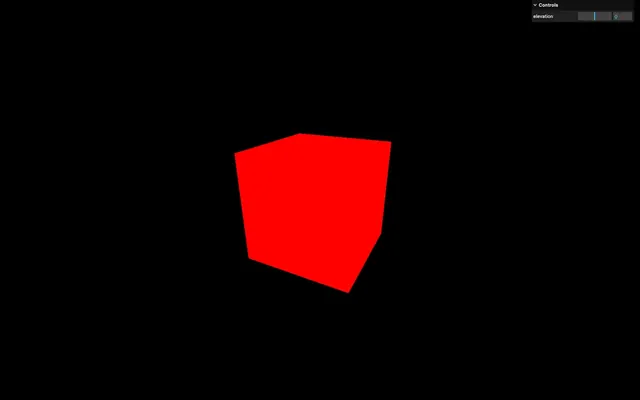
.step(0.01)To change the label, use the the name(...) method:
gui
    .add(mesh.position, 'y')
    .min(- 3)
    .max(3)
    .step(0.01)
    .name('elevation')
Tweaks for non-properties
One important thing to note here is that lil-gui can only modify properties. If you want to update a variable, you can’t:
let myVariable = 1337
gui.add(myVariable, '???')
But you can use some tricks to do so, such as creating an object whose purpose is to hold properties for lil-gui to be used on the object:
const myObject = {
    myVariable: 1337
}
gui.add(myObject, 'myVariable')
Remove this tweak as it was an example that we will put into practice later on in the lesson.
Checkbox
lil-gui will automatically detect what kind of property you want to tweak and use the corresponding interface. A good example is the visible property of Object3D. It is a boolean that, if false, will hide the object:
gui.add(mesh, 'visible')As you can see, lil-gui chose a checkbox because the visible property is a boolean.
We can do the same with the wireframe property of the material:
gui.add(material, 'wireframe')Colors
Handling colors is a little harder. Let’s try modifying the color property of the material.
First, we need to use addColor(...) instead of add(...) because the color property is not a string, a boolean, or a number. It’s an object with various properties because it’s an instance of the Three.js Color class. Among those properties are r, g and b , which lil-gui can use to display a nice tweak:
gui.addColor(material, 'color')You should see a color picker in your panel.
Now try to take the color value from the tweak and apply it to the color property:
You end up with the wrong color:
This is because Three.js applies some color management in order to optimise the rendering. As a result, the color value that is being displayed in the tweak isn’t the same value as the one being used internally.
We are not going to talk about color management right now and leave it for a future lesson. Yet, we want the right color value.
There are two ways of dealing with this.
Retrieving the modified color
The first solution consists of retrieving the color used internally by Three.js thanks to the getHexString() method on the Color instance when the tweak value changes.
To start with, we need to be aware of any tweak change. To do that, we can use the onChange() method:
gui
    .addColor(material, 'color')
    .onChange(() =>
    {
        console.log('value has changed')
    })
Next, we need to access the Color instance and we can use the classic material.color or we can retrieve a value directly as a parameter of the function:
gui
    .addColor(material, 'color')
    .onChange((value) =>
    {
        console.log(material.color)
        console.log(value)
    })
Both are the same Color instance from the color property of the material.
Let’s use the value and log the result of the getHexString():
gui
    .addColor(material, 'color')
    .onChange((value) =>
    {
        console.log(value.getHexString())
    })
So, this is the color value you can safely use in your code.
The problem with this technique is that you need to have the Console open, and this is not handy, especially for designers, or the client.
Only dealing with non-modified color
The second solution consists of dealing with the color before it gets modified by Three.js.
First, we need to save the color somewhere outside of Three.js. We are going to create an object whose purpose is to hold properties.
I personally like to call it global, parameters, or debugObject and put it right after instantiating lil-gui:
const gui = new GUI()
const debugObject = {}
Then, we are going to add a color property to debugObject and we are going to do it before creating the cube so that we can immediately send it to the color property of the MeshBasicMaterial:
debugObject.color = '#3a6ea6'

const geometry = new THREE.BoxGeometry(1, 1, 1, 2, 2, 2)
const material = new THREE.MeshBasicMaterial({ color: debugObject.color, wireframe: false })
By doing that, we have the initial color at only one place.
Then, instead of the previous tweak we had on the material.color, we are going to change it to debugObject.color:
gui
    .addColor(debugObject, 'color')
    .onChange(() =>
    {
        console.log(value.getHexString())
    })
And finally, instead of doing a console.log(), we are going to update the material.color using the set() method:
gui
    .addColor(debugObject, 'color')
    .onChange(() =>
    {
        material.color.set(debugObject.color)
    })
I like to use that solution so that nobody has to open the Console, but it’s up to you.
Let’s put back the debugObject.color to #a778d8.
Function / Button
Sometimes, we just want to trigger instructions on demand. Right now, we want to make the cube perform a little spin animation when we click somewhere in our debug UI.
We can do that by sending a property to the tweak which contains a function. Unfortunately, this means that we can’t have a function sitting like this on its own and then send it to lil-gui:
const myFunction = () => {
    console.log('do something')
}
gui.add(myFunction, '???')
But we can add a spin property to the debugObject object we created earlier and integrate a GSAP animation into it:
debugObject.spin = () =>
{
    gsap.to(mesh.rotation, { duration: 1, y: mesh.rotation.y + Math.PI * 2 })
}
Finally, we can add the tweak to debugObject.spin:
debugObject.spin = () =>
{
    // ...
}
gui.add(debugObject, 'spin')
You should see a spin button, and clicking on it will result in your cube doing a 360 ° rotation.
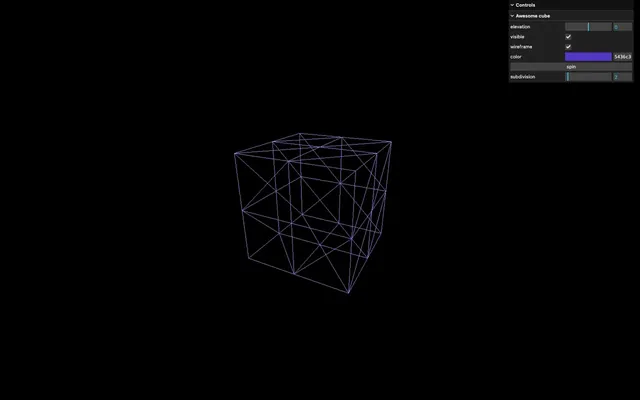
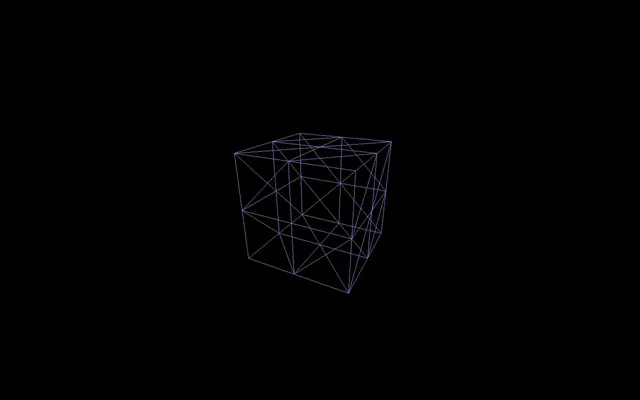
Tweaking the geometry 31:39
Why don’t we try and tweak the geometry subdivision?
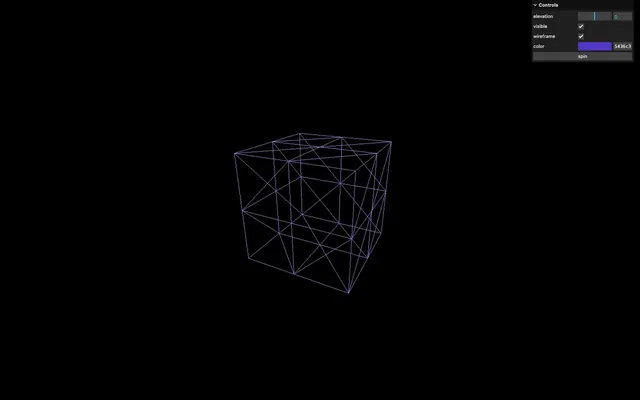
First, we are going to set the wireframe to true in order to visualise the triangles:
const material = new THREE.MeshBasicMaterial({ color: '#9c7fe3', wireframe: true })
If you check the BoxGeometry documentation, you’ll see that the parameters to control the subdivision are named widthSegments, heightSegments, and depthSegments.
Let’s try to add a tweak to the geometry.widthSegments:
gui
    .add(geometry, 'widthSegments')
    .min(1)
    .max(20)
    .step(1)
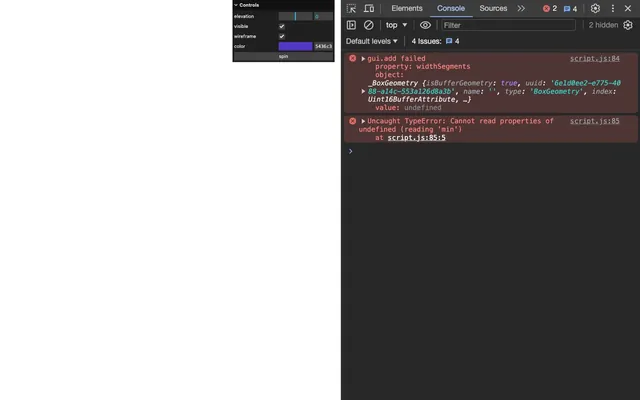
We get an error because widthSegments isn’t a property of the geometry.
widthSegments is only a parameter that we send to the BoxGeometry when we instantiate it. It’ll be used to generate the whole geometry only once.
First, since it’s not an actual property, we need to add a subdivision property to the debugObject object and apply our tweak to it:
debugObject.subdivision = 2
gui
    .add(debugObject, 'subdivision')
    .min(1)
    .max(20)
    .step(1)
We named it subdivision so that we can use it on all three widthSegments, heightSegments, and depthSegments.
Next, when the tweak value changes, we are going to destroy the old geometry and build a brand-new one.
To do that, we are first going to listen to the onChange event in the tweak:
gui
    .add(debugObject, 'subdivision')
    .min(1)
    .max(20)
    .step(1)
    .onChange(() =>
    {
        console.log('subdivision changed')
    })
Building a geometry can be a rather lengthy process for the CPU. Right now, we are listening to the change event which can be triggered a lot if the user drags and drops the range tweak too much.
Instead of using onChange, we are going to use onFinishChange, which will only be triggered when we stop tweaking the value:
gui
    .add(debugObject, 'subdivision')
    .min(1)
    .max(20)
    .step(1)
    .onFinishChange(() =>
    {
        console.log('subdivision finished changing')
    })
Instead of that console.log(), we can build a new geometry using debugObject.subdivision and associate it with the mesh by assigning it to its geometry property:
gui
    .add(debugObject, 'subdivision')
    .min(1)
    .max(20)
    .step(1)
    .onFinishChange(() =>
    {
        mesh.geometry = new THREE.BoxGeometry(
            1, 1, 1,
            debugObject.subdivision, debugObject.subdivision, debugObject.subdivision
        )
    })
And that’s it, but we made a small mistake. The old geometries are still sitting somewhere in the GPU memory which can create a memory leak.
To fix that, we can call the dispose() method on the old geometry before creating the new one:
gui
    .add(debugObject, 'subdivision')
    .min(1)
    .max(20)
    .step(1)
    .onFinishChange(() =>
    {
        mesh.geometry.dispose()
        mesh.geometry = new THREE.BoxGeometry(
            1, 1, 1,
            debugObject.subdivision, debugObject.subdivision, debugObject.subdivision
        )
    })
Folders 39:12
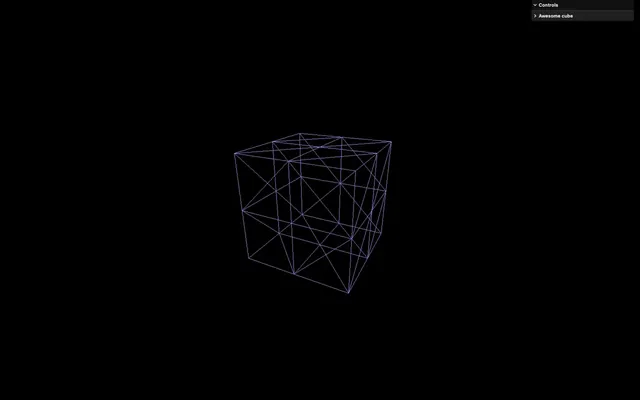
Let’s imagine that we have a lot more tweaks and the debug UI starts to get crowded. We can separate them into folders by using the addFolder() method.
To create a folder, call addFolder() and send the name you want for it as the parameter. Make sure to do it before the tweaks and save it as cubeTweaks:
const cubeTweaks = gui.addFolder('Awesome cube')Then, instead of using gui to create tweaks, use the cubeTweaks variable:
const cubeTweaks = gui.addFolder('Awesome cube')

cubeTweaks
    .add(mesh.position, 'y')
    // ...

cubeTweaks
    .add(mesh, 'visible')

cubeTweaks
    .add(material, 'wireframe')

cubeTweaks
    .addColor(material, 'color')
    // ...

// ...
cubeTweaks
    .add(debugObject, 'spin')

// ...
cubeTweaks
    .add(debugObject, 'subdivision')
    // ...
You can close it by default with the close() method:
const cubeTweaks = gui.addFolder('Awesome cube')
cubeTweaks.close()
Although we won’t do it, you can nest folders inside folders. No excuse for a messy debug UI!
Let’s comment the close():
// cubeTweaks.close()
GUI setup 41:21
lil-gui is flexible and we are going to see some parameters, methods, and tricks to get the best out of it.
Width
You can control the width by sending an object to the GUI constructor with a width property:
const gui = new GUI({
    width: 300
})
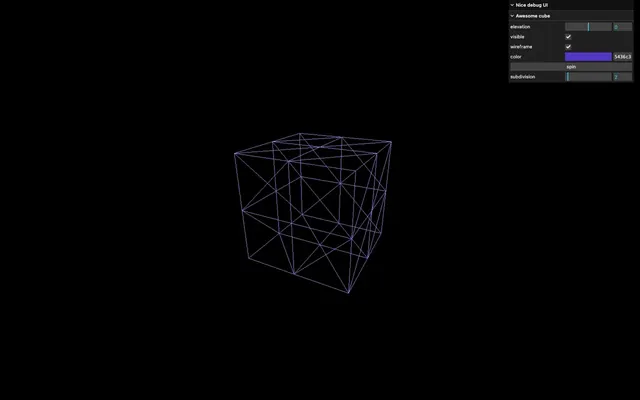
Title
You can change the title on top of the panel with the title property:
const gui = new GUI({
    width: 300,
    title: 'Nice debug UI'
})
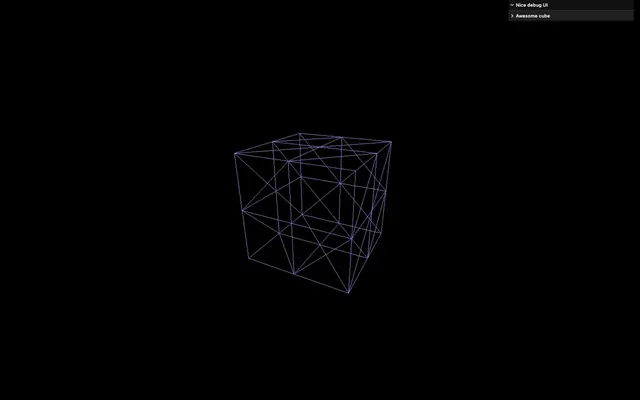
Close folders
You can close all folders by default with closeFolders:
const gui = new GUI({
    width: 300,
    title: 'Nice debug UI',
    closeFolders: true
})
Let’s put it back to false:
const gui = new GUI({
    width: 300,
    title: 'Nice debug UI',
    closeFolders: false
})
Close
You can close it by calling the close() method:
const gui = new GUI({
    width: 300,
    title: 'Nice debug UI',
    closeFolders: false,
})
gui.close()
Comment the close():
// gui.close()
Hide
You can hide it fully by calling the hide() method:
const gui = new GUI({
    width: 300,
    title: 'Nice debug UI',
    closeFolders: false,
})
// gui.close()
gui.hide()
Toggling
But how can we display it once again? This is up to you, but a quick solution could be to listen to the keydown event and if it’s the h key, we toggle it according to the _hidden property indicating if it’s currently hidden as a boolean:
window.addEventListener('keydown', (event) =>
{
    if(event.key == 'h')
        gui.show(gui._hidden)
})
Comment the hide() to have it visible by default:
// gui.hide()
More
There: we are done. But if you are curious, have a look at the lil-gui documentation for more setup and features like:
- Styling
- Positioning
- Having the tweak updated if the property changes
- Other types of tweaks like the Select
- Etc.
Conclusion 46:58
We will use our debug UI during specific moments of the next exercises. However, feel free to add as many tweaks as you want. It's an excellent way to practice and start building some creative stuff.
I would recommend you add tweaks as you progress. If you think of adding all the tweaks at the end of the project, you'll probably end up with no tweaks at all and missed opportunities.
Remember that some of the next lessons were recorded using dat.GUI instead of lil-gui. It doesn’t make a big difference and you should be able to follow without problem.