Introduction 00:00
As the name suggests, a Raycaster can cast (or shoot) a ray in a specific direction and test what objects intersect with it.
You can use that technique to detect if there is a wall in front of the player, test if the laser gun hit something, test if something is currently under the mouse to simulate mouse events, and many other things.
Setup 01:34
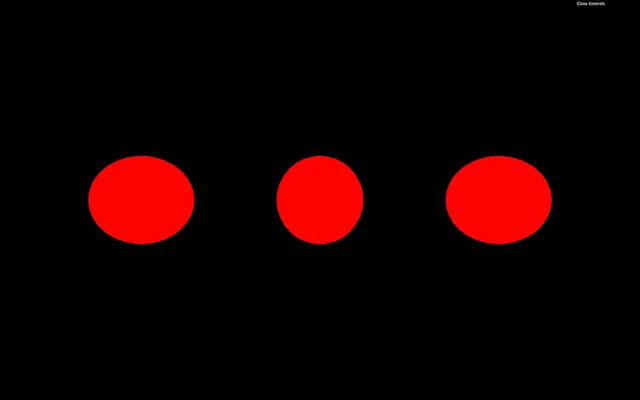
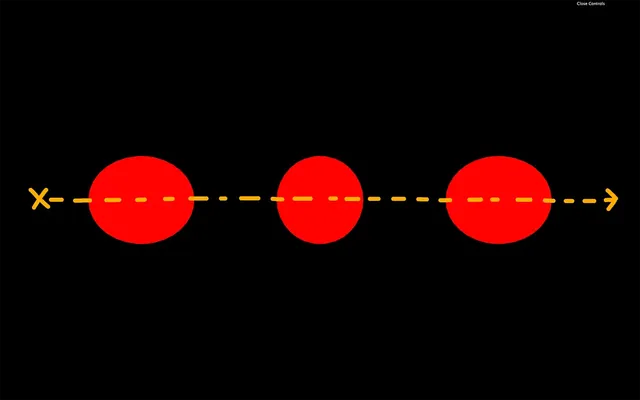
In our starter, we have 3 red spheres, and we are going to shoot a ray through and see if those spheres intersect.
Create the Raycaster 01:48
Instantiate a Raycaster:
/**
 * Raycaster
 */
const raycaster = new THREE.Raycaster()
To change the position and direction where ray will be cast, we can use the set(...) method. The first parameter is the position and the second parameter is the direction.
Both are Vector3, but the direction has to be normalized. A normalized vector has a length of 1. Don't worry, you don't have to do the mathematics by yourself, and you can call the normalize() method on the vector:
const rayOrigin = new THREE.Vector3(- 3, 0, 0)
const rayDirection = new THREE.Vector3(10, 0, 0)
rayDirection.normalize()

raycaster.set(rayOrigin, rayDirection)
This example of a normalized vector isn't very relevant because we could have set 1 instead of 10, but if we change the values, we will still have the normalize() method making sure that the vector is 1 unit long.
Here, the ray position supposedly start a little on the left in our scene, and the direction seems to go to the right. Our ray should go through all the spheres.
Cast a ray 07:19
To cast a ray and get the objects that intersect we can use two methods, intersectObject(...) (singular) and intersectObjects(...) (plural).
intersectObject(...) will test one object and intersectObjects(...) will test an array of objects:
const intersect = raycaster.intersectObject(object2)
console.log(intersect)

const intersects = raycaster.intersectObjects([object1, object2, object3])
console.log(intersects)
If you look at the logs, you'll see that intersectObject(...) returned an array of one item (probably the second sphere) and intersectObjects(...), returned an array of three items (probably the 3 spheres).
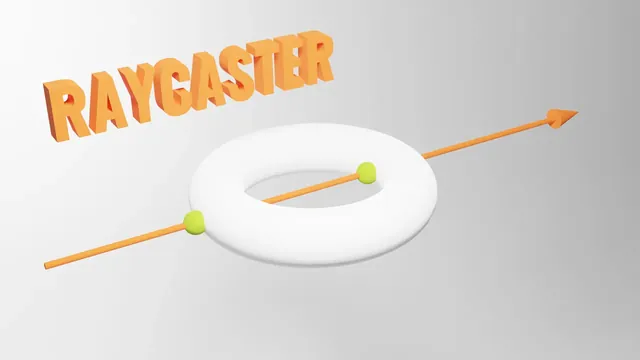
Result of an intersection 10:00
The result of an intersection is always an array, even if you are testing only one object. That is because a ray can go through the same object multiple times. Imagine a donut. The ray will go through the first part of the ring, then the middle's hole, then again the second part of the ring.
Each item of that returned array contains much useful information:
distance: the distance between the origin of the ray and the collision point.face: what face of the geometry was hit by the ray.faceIndex: the index of that face.object: what object is concerned by the collision.point: a Vector3 of the exact position in 3D space of the collision.uv: the UV coordinates in that geometry.
It's up to you to use that data. If you want to test if there is a wall in front of the player, you can test the distance. If you're going to change the object's color, you can update the object's material. If you want to show an explosion on the impact point, you can create this explosion at the point position.
Test on each frame 12:37
Currently, we only cast one ray at the start. If we want to test things while they are moving, we have to do the test on each frame. Let's animate the spheres and turn them blue when the ray intersects with them.
Remove the code we did previously and only keep the raycaster instantiation:
const raycaster = new THREE.Raycaster()Animate the spheres by using the elapsed time and classic Math.sin(...) in the tick function:
const clock = new THREE.Clock()

const tick = () =>
{
    const elapsedTime = clock.getElapsedTime()

    // Animate objects
    object1.position.y = Math.sin(elapsedTime * 0.3) * 1.5
    object2.position.y = Math.sin(elapsedTime * 0.8) * 1.5
    object3.position.y = Math.sin(elapsedTime * 1.4) * 1.5

    // ...
}
You should see the spheres waving up and down at different frequencies.
Now let's update our raycaster like we did before but in the tick function:
const clock = new THREE.Clock()

const tick = () =>
{
    // ...

    // Cast a ray
    const rayOrigin = new THREE.Vector3(- 3, 0, 0)
    const rayDirection = new THREE.Vector3(1, 0, 0)
    rayDirection.normalize()

    raycaster.set(rayOrigin, rayDirection)

    const objectsToTest = [object1, object2, object3]
    const intersects = raycaster.intersectObjects(objectsToTest)
    console.log(intersects)

    // ...
}
Yet again, we don't really need to normalize the rayDirection because its length is already 1. But it's good practice to keep the normalize() in case we change the direction.
We also put the array of objects to test in a variable objectsToTest. That will get handy later.
If you look at the console, you should get an array with intersections in it, and those intersections keep changing depending on the spheres' positions.
We can now update the material of the object property for each item of the intersects array:
for(const intersect of intersects)
    {
        intersect.object.material.color.set('#0000ff')
    }
Unluckily, they all go blue but never go back red. There are many ways to turn the objects that didn't intersect back to red. What we can do is turn all the spheres red and then turn the ones that intersect blue:
for(const object of objectsToTest)
    {
        object.material.color.set('#ff0000')
    }

    for(const intersect of intersects)
    {
        intersect.object.material.color.set('#0000ff')
    }
Use the raycaster with the mouse 23:37
As we said earlier, we can also use the raycaster to test if an object is behind the mouse. In other words, if you are hovering an object.
Mathematically speaking, it's a little complex because we need to cast a ray from the camera in the mouse's direction, but, fortunately, Three.js is doing all the heavy lifting.
For now, let's comment the code related to the raycaster in the tick function.
Hovering
First, let's handle hovering.
To begin with, we need the coordinates of the mouse. We cannot use the basic native JavaScript coordinates, which are in pixels. We need a value that goes from -1 to +1 in both the horizontal and the vertical axis, with the vertical coordinate being positive when moving the mouse upward.
This is how WebGL works and it's related to things like clip space but we don't need to understand those complex concepts.
Examples:
- The mouse is on the top left of the page:
-1 / 1 - The mouse is on the bottom left of the page:
-1 / - 1 - The mouse is on the middle vertically and at right horizontally:
1 / 0 - The mouse is in the center of the page:
0 / 0
First, let's create a mouse variable with a Vector2, and update that variable when the mouse is moving:
/**
 * Mouse
 */
const mouse = new THREE.Vector2()

window.addEventListener('mousemove', (event) =>
{
    mouse.x = event.clientX / sizes.width * 2 - 1
    mouse.y = - (event.clientY / sizes.height) * 2 + 1

    console.log(mouse)
})
Look at the logs and make sure that the values match the previous examples.
We could cast the ray in the mousemove event callback, but it's not recommend because the mousemove event might be triggered more than the frame rate for some browsers. Instead, we will cast the ray in the tick function as we did before.
To orient the ray in the right direction, we can use the setFromCamera() method on the Raycaster. The rest of the code is the same as before. We just update the objects materials to red or blue if they intersect or not:
const tick = () =>
{
    // ...

    raycaster.setFromCamera(mouse, camera)

    const objectsToTest = [object1, object2, object3]
    const intersects = raycaster.intersectObjects(objectsToTest)

    for(const intersect of intersects)
    {
        intersect.object.material.color.set('#0000ff')
    }

    for(const object of objectsToTest)
    {
        if(!intersects.find(intersect => intersect.object === object))
        {
            object.material.color.set('#ff0000')
        }
    }

    // ...
}
The spheres should become blue if the cursor is above them.
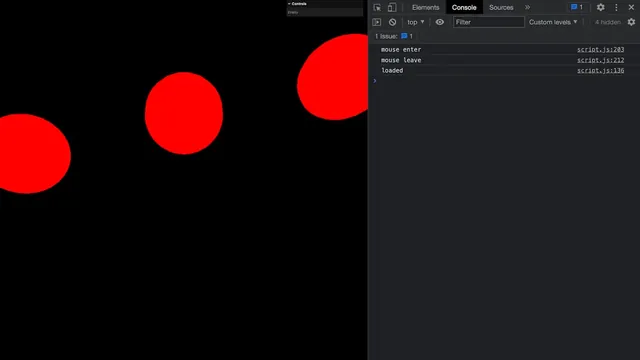
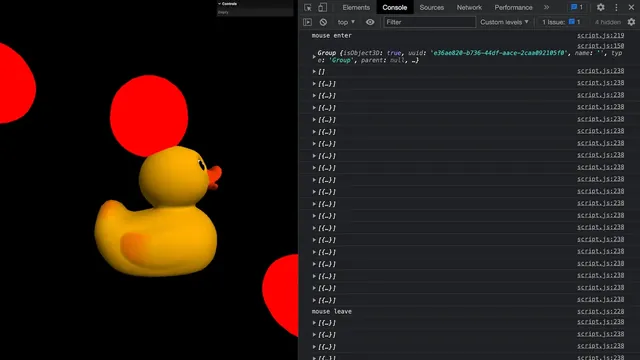
Mouse enter and mouse leave events
Mouse events like 'mouseenter', 'mouseleave', etc. aren't supported either. If you want to be inform when the mouse "enters" an object or "leaves" that object, you'll have to do it by yourself.
What we can do to reproduce the mouseenter and mouseleave events, is to have a variable containing the currently hovered object.
If there is one object intersecting, but there wasn't one before, it means a mouseenter has happened on that object.
If no object intersects, but there was one before, it means a mouseleave has happened.
We just need to save the currently intersecting object:
let currentIntersect = nullAnd then, test and update the currentIntersect variable:
const tick = () =>
{
    // ...
    raycaster.setFromCamera(mouse, camera)
    const objectsToTest = [object1, object2, object3]
    const intersects = raycaster.intersectObjects(objectsToTest)

    if(intersects.length)
    {
        if(!currentIntersect)
        {
            console.log('mouse enter')
        }

        currentIntersect = intersects[0]
    }
    else
    {
        if(currentIntersect)
        {
            console.log('mouse leave')
        }

        currentIntersect = null
    }

    // ...
}
Mouse click event
Now that we have a variable containing the currently hovered object, we can easily implement a click event.
First, we need to listen to the click event regardless of where it happens:
window.addEventListener('click', () =>
{

})
Then, we can test if the there is something in the currentIntersect variable:
window.addEventListener('click', () =>
{
    if(currentIntersect)
    {
        console.log('click')
    }
})
We can also test what object was concerned by the click:
window.addEventListener('click', () =>
{
    if(currentIntersect)
    {
        switch(currentIntersect.object)
        {
            case object1:
                console.log('click on object 1')
                break

            case object2:
                console.log('click on object 2')
                break

            case object3:
                console.log('click on object 3')
                break
        }
    }
})
Reproducing native events takes time, but once you understand it, it's pretty straightforward.
Raycasting with models 44:39
This is all great, but can we apply ray casting to imported models?
The answer is yes, and it’s actually quite easy. But we are going to do it together because there are a few interesting things that we can learn along the way.
First, we need a model.
Load the model
The Duck model that we used in a previous lesson is located in the static/models/Duck/ folder.
Now would be a good time to try to load that model on your own and add it to the scene.
First, we are going to use the GLTFLoader.
Import GLTFLoader from three/examples/jsm/loaders/GLTFLoader.js:
import { GLTFLoader } from 'three/examples/jsm/loaders/GLTFLoader.js'Next, we need to instantiate it.
You can put that code anywhere after instantiating the scene and before the tick function:
/**
 * Model
 */
const gltfLoader = new GLTFLoader()
We can now call the load method. The two parameters are the path to the file and the function that should be called when the model is loaded.
We are going to use the glTF-Binary, but feel free to use another version. In addition, don’t forget that you need to add a DracoLoader instance to the GLTFLoader instance if you want to use the Draco compressed version.
Call the load method and send './models/Duck/glTF-Binary/Duck.glb' as the path (without the static/ path) and a function with a console log in it:
gltfLoader.load(
    './models/Duck/glTF-Binary/Duck.glb',
    () =>
    {
        console.log('loaded')
    }
)
You should see the 'loaded' in the console.
We can now add the model to the scene. First, add a gltf argument to the function:
gltfLoader.load(
    './models/Duck/glTF-Binary/Duck.glb',
    (gltf) =>
    {
        console.log('loaded')
    }
)
Now, add the whole loaded scene contained in the gltf.scene property to your own scene:
gltfLoader.load(
    './models/Duck/glTF-Binary/Duck.glb',
    (gltf) =>
    {
        scene.add(gltf.scene)
    }
)
As you can see, there is something wrong.
Lights
If you’ve tried doing it on your own, you’ve probably struggled a little executing this step.
It seems that something has been added to the scene, but it’s all black. And the reason is that our Duck material is a MeshStandardMaterial and this kind of material can only be seen with lights.
Let’s add an AmbientLight and a DirectionalLight:
/**
 * Lights
 */
// Ambient light
const ambientLight = new THREE.AmbientLight('#ffffff', 0.9)
scene.add(ambientLight)

// Directional light
const directionalLight = new THREE.DirectionalLight('#ffffff', 2.1)
directionalLight.position.set(1, 2, 3)
scene.add(directionalLight)
Now that we can see the Duck, move it down a little:
gltfLoader.load(
    './models/Duck/glTF-Binary/Duck.glb',
    (gltf) =>
    {
        gltf.scene.position.y = - 1.2
        scene.add(gltf.scene)
    }
)
Intersect the model
Let’s try the raycaster on the model.
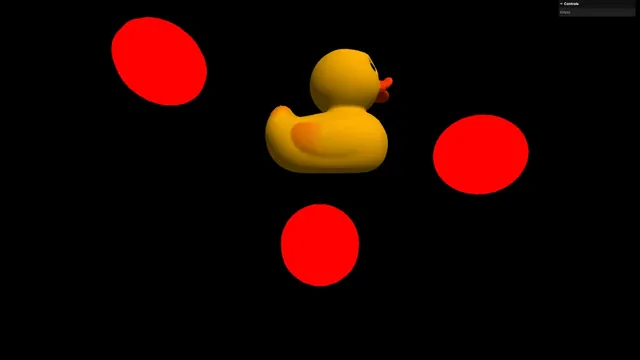
The exercise will be quite simple. We want the Duck to get bigger when the cursor enters it and revert to its normal size when the cursor leaves it.
We are going to test if the cursor is in the Duck or not on each frame, meaning we need to configure the tick function. The raycaster is already set from the mouse and we can do our intersect test right after the code related to the test we did with the spheres.
Previously, we used raycaster.intersectObjects to test the raycaster against an array of meshes. But right now, we are only testing one object which is going to be the gltf.scene. Yes, this object might have multiple children and even worse, children inside children, but you’ll see that it’s not a problem and we are still testing one object.
Instead of using intersectObjects (plural), we are going to use intersectObject (singular). It works just the same and will also return an array of intersections, but we have to send it an object instead of an array of objects.
So, what do you have to do? First, create a modelIntersects variable (so that it doesn’t conflict with the intersects variable), then call the raycaster.intersectObject (singular) method and, finally, send it the gltf.scene (this code won’t work):
const tick = () =>
{
    // ...

    // Test intersect with a model
    const modelIntersects = raycaster.intersectObject(gltf.scene)
    console.log(modelIntersects)

    // Update controls
    // ...
}
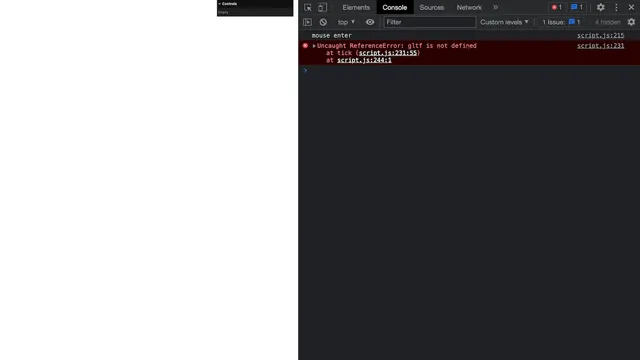
We made a mistake here. If you are comfortable with JS, you know that we can’t access the gltf variable from outside of the loaded callback function. We call this the “scope” of a variable.
Also, loading models takes time. Yes, we are testing in local with quite a simple model, but situations might vary and loading a complex object online will take time.
And those are classic issues that you will be confronted with when you try to interact with or animate loaded models.
To fix both of these issues, we are going to create a model variable using a let right before we load the model and set it to null (equivalent of “nothing” in JavaScript):
let model = null
gltfLoader.load(
    // ...
)
Since we created that model variable outside of any function, we will be able to use it in the tick function.
Next, when the model is loaded, we assign the gltf.scene to that model:
let model = null
gltfLoader.load(
    './models/Duck/glTF-Binary/Duck.glb',
    (gltf) =>
    {
        model = gltf.scene
        gltf.scene.position.y = - 1.2
        scene.add(gltf.scene)
    }
)
I’d also like to replace gltf.scene by model in that loaded function because it makes a bit more sense, although it’s optional:
let model = null
gltfLoader.load(
    './models/Duck/glTF-Binary/Duck.glb',
    (gltf) =>
    {
        model = gltf.scene
        model.position.y = - 1.2
        scene.add(model)
    }
)
Back to the tick function and our intersectObject: we can now use the model variable instead of the gltf.scene (this code won’t work just yet):
const tick = () =>
{
    // ...

    // Test intersect with a model
    const modelIntersects = raycaster.intersectObject(model)
    console.log(modelIntersects)

    // ...
}
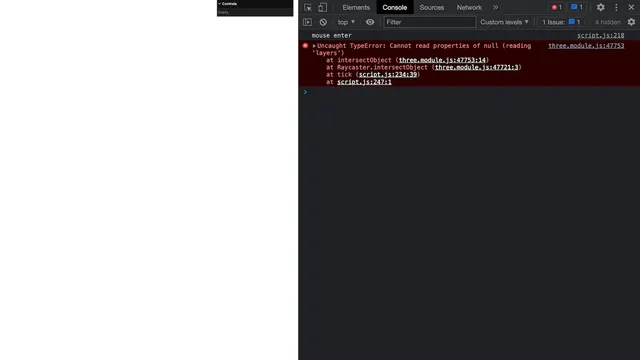
And once again, we get an error. We’ve forgotten that loading a model takes time, meaning that the model variable will be null for a moment.
What we can do here is simply test if there is something in model with an if statement:
const tick = () =>
{
    // ...

    if(model)
    {
        const modelIntersects = raycaster.intersectObject(model)
        console.log(modelIntersects)
    }

    // ...
}
And now we get the array of intersects.
Notes
Before playing with the Duck size there are a few things to note.
Recursive
First, we are calling intersectObject on model, which is a Group, not a Mesh.
You can test that by logging model right before assigning it in the loaded callback function:
let model = null
gltfLoader.load(
    './models/Duck/glTF-Binary/Duck.glb',
    (gltf) =>
    {
        model = gltf.scene
        console.log(model)
        model.position.y = - 1.2
        scene.add(model)
    }
)
This shouldn’t work since the Raycaster is supposed to be tested against Meshes. The reason why it’s working is that, by default, the Raycaster will check the children of the object. Even better, it’ll test children of children recursively.
We can actually choose to deactivate that option by setting the second parameter of the intersectObject and intersectObjects methods to false, but we are fine with the default behaviour.
Array of intersects
The second thing to note is that we are receiving an array of intersects while we are testing only one object.
The first reason is that, since the Raycaster is testing children recursively, there can be multiple Meshes that intersect with the ray. It’s not the case here since the Duck is made of only one Mesh, but we could have tested a more complex model.
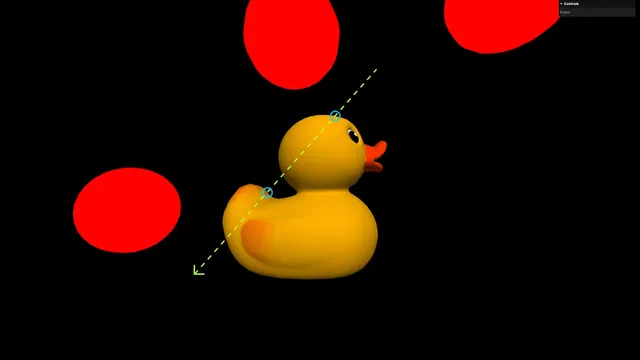
The second reason is that, as we’ve seen earlier, even one Mesh can intersect multiple times with a ray and it’s actually the case with our Duck. Tested from a very specific angle, you can have multiple intersects:
Update the scale
We are almost done. All we need to do now is update the scale of the model according to the array of intersects.
Right after calling the intersectObject, we can test the length of the array.
0 is considered as false, so we can just use modelIntersects.length as the condition.
If it’s above 0, it’ll be true, meaning that the mouse is hovering over the model and we should increase the scale. Otherwise, it will be false, meaning that the mouse isn’t hovering over the model and we should set the scale to 1:
const tick = () =>
{
    // ...

    if(model)
    {
        const modelIntersects = raycaster.intersectObject(model)

        if(modelIntersects.length)
        {
            model.scale.set(1.2, 1.2, 1.2)
        }
        else
        {
            model.scale.set(1, 1, 1)
        }
    }

    // ...
}