Introduction 00:00
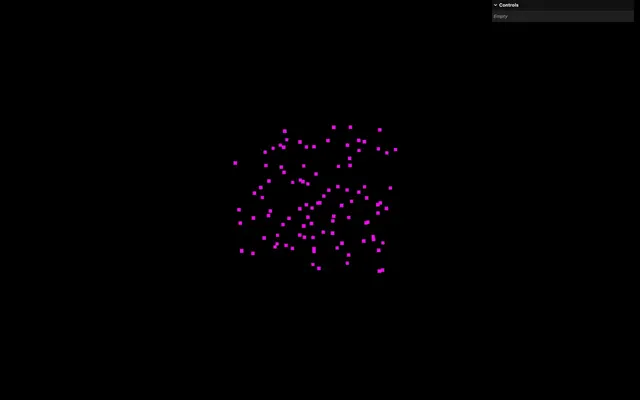
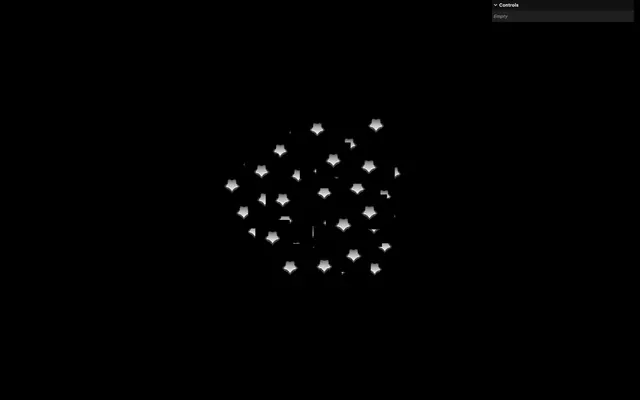
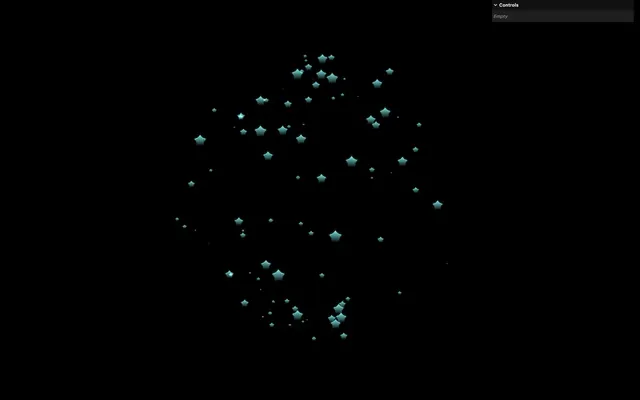
In this lesson we are going to create fireworks whenever the user clicks on the screen:

The trick here is that we are going to use particles and animate them in a single vertex shader.
- The particles start to expand fast in every direction
- They scale up even faster
- They start to fall down slowly
- They scale down
- They twinkle as they disappear
That doesn’t look too complicated, now does it? Remember that we need to do that in the vertex shader in order to achieve good performance, meaning that the same code will be executed for all particles.
Also, all the previously mentioned animation steps are intertwined, and we need to find a way to handle the various steps while combining them.
At the very end, we are going to implement a sky background as a bonus.
Setup 02:09
We get the usual simple setup with a few things to note:
- One test cube to make sure that the experience is running properly
- An instance of
lil-guithat we are going to use for the sky - The
vite-plugin-glsldependency to handle GLSL files OrbitControlsto rotate aroundTextureLoaderthat is ready to load some fancy particle texturesgsapin the dependencies that we are going to use to animate one single property
Base particles 02:57
Let’s create the particles instead of that cube.
Remove the whole Test section with the cube and create a Fireworks section instead, right before the Animate section:
/**
 * Fireworks
 */

We are going to have a black screen for a few minutes.
Since we need to create a new firework on each click, we better set a function for it.
Create a createFirework function and call it immediately:
const createFirework = () =>
{

}

createFirework()
We are going to add various parameters as we go such as the position, the radius, the amount of particles, etc.
Most of the following code will be inside createFirework.
Geometry
We are going to instantiate the usual BufferGeometry and fill it with random positions, but first, we need to know how many particles we want.
Add a count parameter to the createFirework function and set it to 100 when calling the function:
const createFirework = (count) =>
{

}

createFirework(100)
Don’t worry, we are going to add a lot more soon.
Now create a positionsArray using a Float32Array with a length of count * 3 since we need 3 values per vertex (xyz):
const createFirework = (count) =>
{
    // Geometry
    const positionsArray = new Float32Array(count * 3)
}
Loop from 0 to count, create an i3 which is i * 3 so that we have a value going 3 by 3 and fill the positionsArray array with random values:
const createFirework = (count) =>
{
    // Geometry
    const positionsArray = new Float32Array(count * 3)

    for(let i = 0; i < count; i++)
    {
        const i3 = i * 3

        positionsArray[i3    ] = Math.random()
        positionsArray[i3 + 1] = Math.random()
        positionsArray[i3 + 2] = Math.random()
    }
}
We are moving swiftly through this because we have done it multiple times before. But to put it in a nutshell: each loop corresponds to one vertex. For now, we’re filling the array with random positions, but later we will send more specific coordinates.
Subtract 0.5 to each Math.random() so that values are as much positive as negative:
const createFirework = (count) =>
{
    // Geometry
    const positionsArray = new Float32Array(count * 3)

    for(let i = 0; i < count; i++)
    {
        const i3 = i * 3

        positionsArray[i3    ] = Math.random() - 0.5
        positionsArray[i3 + 1] = Math.random() - 0.5
        positionsArray[i3 + 2] = Math.random() - 0.5
    }
}
We can now create the actual BufferGeometry:
const createFirework = (count) =>
{
    // ...

    const geometry = new THREE.BufferGeometry()
}
Then, add a 'position' attribute to it using a Float32BufferAttribute:
const createFirework = (count) =>
{
    // ...

    const geometry = new THREE.BufferGeometry()
    geometry.setAttribute('position', new THREE.Float32BufferAttribute(positionsArray, 3))
}
3 corresponds to the itemSize and indicates that we have 3 values per vertex (because xyz).
Material
For the material, let’s not rush anything and start with a PointsMaterial, which we will later replace with a ShaderMaterial:
const createFirework = (count) =>
{
    // ...

    // Material
    const material = new THREE.PointsMaterial()
}
Points
We can finally create the particles that we are going to name firework (singular) and use a Points instance, then add() it to the scene:
const createFirework = (count) =>
{
    // ...

    // Points
    const firework = new THREE.Points(geometry, material)
    scene.add(firework)
}
Finally, we’re getting something on screen, and we have a long and exciting road ahead.
We are going to change the position of the firework according to a position parameter:
const createFirework = (count, position) =>
{
    // ...

    // Points
    const firework = new THREE.Points(geometry, material)
    firework.position.copy(position)
    scene.add(firework)
}

createFirework(100, new THREE.Vector3())
Not very useful at the moment, but it’ll come in handy once we will place them randomly on each click.
Custom shader 10:38
In src/, create a shaders/firework/ folder.
In the src/shaders/firework/ folder, create a vertex.glsl file and add the minimum program we need to position the vertices:
void main()
{
    // Final position
    vec4 modelPosition = modelMatrix * vec4(position, 1.0);
    vec4 viewPosition = viewMatrix * modelPosition;
    gl_Position = projectionMatrix * viewPosition;
}
We’ve separated the modelPosition and the viewPosition because we are going to need the viewPosition in a minute.
Since we are dealing with particles (officially named points), we also need to set a gl_PointSize. Set it to 20.0 for now, which should correspond to 20 fragments:
void main()
{
// ...
// Final size
gl_PointSize = 20.0;
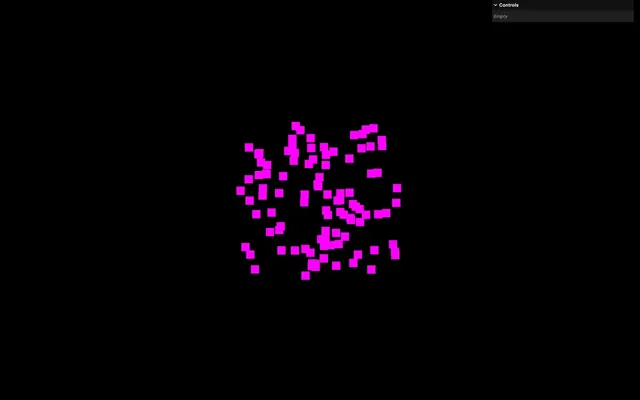
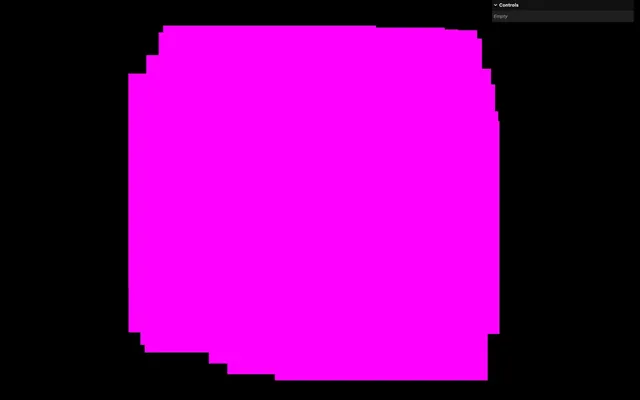
}Still in the src/shaders/firework/ folder, create a fragment.glsl file and add the minimum program we need to color the fragments in pink. Oh, and don’t forget that the tonemapping_fragment and colorspace_fragment includes:
void main()
{
    // Final color
    gl_FragColor = vec4(1.0, 0.0, 1.0, 1.0);
    #include <tonemapping_fragment>
    #include <colorspace_fragment>
}
Use the shader files
Back in script.js, import both shaders as fireworkVertexShader and fireworkFragmentShader:
import fireworkVertexShader from './shaders/firework/vertex.glsl'
import fireworkFragmentShader from './shaders/firework/fragment.glsl'
Replace the PointsMaterial with a ShaderMaterial and use the shaders on the vertexShader and fragmentShader properties:
const createFirework = (count, position) =>
{
    // ...
    const material = new THREE.ShaderMaterial({
        vertexShader: fireworkVertexShader,
        fragmentShader: fireworkFragmentShader
    })
    // ...
}
Size 15:19
First, let’s take care of the size. We are going to have a similar approach to what we did in previous lessons, but then go the extra mile and handle things more appropriately and reliably.
Perspective
As we’ve seen in previous lessons, to add perspective to the particles (making them smaller when further away), we need to multiply gl_PointSize by 1.0 / - viewPosition.z.
It’s a trick that we took from the Three.js shader chunks, and it’ll keep on working just fine in this case:
void main()
{
    // ...
    gl_PointSize = 20.0;
    gl_PointSize *= 1.0 / - viewPosition.z;
}
Now that the particles are getting smaller with the distance, they are a bit too small. Set the initial gl_PointSize to 50.0:
void main()
{
    // ...
    gl_PointSize = 50.0;
    // ...
}
At this point, you might notice that your particles are smaller than mine. This is due to the pixel ratio not being taken into account.
For a similar screen surface, you have more pixels, making the particles look smaller since they are supposed to cover 50 pixels. That’s what we are going to fix next.
Uniform
We now want to control the size using a uniform. Add a uSize uniform to the ShaderMaterial using a Uniform instance and set it to 50:
const createFirework = (count, position) =>
{
    // ...

    const material = new THREE.ShaderMaterial({
        // ...
        uniforms:
        {
            uSize: new THREE.Uniform(50)
        }
    })

    // ...
}
Back in the vertex shader, retrieve the uSize uniform as a float and send it to the gl_PointSize instead of the raw 50.0:
uniform float uSize;

void main()
{
    // ...

    // Final size
    gl_PointSize = uSize;
    gl_PointSize *= 1.0 / - viewPosition.z;
}
Now add a size parameter to the createFirework function, forward it to the uSize uniform, and set it to 50 when calling the createFirework function:
const createFirework = (count, position, size) =>
{
    // ...

    const material = new THREE.ShaderMaterial({
        // ...
        uniforms:
        {
            uSize: new THREE.Uniform(size)
        }
    })

    // ...
}

createFirework(100, new THREE.Vector3(), 50)
We get the same result as before, but we can now control the size from createFirework parameters.
Since we are starting to have a lot of parameters for createFirework, feel free to add line breaks and comments:
createFirework(
    100,                 // Count
    new THREE.Vector3(), // Position
    50                   // Size
)
Proportionate to the render height 19:20
There are two more issues to fix now. The well-known one is the pixel ratio previously mentioned, but a lesser-known one is the size relative to the render height.
To test that, resize the window vertically and check how the particles behave.
They stay the same size. Normal, you might think. Well, not really. In Three.js, the FOV of the camera is vertical, meaning that for a fixed FOV, object size will stay relative to the height.
Let’s do a quick test to understand this.
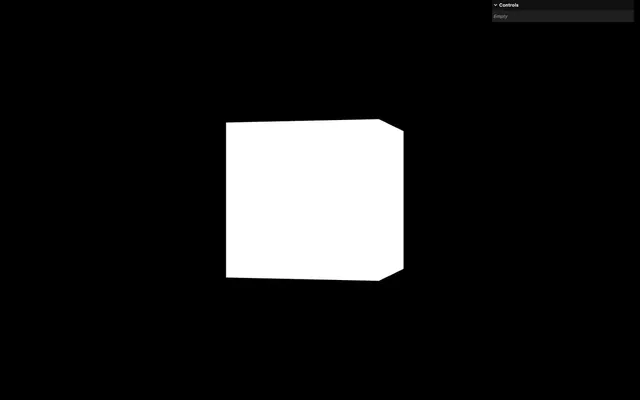
Outside of the createFirework function, create a white plane:
// Test
const test = new THREE.Mesh(
    new THREE.PlaneGeometry(),
    new THREE.MeshBasicMaterial()
)
scene.add(test)
Now resize the window vertically and see how the plane gets smaller.
The plane resizes with the render height and we need the particles to do the same.
In the previous lessons, we were only handling the pixel ratio. In this lesson, we are going to do things right.
Remove the test plane.
First, we need to send the resolution of the render to the shader.
Create a uResolution using a Uniform instance and send it a Vector2 with sizes.width and sizes.height as the values:
const createFirework = (count, position, size) =>
{
    // ...

    const material = new THREE.ShaderMaterial({
        // ...
        uniforms:
        {
            // ...
            uResolution: new THREE.Uniform(new THREE.Vector2(sizes.width, sizes.height))
        }
    })

    // ...
}
In the resize callback function we want to update that uniform, but we have an issue.
We don’t have access to the material since it has been created in the createFirework function.
We can’t just create it outside of the function because we need some of the createFirework parameters to set it properly.
Instead, what we are going to do is create a Vector2 in sizes:
const sizes = {
    width: window.innerWidth,
    height: window.innerHeight
}
sizes.resolution = new THREE.Vector2(sizes.width, sizes.height)
And send it to the uResolution uniform:
const createFirework = (count, position, size) =>
{
    // ...

    const material = new THREE.ShaderMaterial({
        // ...
        uniforms:
        {
            // ...
            uResolution: new THREE.Uniform(sizes.resolution)
        }
    })

    // ...
}
Now we have access to it in the resize callback function and we can update it:
window.addEventListener('resize', () =>
{
    // Update sizes
    sizes.width = window.innerWidth
    sizes.height = window.innerHeight
    sizes.resolution.set(sizes.width, sizes.height)

    // ...
})
Having both width, height and resolution might sound redundant, but this will come in handy shortly.
Let’s retrieve the uResolution uniform as a vec2 in the vertex shader:
uniform float uSize;
uniform vec2 uResolution;

void main()
{
    // ...
}
And we can now use it in the gl_PointSize by multiplying the uResolution.y:
void main()
{
    // ...

    // Final size
    gl_PointSize = uSize * uResolution.y;
    gl_PointSize *= 1.0 / - viewPosition.z;
}
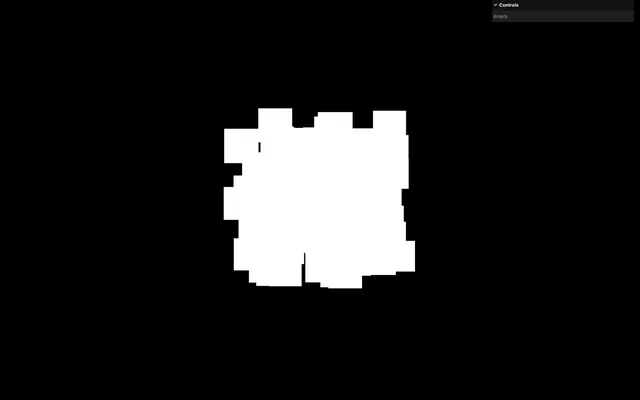
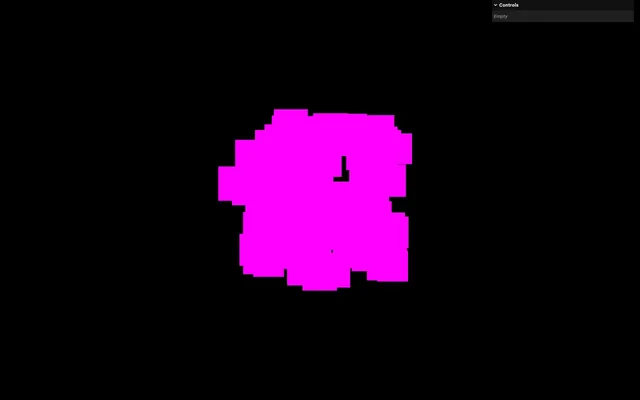
Particles are now way too big.
Some of you might also notice that the particles aren’t as big as on the screenshot. This is due to a limitation where the particle size can’t go above 64 pixels for some specific devices (especially Apple’s MacBooks). Since we are going to make the particles much smaller in a moment, it’s not a big issue and you can continue, as long as you can see the particles.
Let’s reduce the size by using 0.5 instead of 50 when calling createFirework():
createFirework(
    100,                 // Count
    new THREE.Vector3(), // Position
    0.5                  // Size
)
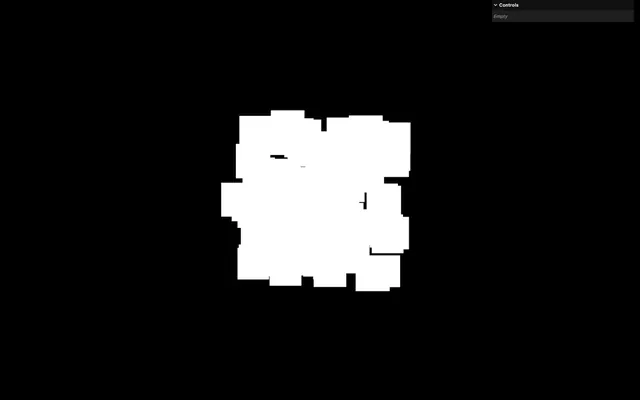
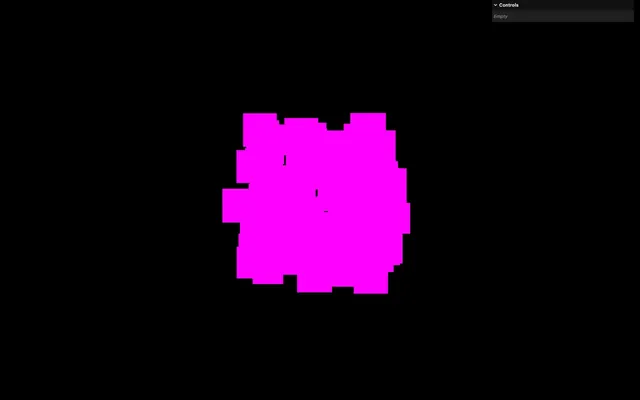
And now, particles will stay proportionate to the render height.
We are almost done. We now need to handle the pixel ratio and we’ve already sent this information as Math.min(window.devicePixelRatio, 2) in two places of the code, to the renderer.
Let’s simplify things and save it as a property of sizes.
Update the initial sizes and add the pixelRatio property with the same formula:
const sizes = {
    width: window.innerWidth,
    height: window.innerHeight,
    pixelRatio: Math.min(window.devicePixelRatio, 2)
}
Update it in the resize callback function:
window.addEventListener('resize', () =>
{
    // Update sizes
    sizes.width = window.innerWidth
    sizes.height = window.innerHeight
    sizes.pixelRatio = Math.min(window.devicePixelRatio, 2)
    sizes.resolution.set(sizes.width, sizes.height)
    // ...
})
Send it to the two occurrences of renderer.setPixelRatio(), in the resize callback function and after instantiating the renderer:
window.addEventListener('resize', () =>
{
    // ...
    renderer.setPixelRatio(sizes.pixelRatio)
})

// ...

const renderer = new THREE.WebGLRenderer({
    // ...
})
renderer.setSize(sizes.width, sizes.height)
renderer.setPixelRatio(sizes.pixelRatio)
That was a lot of restructuring, but we are now ready to fix the problem in a very simple manner.
When instantiating and updating sizes.resolution, multiply sizes.width and sizes.height by sizes.pixelRatio:
sizes.resolution = new THREE.Vector2(sizes.width * sizes.pixelRatio, sizes.height * sizes.pixelRatio)

window.addEventListener('resize', () =>
{
    // ...
    sizes.resolution.set(sizes.width * sizes.pixelRatio, sizes.height * sizes.pixelRatio)
    // ...
})
And that’s it. When the pixel ratio is, let’s say 2, uResolution will be twice as big, making the particles twice as big in terms of fragment size, resulting in the same size on screen.
Texture 31:59
Now that the particle size is right, let’s make it look a bit better using textures.
Like in the previous lessons, I’ve put some textures in the static/particles/ folder. It’s a selection of particle textures under CC0 license from Kenney.
We are going to load them all but only use one. Later, we are going to choose one randomly.
Before the createFirework function, create a textures array and load all the particles in it:
const textures = [
    textureLoader.load('./particles/1.png'),
    textureLoader.load('./particles/2.png'),
    textureLoader.load('./particles/3.png'),
    textureLoader.load('./particles/4.png'),
    textureLoader.load('./particles/5.png'),
    textureLoader.load('./particles/6.png'),
    textureLoader.load('./particles/7.png'),
    textureLoader.load('./particles/8.png'),
]

const createFirework = (count, position, size) =>
{
    // ...
}
Add a texture parameter to the createFirework function and send one item from the textures array when calling createFirework:
const createFirework = (count, position, size, texture) =>
{
    // ...
}

createFirework(
    100,                 // Count
    new THREE.Vector3(), // Position
    0.5,                 // Size
    textures[7]          // Texture
)
Send that texture as a uTexture uniform using a Uniform instance:
const createFirework = (count, position, size, texture) =>
{
    // ...

    // Material
    const material = new THREE.ShaderMaterial({
        // ...
        uniforms:
        {
            // ...
            uTexture: new THREE.Uniform(texture)
        }
    })

    // ...
}
In the fragment shader, retrieve the uTexture uniform as a sampler2D:
uniform sampler2D uTexture;

void main()
{
    // ...
}
If you remember from the previous lesson, we don’t access the texture coordinates the same way when it comes to particles and we use gl_PointCoord that you can test on gl_FragColor if you are curious:
void main()
{
    // ...
    gl_FragColor = vec4(gl_PointCoord, 1.0, 1.0);
    // ...
}
Extract the color as vec4 textureColor from uTexture using texture() with gl_PointCoord:
void main()
{
vec4 textureColor = texture(uTexture, gl_PointCoord);
// ...
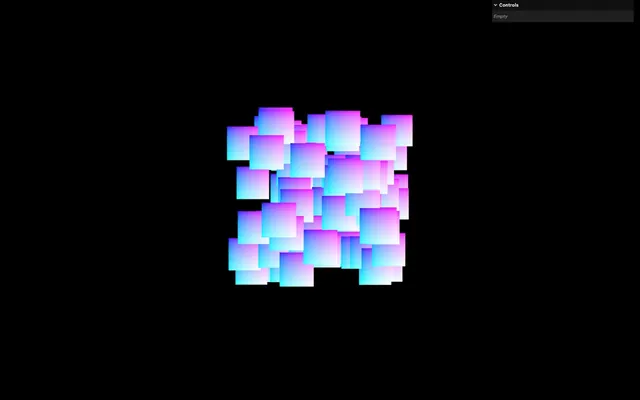
}And send it to gl_FragColor:
uniform sampler2D uTexture;

void main()
{
    vec4 textureColor = texture(uTexture, gl_PointCoord);

    // Final color
    gl_FragColor = textureColor;
    // ...
}
We have a few things to fix.
First, if you’ve used the same particle texture as me, you’ve probably noticed that it’s upside down.
In createFirework, right before we send the texture to the material, set its flipY to false:
const createFirework = (count, position, size, texture) =>
{
    // ...

    // Material
    texture.flipY = false
    const material = new THREE.ShaderMaterial({
        // ...
    })

    // ...
}
We could have done it differently, but using this solution ensures that any texture sent to the function will have flipY set to false. This way, it will work just fine.
While we are near the material, set its transparent property to true because we already know we are going to use transparency:
const createFirework = (count, position, size, texture) =>
{
    // ...
    const material = new THREE.ShaderMaterial({
        // ...
        transparent: true
    })

    // ...
}
Back in fragment.glsl, we don’t need the 4 channels of the texture because it’s a grayscale image. Instead, retrieve only the r channel and save it as a float textureAlpha:
void main()
{
    float textureAlpha = texture(uTexture, gl_PointCoord).r;
    // ...
}
Send it to the alpha channel of gl_FragColor and keep the rest at 1.0:
uniform sampler2D uTexture;

void main()
{
    float textureAlpha = texture(uTexture, gl_PointCoord).r;

    // Final color
    gl_FragColor = vec4(1.0, 1.0, 1.0, textureAlpha);
    // ...
}
As always with textured particles, transparency is a bit messed up because, even though it’s transparent, they are occluding what’s behind on the depth buffer.
To fix that, set the depthWrite to false on the material. Then, use that opportunity to set the blending to AdditiveBlending so that the particles feel more like light:
const createFirework = (count, position, size, texture) =>
{
    // ...
    const material = new THREE.ShaderMaterial({
        // ...
        depthWrite: false,
        blending: THREE.AdditiveBlending
    })

    // ...
}
Random size 40:48
As always, perfect particles don’t exist and would look unrealistic. We need to add randomness to their size.
In the geometry part, create a sizesArray of count length and fill it with random values:
const createFirework = (count, position, size, texture) =>
{
    // ...
    const sizesArray = new Float32Array(count)

    for(let i = 0; i < count; i++)
    {
        // ...

        sizesArray[i] = Math.random()
    }

    // ...
}
Make sure to use i and not i3 since we want to go 1 by 1.
Now send the array as a Float32BufferAttribute to the 'aSize' attribute and make sure to set the item size to 1 since we only have one value per vertex:
const createFirework = (count, position, size, texture) =>
{
    // ...

    geometry.setAttribute('position', new THREE.Float32BufferAttribute(positionsArray, 3))
    geometry.setAttribute('aSize', new THREE.Float32BufferAttribute(sizesArray, 1))

    // ...
}
In vertex.glsl, retrieve the aSize attribute as a float and multiply the gl_PointSize by it:
// ...

attribute float aSize;

void main()
{
    // ...

    // Final size
    gl_PointSize = uSize * uResolution.y * aSize;
    gl_PointSize *= 1.0 / - viewPosition.z;
}

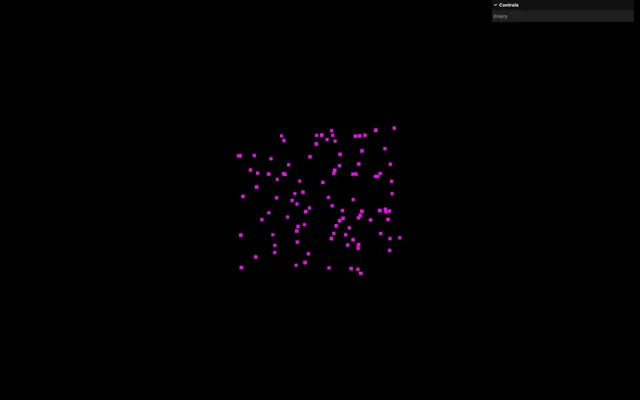
Sphere distribution 43:10
Currently, particles are placed on a cuboid volume, which isn’t very common for fireworks.
Instead, we want to position them on a sphere and Three.js has the perfect class for it, the Spherical.
First, we want to control the radius of the sphere from the parameters of createFirework.
Add a radius parameter and set it to 1 when calling createFirework():
const createFirework = (count, position, size, texture, radius) =>
{
    // ...
}

createFirework(
    100,                 // Count
    new THREE.Vector3(), // Position
    0.5,                 // Size
    textures[7],         // Texture
    1                    // Radius
)
In the for loop, right before filling the positionsArray, instantiate a Spherical and set the values to radius, Math.random() * Math.PI and Math.random() * Math.PI * 2:
const createFirework = (count, position, size, texture, radius) =>
{
// ...
for(let i = 0; i < count; i++)
{
const i3 = i * 3
const spherical = new THREE.Spherical(
radius,
Math.random() * Math.PI,
Math.random() * Math.PI * 2
)
// ...
}
// ...
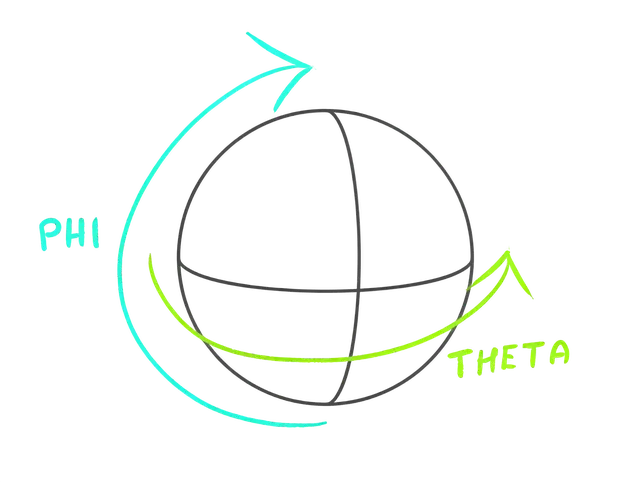
}The second parameter is the “phi” angle and the third parameter is the “theta” angle. Phi goes from 0 to PI (half a circle) and theta goes from 0 to two times PI (a full circle):
We now want to convert the spherical coordinates to a 3D position and we can do that by creating a position from a Vector3 and calling its setFromSpherical() method:
const createFirework = (count, position, size, texture, radius) =>
{
    // ...

    for(let i = 0; i < count; i++)
    {
        const i3 = i * 3

        const spherical = new THREE.Spherical(
            radius,
            Math.random() * Math.PI,
            Math.random() * Math.PI * 2
        )
        const position = new THREE.Vector3()
        position.setFromSpherical(spherical)

        // ...
    }

    // ...
}
Finally, we can assign the position properties to the positionsArray:
const createFirework = (count, position, size, texture, radius) =>
{
// ...
for(let i = 0; i < count; i++)
{
// ...
positionsArray[i3 ] = position.x
positionsArray[i3 + 1] = position.y
positionsArray[i3 + 2] = position.z
// ...
}
// ...
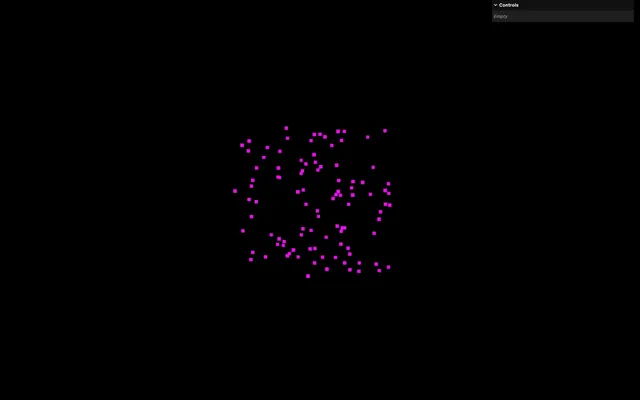
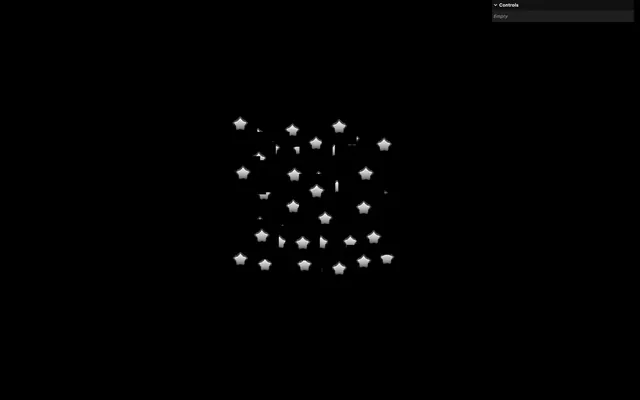
}It’s looking like a sphere, but it’s too perfect.
To fix that, we are going to randomize the radius a little when instantiating the Spherical:
const createFirework = (count, position, size, texture, radius) =>
{
// ...
for(let i = 0; i < count; i++)
{
// ...
const spherical = new THREE.Spherical(
radius * (0.75 + Math.random() * 0.25),
Math.random() * Math.PI,
Math.random() * Math.PI * 2
)
// ...
}
// ...
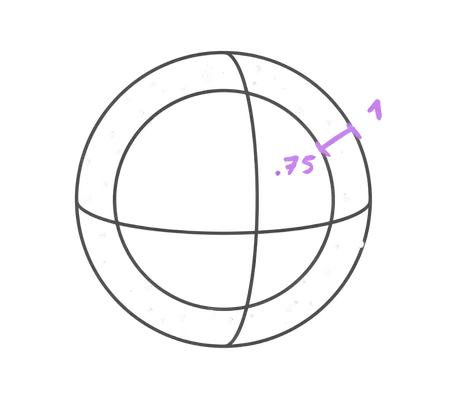
}Behind this fancy formula is a simple calculation. We multiply the radius by a number that will vary between 0.75 and 1. This way, the particles won’t go beyond the set radius but can get up to 25% closer to the center.
Color 50:00
Although, in the end, the color will be random, it’ll be the same for all the particles and we want to control it as a parameter of createFirework.
Add a color parameter to the createFirework function and set it to a Color instance when calling createFirework():
const createFirework = (count, position, size, texture, radius, color) =>
{
    // ...
}

createFirework(
    100,                       // Count
    new THREE.Vector3(),       // Position
    0.5,                       // Size
    textures[7],               // Texture
    1,                         // Radius
    new THREE.Color('#8affff') // Color
)
Add a uColor uniform using a Uniform instance and send it the color parameter:
const createFirework = (count, position, size, texture, radius, color) =>
{
    // ...

    const material = new THREE.ShaderMaterial({
        // ...
        uniforms:
        {
            // ...
            uColor: new THREE.Uniform(color)
        },
        // ...
    })

    // ...
}
In the fragment shader, retrieve the uColor as a vec3 and send it to the first 3 values of gl_FragColor:
// ...
uniform vec3 uColor;

void main()
{
    // ...
    gl_FragColor = vec4(uColor, textureAlpha);
    // ...
}
Progress 51:40
We are finally getting into the animation, but to control that animation we need a value that changes from 0 to 1. Then, we are going to use that unique value in the vertex shader to control all the aspects of the animation.
Create a uProgress uniform using a Uniform instance and set it to 0:
const createFirework = (count, position, size, texture, radius, color) =>
{
    // ...

    const material = new THREE.ShaderMaterial({
        // ...
        uniforms:
        {
            // ...
            uProgress: new THREE.Uniform(0)
        }
    })

    // ...
}
To animate that uniform from 0 to 1, we are going to use GSAP which is a little exaggerated, but we already know GSAP and it’s convenient.
Import gsap from 'gsap' which is already in the project dependencies:
import gsap from 'gsap'At the end of the createFirework function, call gsap.to() to animate the material.uniforms.uProgress.value to 1:
const createFirework = (count, position, size, texture, radius, color) =>
{
    // ...

    // Animate
    gsap.to(
        material.uniforms.uProgress,
        { value: 1 },
    )
}
Although we can’t see it since it’s just a number, for now, the value should animate properly.
By default, GSAP sets a duration to 1, which is a bit too fast. Change it to 3 using the duration property:
const createFirework = (count, position, size, texture, radius, color) =>
{
    // ...

    // Animate
    gsap.to(
        material.uniforms.uProgress,
        { value: 1, duration: 3 },
    )
}
By default, GSAP uses a nonlinear easing so that the animation looks less robotic. We are going to use this value only as a reference and apply the easing ourselves from the vertex shader, which is why we need this one to be perfectly linear. Set the ease property to'linear':
const createFirework = (count, position, size, texture, radius, color) =>
{
    // ...

    // Animate
    gsap.to(
        material.uniforms.uProgress,
        { value: 1, duration: 3, ease: 'linear' },
    )
}
Dispose 54:20
Right now is the perfect opportunity to dispose of the fireworks.
When the animation ends, the particles of the fireworks shouldn’t be visible and we can get rid of it properly.
We can be alerted of the end of the GSAP animation by adding a onComplete property and sending it a callback function.
Before the gsap.to(), create a destroy function, put a console.log('destroy') in it, and send it to the onComplete property of the gsap.to():
const createFirework = (count, position, size, texture, radius, color) =>
{
    // ...

    // Destroy
    const destroy = () =>
    {
        console.log('destroy')
    }

    // Animate
    gsap.to(
        material.uniforms.uProgress,
        { value: 1, duration: 3, ease: 'linear', onComplete: destroy },
    )
}
After 3 seconds, you should see the 'destroy' in the Console.
Now the question is, what should we dispose of?
Three.js documentation contains a good amount of information about this https://threejs.org/docs/#manual/en/introduction/How-to-dispose-of-objects
In our case, we need to dispose of the geometry and the material, but we also need to remove the Points instance from the scene:
const createFirework = (count, position, size, texture, radius, color) =>
{
    // ...

    // Destroy
    const destroy = () =>
    {
        scene.remove(firework)
        geometry.dispose()
        material.dispose()
    }

    // ...
}
After 3 seconds, the firework is gone.
Also note that we don’t dispose of the texture because we might use it for other fireworks when the user can create them on click.
Generate on click 58:11
Debugging now will be harder since we need to reload the page to see a new firework. Let’s create one for each click.
For now, we are going to create the exact same one, but later, we are going to randomize it.
After calling createFirework(), listen to the 'click' event on window and call the exact same function with the same parameters:
createFirework(
    100,                       // Count
    new THREE.Vector3(),       // Position
    0.5,                       // Size
    textures[7],               // Texture
    1,                         // Radius
    new THREE.Color('#8affff') // Color
)

window.addEventListener('click', () =>
{
    createFirework(
        100,                       // Count
        new THREE.Vector3(),       // Position
        0.5,                       // Size
        textures[7],               // Texture
        1,                         // Radius
        new THREE.Color('#8affff') // Color
    )
})
Clicking will generate a new instance, they always disappear after 3 seconds and we know that they are being disposed of properly.
Animation 59:18
All those preparations have lead us to this moment. It’s time to animate the particles.
As mentioned at the beginning, the animation is composed of 5 different phases:
- The particles start to expand fast in every direction
- They scale up even faster
- They start to fall down slowly
- They scale down
- They twinkle as they disappear
And those phases are overlapping each other, otherwise, it would be too easy (and not pretty).
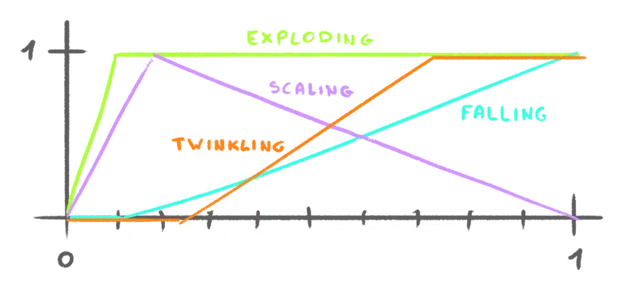
The trick to creating such complex animations from one single progress value is to separate them properly and to remap the progress to suit the phase we are dealing with.
Let’s start with the first phase and make the particles explode.
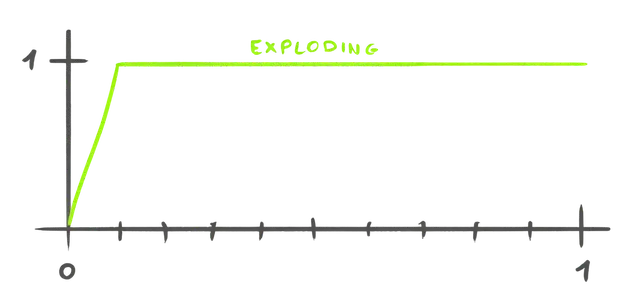
Exploding
First, in the vertex shader, we need to retrieve the uProgress as a float:
uniform float uProgress;We want to change the position variable, but since it’s an attribute, we can’t update it.
Create a newPosition out of the position and send it to the modelPosition:
void main()
{
    vec3 newPosition = position;

    // Final position
    vec4 modelPosition = modelMatrix * vec4(newPosition, 1.0);
    // ...
}
We now want to remap the uProgress so that it goes from 0 to 1 at the beginning of the animation.
Until now, we have been using smoothstep which is a good solution, but in our case, we only want the remap part and not the smoothing part:
Unfortunately, there is no built-in function for this in GLSL, but we can use the following function that we can add right before the main():
float remap(float value, float originMin, float originMax, float destinationMin, float destinationMax)
{
    return destinationMin + (value - originMin) * (destinationMax - destinationMin) / (originMax - originMin);
}

void main()
{
    // ...
}
Without going into details, you send:
value: the value you want to remaporiginMinandoriginMax: the start and end of the original range (the part that you want to transform into another range)destinationMinanddestinationMax: the start and end of the destination range (in our case it’s just0and1, but we could have had a different destination range)
We want the explosion to happen between 0 and 0.1. Create an explodingProgress variable and remap it this way:
void main()
{
    // ...

    // Exploding
    float explodingProgress = remap(uProgress, 0.0, 0.1, 0.0, 1.0);

    // ...
}
We are now going to move the vertices from the center to their normal position according to this explodingProgress and we can do that by multiplying newPosition by explodingProgress:
void main()
{
    // ...

    // Exploding
    float explodingProgress = remap(uProgress, 0.0, 0.1, 0.0, 1.0);
    newPosition *= explodingProgress;

    // ...
}
Not bad, but shouldn’t the particles stop at 0.1?
Yes, it should but our remap function doesn’t stop the values from going above or below the limits we provide.
To fix that, we can clamp the value right after the remap using clamp:
void main()
{
    // ...

    // Exploding
    float explodingProgress = remap(uProgress, 0.0, 0.1, 0.0, 1.0);
    explodingProgress = clamp(explodingProgress, 0.0, 1.0);
    newPosition *= explodingProgress;

    // ...
}
And now, we want the animation to be fast at the beginning and to slow down before reaching the end of the transition.
In previous lessons, we’ve seen that we can use a pow to get this kind of result:
void main()
{
    // ...

    // Exploding
    float explodingProgress = remap(uProgress, 0.0, 0.1, 0.0, 1.0);
    explodingProgress = clamp(explodingProgress, 0.0, 1.0);
    explodingProgress = pow(explodingProgress, 3.0);
    newPosition *= explodingProgress;

    // ...
}
Doing that resulted in the opposite of what we wanted. It started slow and accelerated at the end, which makes sense if you watch the curve of a power of 3:
To fix that, we are going to invert the value so that it goes from 1 to 0 instead of 0 to 1, apply the power, and invert it back:
void main()
{
    // ...

    // Exploding
    float explodingProgress = remap(uProgress, 0.0, 0.1, 0.0, 1.0);
    explodingProgress = clamp(explodingProgress, 0.0, 1.0);
    explodingProgress = 1.0 - pow(1.0 - explodingProgress, 3.0);
    newPosition = mix(vec3(0.0), newPosition, explodingProgress);

    // ...
}
Note that, again, this works only because our value range goes from 0 to 1.
Falling
Right after that explosion, we want the particles to fall down:
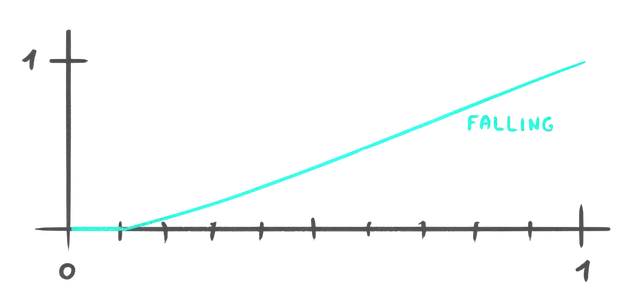
Create a fallingProgress and apply the exact same technique with only the remap() parameters changing:
void main()
{
    // ...

    // Falling
    float fallingProgress = remap(uProgress, 0.1, 1.0, 0.0, 1.0);
    fallingProgress = clamp(fallingProgress, 0.0, 1.0);
    fallingProgress = 1.0 - pow(1.0 - fallingProgress, 3.0);

    // ...
}
We can use the fallingProgress to subtract from newPosition.y and multiply it by 0.2:
void main()
{
    // ...

    // Falling
    float fallingProgress = remap(uProgress, 0.1, 1.0, 0.0, 1.0);
    fallingProgress = clamp(fallingProgress, 0.0, 1.0);
    fallingProgress = 1.0 - pow(1.0 - fallingProgress, 3.0);
    newPosition.y -= fallingProgress * 0.2;

    // ...
}
Scaling
The scaling part is a little bit trickier because the particle scales up fast at the beginning and then scales down slowly at the end.
We are going to calculate the opening and the closing separately, take the smallest of the two, and clamp it.
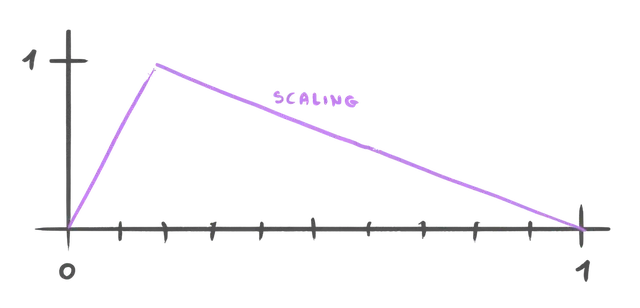
Calculate the sizeOpeningProgress using the usual remap():
void main()
{
    // ...

    // Scaling
    float sizeOpeningProgress = remap(uProgress, 0.0, 0.125, 0.0, 1.0);

    // ...
}
Calculate the sizeClosingProgress using the remap() but invert the two last values so that it goes from 1 to 0 instead of 0 to 1:
void main()
{
    // ...

    // Scaling
    float sizeOpeningProgress = remap(uProgress, 0.0, 0.125, 0.0, 1.0);
    float sizeClosingProgress = remap(uProgress, 0.125, 1.0, 1.0, 0.0);

    // ...
}
Get the minimum of the two using min and save it as sizeProgress:
void main()
{
    // ...

    // Scaling
    float sizeOpeningProgress = remap(uProgress, 0.0, 0.125, 0.0, 1.0);
    float sizeClosingProgress = remap(uProgress, 0.125, 1.0, 1.0, 0.0);
    float sizeProgress = min(sizeOpeningProgress, sizeClosingProgress);

    // ...
}
Clamp sizeProgress between 0 and 1 using clamp:
void main()
{
    // ...

    // Scaling
    float sizeOpeningProgress = remap(uProgress, 0.0, 0.125, 0.0, 1.0);
    float sizeClosingProgress = remap(uProgress, 0.125, 1.0, 1.0, 0.0);
    float sizeProgress = min(sizeOpeningProgress, sizeClosingProgress);
    sizeProgress = clamp(sizeProgress, 0.0, 1.0);

    // ...
}
Use sizeProgress on the gl_PointSize by multiplying it with the rest:
void main()
{
    // ...

    gl_PointSize = uSize * uResolution.y * aSize * sizeProgress;
    // ...
}
Twinkling
For the last part, we want the particles to twinkle, meaning that they will scale up and down quite fast as if the fire burning them was fading out uncontrollably.
We want to start the twinkle a little after the particles start to scale down, but to have the effect built up fast enough so that we can appreciate it before the particle is gone:
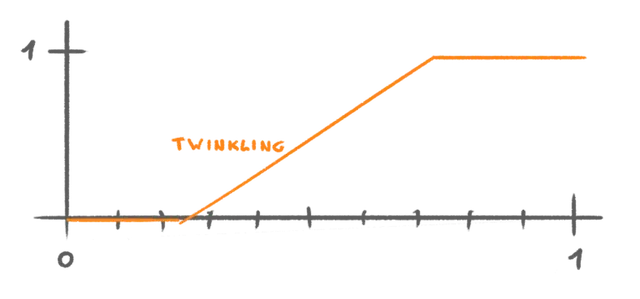
First, let’s calculate the twinklingProgress like we did for the previous parts, using a remap from 0.2 to 0.8 and a clamp:
void main()
{
    // ...

    // Twinkling
    float twinklingProgress = remap(uProgress, 0.2, 0.8, 0.0, 1.0);
    twinklingProgress = clamp(twinklingProgress, 0.0, 1.0);

    // Final position
    // ...
}
Let’s put the twinklingProgress aside and try to make the particles twinkle all the time.
Since the scale needs to go up and down repeatedly, we can use a classic sin on the uProgress.
Create a float sizeTwinkling variable and assign a sin() of uProgressto it:
void main()
{
    // ...

    // Twinkling
    float twinklingProgress = remap(uProgress, 0.2, 0.8, 0.0, 1.0);
    twinklingProgress = clamp(twinklingProgress, 0.0, 1.0);
    float sizeTwinkling = sin(uProgress);

    // Final position
    // ...
}
Before going any further, we know that a sine goes from -1 to +1 and we would like a value from 0 to 1. Multiply sizeTwinkling by 0.5 and add 0.5:
void main()
{
    // ...
    float sizeTwinkling = sin(uProgress) * 0.5 + 0.5;

    // ...
}
We also know that the uProgress goes from 0 to 1 which won’t result in a lot of waves in the sin(). Multiply uProgress by 30.0:
void main()
{
    // ...
    float sizeTwinkling = sin(uProgress * 30.0) * 0.5 + 0.5;

    // ...
}
We can now send sizeTwinkling to the gl_PointSize:
void main()
{
    // ...
    gl_PointSize = uSize * uResolution.y * aSize * sizeProgress * sizeTwinkling;
    // ...
}
Finally, we need to combine the twinklingProgress with the sizeTwinkling:
void main()
{
    // ...
    float sizeTwinkling = sin(uProgress * 30.0) * 0.5 + 0.5;
    sizeTwinkling = sizeTwinkling * twinklingProgress;

    // ...
}
Doing that is wrong because when twinklingProgress is 0, sizeTwinkling ends up being 0 too, resulting in the particles not being visible unless they are sparkling.
To fix that, we can invert the value by starting from 1.0 and then subtracting the value we calculated:
void main()
{
    // ...
    float sizeTwinkling = sin(uProgress * 30.0) * 0.5 + 0.5;
    sizeTwinkling = 1.0 - sizeTwinkling * twinklingProgress;

    // ...
}
Randomize timing
This is all looking great, but again, too regular. All particles follow a similar animation at the exact same time which is particularly disturbing when it comes to the twinkling.
They should start at the same time, but their life span should be different. But none of the particles should take longer since we dispose of the fireworks at the end of the animation. On top of that, we need them to be gone before we do.
We are going to create a time multiplier as an attribute and make the particles randomly faster.
In the geometry part, create a timeMultipliersArray of count length and fill it with values going randomly from 1 to 2:
const createFirework = (count, position, size, texture, radius, color) =>
{
    // ...
    const timeMultipliersArray = new Float32Array(count)

    for(let i = 0; i < count; i++)
    {
        // ...

        timeMultipliersArray[i] = 1 + Math.random()
    }

    // ...
}
Make sure to use i and not i3 since we want to go 1 by 1.
Now create the 'aTimeMultiplier' attribute using Float32BufferAttribute and make sure to set the item size to 1 since we only have one value per vertex:
const createFirework = (count, position, size, texture, radius, color) =>
{
    // ...

    geometry.setAttribute('position', new THREE.Float32BufferAttribute(positionsArray, 3))
    geometry.setAttribute('aSize', new THREE.Float32BufferAttribute(sizesArray, 1))
    geometry.setAttribute('aTimeMultiplier', new THREE.Float32BufferAttribute(timeMultipliersArray, 1))

    // ...
}
In the vertex shader, retrieve the aTimeMultiplier attribute as a float:
// ...

attribute float aSize;
attribute float aTimeMultiplier;

void main()
{
    // ...
}
At the beginning of the main(), create a float progress and assign it uProgress multiplied by aTimeMultiplier, then use it for the various progress calculations instead of uProgress:
void main()
{
    float progress = uProgress * aTimeMultiplier;

    // ...

    float explodingProgress = remap(progress, 0.0, 0.1, 0.0, 1.0);

    // ...

    float fallingProgress = remap(progress, 0.1, 1.0, 0.0, 1.0);

    // ...

    float sizeOpeningProgress = remap(progress, 0.0, 0.125, 0.0, 1.0);
    float sizeClosingProgress = remap(progress, 0.125, 1.0, 1.0, 0.0);

    // ...

    float twinklingProgress = remap(progress, 0.2, 0.8, 0.0, 1.0);
    // ...
    float sizeTwinkling = sin(progress * 40.0) * 0.5 + 0.5;
}
Particles now progress at various speeds and the twinkling looks more random.
Windows issue 01:27:17
Some of you might have noticed that, even though the particles are extremely small, they are still visible until they are completely removed from the scene. This behaviour varies according to your OS and GPU, but, most of the time, it concerns Windows users and we need to fix it anyway.
What’s happening is that, for those users, the gl_PointSize is clamped to a minimum of 1.0. Any value below 1.0 will end up at 1.0, preventing the particles from disappearing.
What we are going to do is hide the particle completely when gl_PointSize is below 1.0.
Unfortunately, there are no GLSL instructions to do so. Instead, we are going to use a silly technique consisting of moving the particles far away from the rendering clip space.
In vertex.glsl, use an if statement to test if gl_PointSize is below 1.0, and, if so, set the gl_Position to a vec4(9999.9):
void main()
{
    // ...

    // Final size
    // ...

    if(gl_PointSize < 1.0)
        gl_Position = vec4(9999.9);
}
Randomness 01:27:17
And we are done with the animation.
It’s time to add some randomness to those fireworks.
Create a createRandomFirework function after the createFirework function:
const createFirework = (count, position, size, texture, radius, color) =>
{
    // ...
}

const createRandomFirework = () =>
{

}
In there, create a random count:
const createRandomFirework = () =>
{
    const count = Math.round(400 + Math.random() * 1000)
}
Create a random position:
const createRandomFirework = () =>
{
    // ...
    const position = new THREE.Vector3(
        (Math.random() - 0.5) * 2,
        Math.random(),
        (Math.random() - 0.5) * 2
    )
}
Create a random size:
const createRandomFirework = () =>
{
    // ...
    const size = 0.1 + Math.random() * 0.1
}
Choose a random texture among textures:
const createRandomFirework = () =>
{
    // ...
    const texture = textures[Math.floor(Math.random() * textures.length)]
}
Create a random radius:
const createRandomFirework = () =>
{
    // ...
    const radius = 0.5 + Math.random()
}
Create a random color using a Color class and its setHSL() method:
const createRandomFirework = () =>
{
    // ...
    const color = new THREE.Color()
    color.setHSL(Math.random(), 1, 0.7)
}
Call createFirework() using all those random variables:
const createRandomFirework = () =>
{
    // ...
    createFirework(count, position, size, texture, radius, color)
}
Replace the initial createFirework() call with createRandomFirework() and send it as the callback function of the 'click' listener as well:
const createRandomFirework = () =>
{
    // ...
}

createRandomFirework()

document.addEventListener('click', createRandomFirework)
Fire!
Sky background 01:36:57
We are done with the fireworks, but let’s have a bit more fun and add a nice sky background.
To do so, we are going to use the Sky class.
It’s a physics-based class that will result in a realistic sky where you can simulate sunset, dawn, bright day, etc.
Unfortunately, there isn’t a lot of documentation about this class, but the example is self-explanatory and quite easy to implement.
Open the example and then open the code by clicking on the bottom right icon <> of the page.
Right before the Animate section of your code, add a Sky section:
/**
 * Sky
 */
Although it won’t work as it is, copy everything from inside the initSky function taken from the example into your code:
sky = new Sky();
sky.scale.setScalar( 450000 );
scene.add( sky );

sun = new THREE.Vector3();

/// GUI

const effectController = {
    turbidity: 10,
    rayleigh: 3,
    mieCoefficient: 0.005,
    mieDirectionalG: 0.7,
    elevation: 2,
    azimuth: 180,
    exposure: renderer.toneMappingExposure
};

function guiChanged() {

    const uniforms = sky.material.uniforms;
    uniforms[ 'turbidity' ].value = effectController.turbidity;
    uniforms[ 'rayleigh' ].value = effectController.rayleigh;
    uniforms[ 'mieCoefficient' ].value = effectController.mieCoefficient;
    uniforms[ 'mieDirectionalG' ].value = effectController.mieDirectionalG;

    const phi = THREE.MathUtils.degToRad( 90 - effectController.elevation );
    const theta = THREE.MathUtils.degToRad( effectController.azimuth );

    sun.setFromSphericalCoords( 1, phi, theta );

    uniforms[ 'sunPosition' ].value.copy( sun );

    renderer.toneMappingExposure = effectController.exposure;
    renderer.render( scene, camera );

}

const gui = new GUI();

gui.add( effectController, 'turbidity', 0.0, 20.0, 0.1 ).onChange( guiChanged );
gui.add( effectController, 'rayleigh', 0.0, 4, 0.001 ).onChange( guiChanged );
gui.add( effectController, 'mieCoefficient', 0.0, 0.1, 0.001 ).onChange( guiChanged );
gui.add( effectController, 'mieDirectionalG', 0.0, 1, 0.001 ).onChange( guiChanged );
gui.add( effectController, 'elevation', 0, 90, 0.1 ).onChange( guiChanged );
gui.add( effectController, 'azimuth', - 180, 180, 0.1 ).onChange( guiChanged );
gui.add( effectController, 'exposure', 0, 1, 0.0001 ).onChange( guiChanged );

guiChanged();
First, we need to import the Sky class from the Three.js examples:
import { Sky } from 'three/addons/objects/Sky.js'Secondly, we need to add a const in front of sky and sun:
const sky = new Sky();
// ...

const sun = new THREE.Vector3();
Thirdly, remove the instantiation of GUI since we already have one with the same name:
// const gui = new GUI();And the sky should work now.
Before tweaking it, let’s refactor the code a little. It’s up to you and your coding style, but here’s how it works for me with:
- No
; - No space between
() - No space between
[] - Arrow functions instead of classic functions
guiChangedrenamed toupdateSkyeffectControllerrenamed toskyParameters
const sky = new Sky()
sky.scale.setScalar(450000)
scene.add(sky)

const sun = new THREE.Vector3()

const skyParameters = {
    turbidity: 10,
    rayleigh: 3,
    mieCoefficient: 0.005,
    mieDirectionalG: 0.7,
    elevation: 2,
    azimuth: 180,
    exposure: renderer.toneMappingExposure
}

const updateSky = () =>
{
    const uniforms = sky.material.uniforms
    uniforms['turbidity'].value = skyParameters.turbidity
    uniforms['rayleigh'].value = skyParameters.rayleigh
    uniforms['mieCoefficient'].value = skyParameters.mieCoefficient
    uniforms['mieDirectionalG'].value = skyParameters.mieDirectionalG

    const phi = THREE.MathUtils.degToRad(90 - skyParameters.elevation)
    const theta = THREE.MathUtils.degToRad(skyParameters.azimuth)

    sun.setFromSphericalCoords(1, phi, theta)

    uniforms['sunPosition'].value.copy(sun)

    renderer.toneMappingExposure = skyParameters.exposure
    renderer.render(scene, camera)
}

gui.add(skyParameters, 'turbidity', 0.0, 20.0, 0.1).onChange(updateSky)
gui.add(skyParameters, 'rayleigh', 0.0, 4, 0.001).onChange(updateSky)
gui.add(skyParameters, 'mieCoefficient', 0.0, 0.1, 0.001).onChange(updateSky)
gui.add(skyParameters, 'mieDirectionalG', 0.0, 1, 0.001).onChange(updateSky)
gui.add(skyParameters, 'elevation', 0, 90, 0.1).onChange(updateSky)
gui.add(skyParameters, 'azimuth', - 180, 180, 0.1).onChange(updateSky)
gui.add(skyParameters, 'exposure', 0, 1, 0.0001).onChange(updateSky)

updateSky()
In order to get a dark sky, almost as if it was night, you should also set the min, max, and step of the 'elevation' to -3, 10 and 0.01:
gui.add(skyParameters, 'elevation', -3, 10, 0.01).onChange(updateSky)Have fun and find a good-looking sky setup, then add the values for the skyParameters object.
For me, it’s going to be:
const skyParameters = {
    turbidity: 10,
    rayleigh: 3,
    mieCoefficient: 0.005,
    mieDirectionalG: 0.95,
    elevation: -2.2,
    azimuth: 180,
    exposure: renderer.toneMappingExposure
}
Separating shader chunks 01:44:26
We are going to move the remap function in a separate file and include it.
In src/shaders/, create a includes/ folder.
In that src/shaders/includes/ folder, create a remap.glsl file and put the remap function in it:
float remap(float value, float originMin, float originMax, float destinationMin, float destinationMax)
{
    return destinationMin + (value - originMin) * (destinationMax - destinationMin) / (originMax - originMin);
}
Back in vertex.glsl, instead of the function, use an #include:
// ...

#include ../includes/remap.glsl

void main()
{
    // ...
}
Make sure everything is saved and the project should work like before.
This is not mandatory, but it’s considered good practice and it makes the function easily reusable in other shaders.
Going further 01:45:18
We are done with the lesson. As you can see, animating particles in the vertex shader is hard, especially when the animation is composed of multiple phases.
Separating those phases as much and as clearly as possible helps a lot.
As always, feel free to go further. Here are some suggestions:
- Add more particles. We have been a bit shy and you can add a lot more particles.
- Add default parameters to the
createFireworkfunction. - Add more parameters to the firework function.
- Have different colors instead of a uniform color.
- Improve how particles are positioned in the sphere. The technique we used tends to concentrate particles on the poles.
- Add sound.
- Handle other shapes than a sphere. You could even try with the geometry of a loaded model.