Introduction 00:00
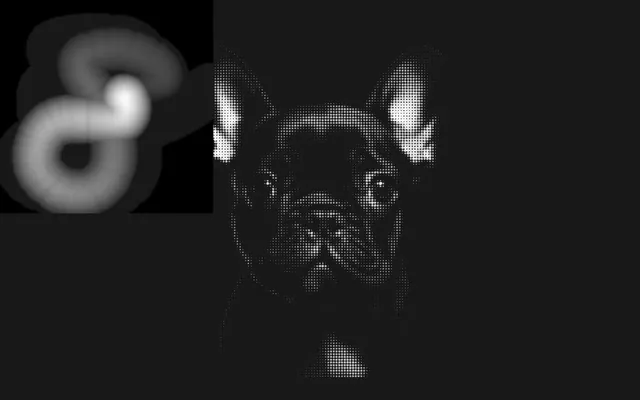
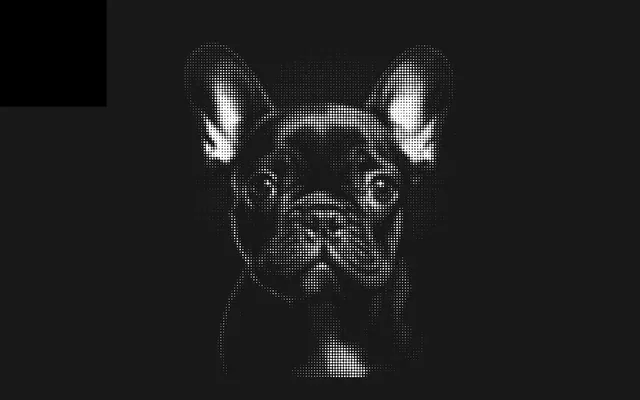
In this lesson, we are going to learn how to create a cool cursor animation on a picture made of particles:

It’s the opportunity to learn how to use a 2D canvas as a texture that we send and use in a custom shader to displace the particles.
Setup 00:50
The starter already contains particles ready to be enhanced and animated:
- A grid of particles
- A ShaderMaterial using the vertex and fragment from the
src/shaders/particles/folder - The
vite-plugin-glsldependency to handle GLSL files OrbitControlsto rotate around- A
TextureLoaderinstance
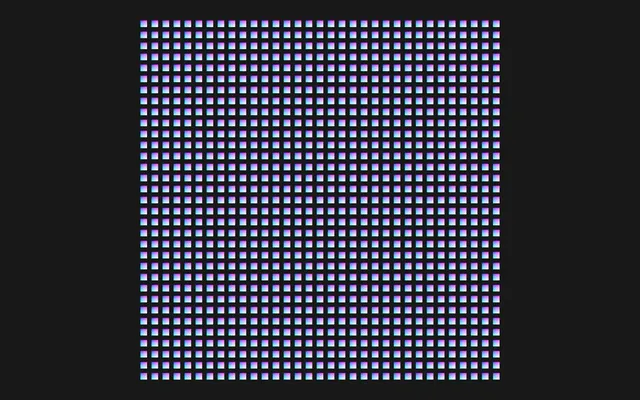
The particle size is already handled in the vertex.glsl with perspective and relative to the height of the render, as seen in previous lessons:
Default particles are quite big so that we can appreciate what we do without having to zoom every time we reload.
Once we are happy with the look of the particles, we are going to make them smaller and add a lot more.
Particles 03:03
We are going to use one of the pictures you can find in the static/ folder and make that picture appear on the particles.
We want the particles to be discs instead of squares. We want their size to depend on the brightness of the picture and we also want to modify the color of the particles to match the picture.
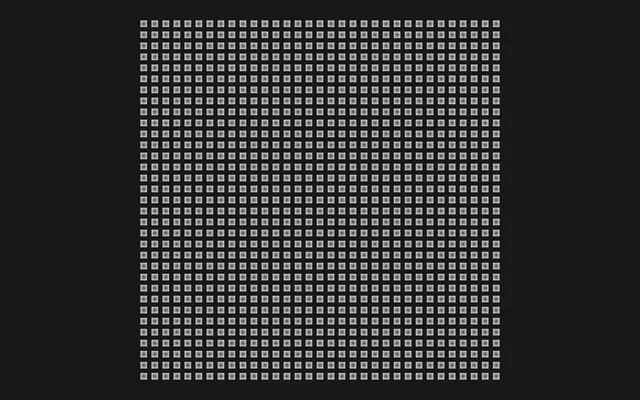
Discs
Let’s start with the shape of the particles and make them look like discs. This time, we don’t want a fancy pattern, just perfect discs.
First, we want the UV coordinates inside the particle, and since they are points, we can use the gl_PointCoord.
In fragment.glsl save gl_PointCoord as a vec2 uv variable:
void main()
{
    vec2 uv = gl_PointCoord;

    // ...
}
Send it to the gl_FragColor as the first two parameters, out of curiosity:
void main()
{
    vec2 uv = gl_PointCoord;

    gl_FragColor = vec4(uv, 1.0, 1.0);
    // ...
}
To draw a disc, we need the distance of the fragment to the center of the particle and we can do that using the distance function as seen in previous lessons.
Create a float distanceToCenter variable and save the distance between the uv and vec2(0.5):
void main()
{
    vec2 uv = gl_PointCoord;
    float distanceToCenter = distance(uv, vec2(0.5));

    // ...
}
Send it to the gl_FragColor as the first 3 values out of curiosity:
void main()
{
    vec2 uv = gl_PointCoord;
    float distanceToCenter = distance(uv, vec2(0.5));

    gl_FragColor = vec4(distanceToCenter, distanceToCenter, distanceToCenter, 1.0);
    // ...
}
It worked, but there is actually another way of getting the distance to the center and it’s by getting the length of the uv after subtracting 0.5:
void main()
{
    vec2 uv = gl_PointCoord;
    float distanceToCenter = length(uv - vec2(0.5));

    gl_FragColor = vec4(distanceToCenter, distanceToCenter, distanceToCenter, 1.0);
    // ...
}
There is no big difference between the two techniques and I find this one a bit more convoluted than using the distance, which is why I usually avoid it when I’m teaching to beginners. But since it’s used quite often, I thought it would be nice to teach it.
We have the distance to the center and we could use it to play with the alpha. But alpha tends to create visual bugs as seen in previous lessons and there is a more suited solution named “discard”.
Discard is an instruction that can be called just by writing discard;. It’ll prevent the fragment from being drawn entirely without even relying on transparency.
It’s as if there is nothing there even though the geometry says otherwise.
In our case, we want to discard the fragment when the distanceToCenter is above 0.5. We can use an if statement:
void main()
{
    vec2 uv = gl_PointCoord;
    float distanceToCenter = length(uv - vec2(0.5));

    if(distanceToCenter > 0.5)
        discard;

    // ...
}
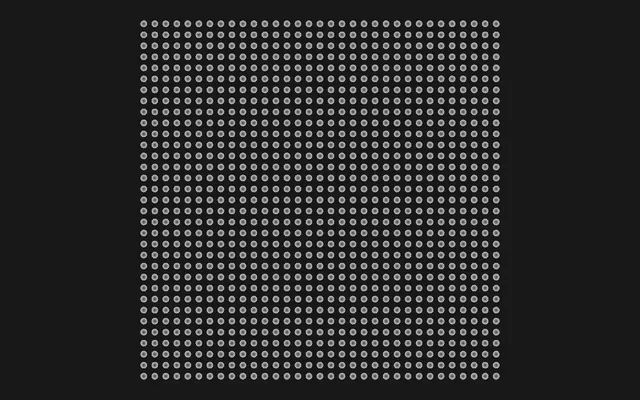
Our particles look like discs and we won’t have any transparency issues.
Note that discard; can have a performance impact that is hard to predict, but it’s usually negligible.
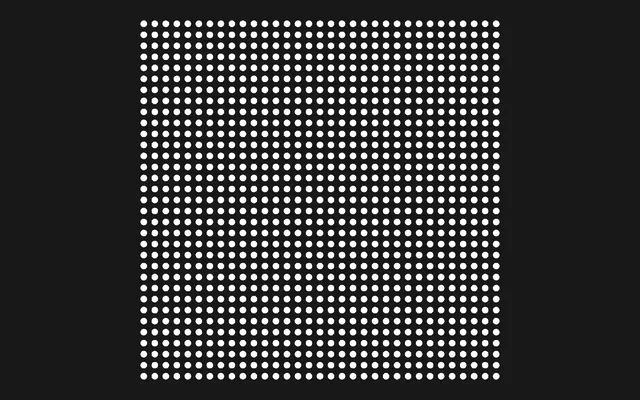
Put back 1.0 on gl_FragColor so that we get white particles:
void main()
{
    // ...

    gl_FragColor = vec4(1.0, 1.0, 1.0, 1.0);
    // ...
}
Texture
Some pictures are located in static/. We are going to load one and send it to the shader so that we can use it on the particles.
We already have a TextureLoader instance. We are going to create a uPictureTexture uniform using the classic Uniform and load the texture directly in it:
const particlesMaterial = new THREE.ShaderMaterial({
    // ...
    uniforms:
    {
        // ...
        uPictureTexture: new THREE.Uniform(textureLoader.load('./picture-1.png'))
    }
})
I chose the picture-1.png but feel free to use another one or even one you’ve made. If you use a custom one, make sure it’s in grayscale and square.
In vertex.glsl, retrieve the uPictureTexture as a sampler2D:
uniform sampler2D uPictureTexture;Before the Point size part, use the texture() function to pick the color from uPictureTexture at the uv coordinates and swizzle the r channel to save it in a float pictureIntensity variable:
void main()
{
    // ...

    // Picture
    float pictureIntensity = texture(uPictureTexture, uv).r;

    // Point size
    // ...
}
We do have access to the uv attribute of the geometry even though we are using that geometry for points. In addition, the uv corresponds to the default UV of a plane (0, 0 in the bottom left corner and 1, 1 in the top right corner).
Use the pictureIntensity to multiply the gl_PointSize:
void main()
{
    // ...

    // Point size
    gl_PointSize = 0.3 * pictureIntensity * uResolution.y;
    gl_PointSize *= (1.0 / - viewPosition.z);
}

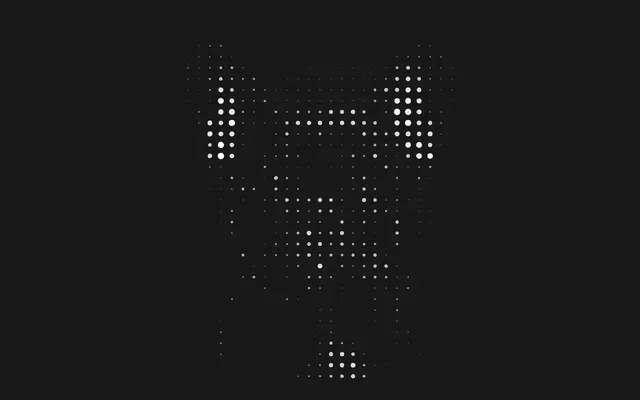
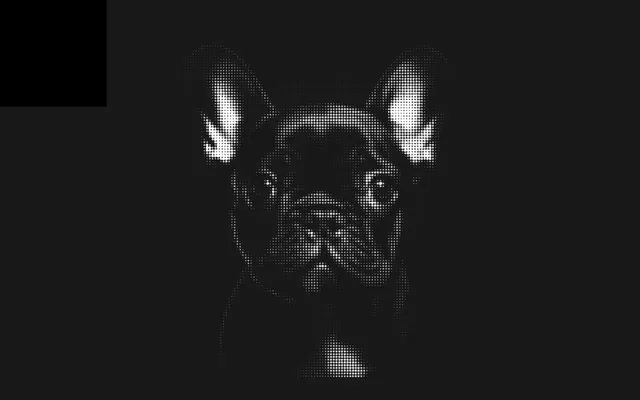
We can already notice the picture although we need more particles to really appreciate it, which we will do shortly.
Changing the size of the particles is a good start, but we are also going to change the color and make the small ones darker.
Create a vec3 vColor varying and assign it the pictureIntensity:
varying vec3 vColor;

void main()
{
    // ...

    // Varyings
    vColor = vec3(pictureIntensity);
}
In fragment.glsl, retrieve the vColor varying and set it on the first three values of gl_FragColor:
varying vec3 vColor;

void main()
{
    // ...

    gl_FragColor = vec4(vColor, 1.0);
    // ...
}
Quite nice, but we are going to make the dark ones even darker, while keeping the bright ones the same brightness. And to do that, we are going to crush the vColor by applying a power:
In vertex.glsl, use a pow on the pictureIntensity:
void main()
{
    // ...

    // Varyings
    vColor = vec3(pow(pictureIntensity, 2.0));
}

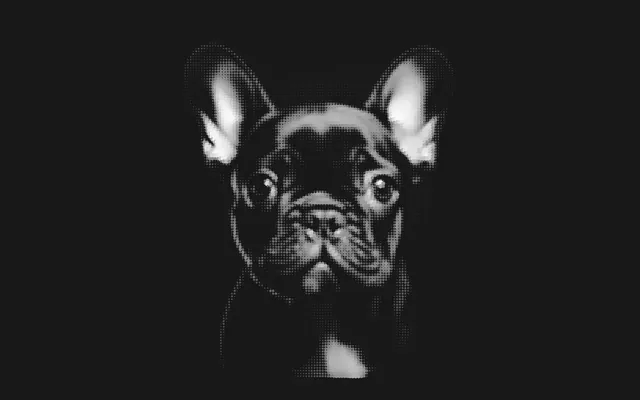
More particles
Our particles are ready. Let’s add more of them by increasing the subdivision on the PlaneGeometry to 128:
const particlesGeometry = new THREE.PlaneGeometry(10, 10, 128, 128)
Reduce their base size to 0.15 in vertex.glsl:
void main()
{
    // ...

    // Point size
    gl_PointSize = 0.15 * pictureIntensity * uResolution.y;
    // ...
}

It would have been nice to have those tweaks added to the debug panel, but let’s keep things simple.
Displacement theory 21:56
We have our particles. We now want to animate them when the cursor hovers over the picture.
Even better, we want to have some kind of trail where the particles stay elevated for a brief moment even though the cursor is already gone.
Because of this trail effect, we can’t just send the cursor coordinate to the shader and use it to move the particles. We need some kind of persistence in the effect and we are going to use a canvas to do so.
A canvas? Like the WebGL canvas?
No. We are going to use a 2D canvas. If you don’t know what a 2D canvas is, it’s actually what the <canvas> was used for before WebGL and it’s still available today.
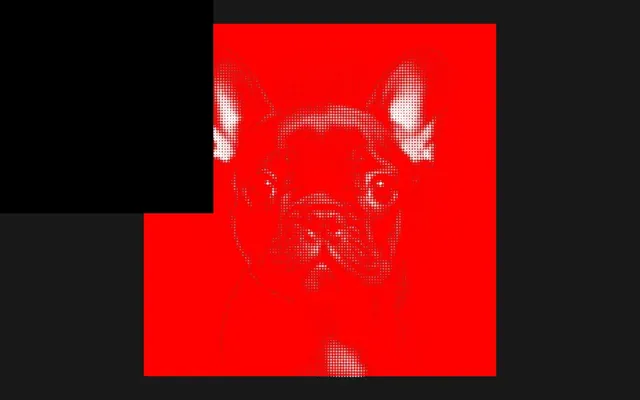
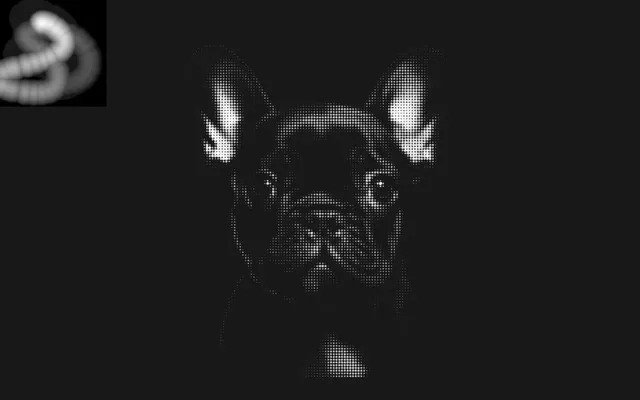
We are going to create a 2D canvas filled with black, draw a white glow on each frame where the cursor is supposed to be, fade out the whole canvas slightly on each frame, and use that canvas as a displacement texture for the particles.
If it doesn’t make sense, check the video at the beginning of the lesson and you’ll see the 2D canvas on the top left corner.
2D canvas 25:16
What is it
Before creating that 2D canvas, let’s explain what it is and how it works in case you haven’t used one yet.
This is not a lesson about 2D canvas and it would have taken a full chapter to master it, but it’s an opportunity to learn some basics and understand when and how to use it.
The <canvas> existed centuries before WebGL came to life. And with it, we are able to do a lot of things:
- Draw shapes
- Draw images
- Change the style of what we draw
- Transform pixels
- Add gradients
- Change how the pixel we draw merges with the pixels already drawn
- Erase some parts
- Animate everything
Sounds great, but the limitation is that drawing is done by the CPU, unlike WebGL, which relies mostly on the GPU.
This creates performance issues and limits what we can do with it, especially when animating on each frame.
Still, we can create drawings and simple animations that will work on most devices. Do not underestimate the power of the CPU.
We are going to create a 2D canvas and focus on it for a while.
By the way, there is a famous cheat sheet for canvas that you should keep nearby: https://simon.html5.org/dump/html5-canvas-cheat-sheet.html
Create the 2D canvas
Since we are going to have a lot of variables, we are going to organize this part in a displacement object in order to separate it from the rest.
Before the Particles part, create a displacement object:
/**
 * Displacement
 */
const displacement = {}
First, we need an actual <canvas> element, just like for the WebGL. We can create it in HTML or we can create it directly from the JS.
Let’s do it in JS. Use the document.createElement() method and save it as a canvas property:
/**
 * Displacement
 */
const displacement = {}

// 2D canvas
displacement.canvas = document.createElement('canvas')
Set a size to 128 using the width and height properties:
// 2D canvas
displacement.canvas = document.createElement('canvas')
displacement.canvas.width = 128
displacement.canvas.height = 128
And add it to the DOM using document.body.append():
document.body.append(displacement.canvas)Note that adding the canvas element to the DOM is not mandatory, but we want to see what we are going to draw in it.
The <canvas> is in the DOM, but it’s transparent, too small, and behind the WebGL canvas:
Let’s fix that by setting some style on the element directly:
// 2D canvas
// ...
displacement.canvas.style.position = 'fixed'
displacement.canvas.style.width = '512px'
displacement.canvas.style.height = '512px'
displacement.canvas.style.top = 0
displacement.canvas.style.left = 0
displacement.canvas.style.zIndex = 10
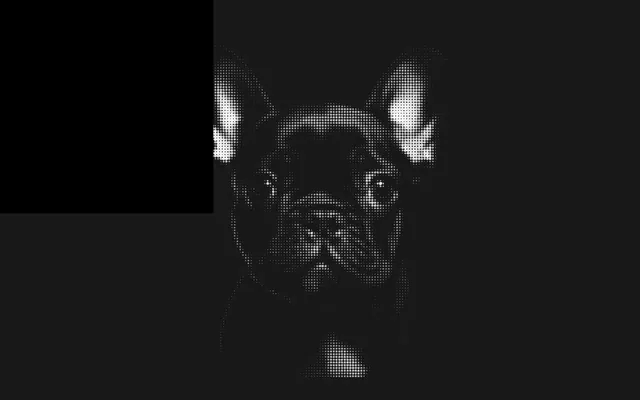
document.body.append(displacement.canvas)We changed the width and the height of the style, which doesn’t affect the actual amount of pixels composing the canvas. It’s just so that we can see it better:
The 2D canvas is there, but it’s currently transparent.
Context
To draw onto that canvas, we need what we call the “context” and you might have heard of it for WebGL. Three.js actually gets a “WebGL context” out of the canvas.
But in our case, it’s not a webgl context we want, but a 2d context.
Call getContext('2d') on the displacement.canvas and save it as displacement.context:
// Context
displacement.context = displacement.canvas.getContext('2d')
Fill the canvas
We have everything we need to draw onto our canvas and we are going to start by filling it with a uniform black.
Remember that, to draw on the canvas, you need to use the context, and that context contains a bunch of methods, one being fillRect() that will, as the name suggests, fill a rectangle.
Call fillRect() with the following parameters after retrieving the context:
// Context
displacement.context = displacement.canvas.getContext('2d')
displacement.context.fillRect(0, 0, displacement.canvas.width, displacement.canvas.height)
The first two parameters are x and y coordinates of the rectangle and the last two parameters are the width and height, which is why the canvas is completely filled.
And since the default filling style is black, we get a black canvas.
Although we are fine with black, for the sake of learning, set the fillStyle property to 'red' before calling fillRect():
displacement.context = displacement.canvas.getContext('2d')
displacement.context.fillStyle = 'red'
displacement.context.fillRect(0, 0, displacement.canvas.width, displacement.canvas.height)
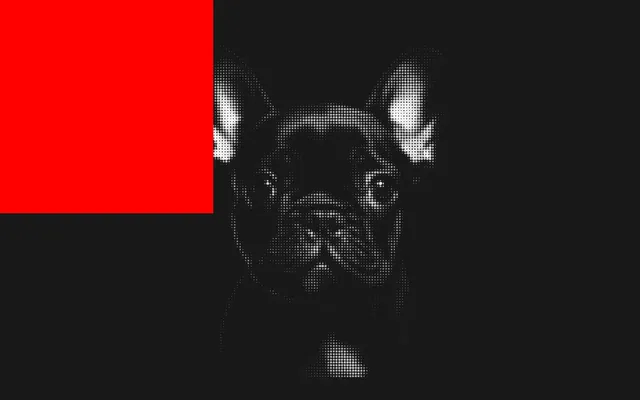
And this is how 2D canvas works: you define a style and you draw shapes.
This was just an example as we want the canvas to be black. Remove the fillStyle:
// Context
displacement.context = displacement.canvas.getContext('2d')
displacement.context.fillRect(0, 0, displacement.canvas.width, displacement.canvas.height)
Draw glow
There is a glow.png file located in the static/ folder. This glow is a grayscale radial gradient that we are going to use to draw on the canvas where the cursor is.
We are going to do it in the tick function after retrieving the cursor coordinates, but for now, we just want to give it a try and discover how we can draw an image on the canvas.
First, we need to load it. Forget about the TextureLoader, this is not Three.js. We need to load the image in pure JavaScript.
Create an instance of Image and update its src to the path where to find the glow.png:
// Glow image
displacement.glowImage = new Image()
displacement.glowImage.src = './glow.png'
To draw that image onto the canvas, we can use the drawImage() function whose parameters are the same as for the fillRect() (x, y, width, height) with the image as the very first parameter:
displacement.glowImage = new Image()
displacement.glowImage.src = './glow.png'
displacement.context.drawImage(displacement.glowImage, 20, 20, 32, 32)
We get nothing and the reason is that loading an image takes time, but we tried to draw it right away.
We could listen to the load event, but since this is just a test, let’s use a setTimeout to wait 1000 ms:
displacement.glowImage = new Image()
displacement.glowImage.src = './glow.png'
window.setTimeout(() =>
{
    displacement.context.drawImage(displacement.glowImage, 20, 20, 32, 32)
}, 1000)
It’s working and we managed to draw the glow, but since we want to do it in the tick function where the cursor is, let’s remove the drawImage() and the setTimeout():
displacement.glowImage = new Image()
displacement.glowImage.src = './glow.png'
Draw on cursor coordinates 42:27
Our canvas is ready and we know how to draw the glow on it.
Now, we need to draw that glow on each frame relative to the cursor on the particles, and we are going to use a Raycaster to do so.
Interactive plane
Unfortunately, the Raycaster won’t work with the particles because it requires a geometry made out of vertices and triangles.
To fix that, we are going to create a plane at the exact same position as the particles, make it invisible, and use the Raycaster on that plane.
Create a Mesh using a PlaneGeometry and a MeshBasicMaterial, make it the size of the particles (10, 10), set the color to 'red', and save it as interactivePlane:
// Interactive plane
displacement.interactivePlane = new THREE.Mesh(
    new THREE.PlaneGeometry(10, 10),
    new THREE.MeshBasicMaterial({ color: 'red' })
)
scene.add(displacement.interactivePlane)
For now, we are going to keep it visible and hide it once we have the cursor coordinates.
Raycaster
For the Raycaster, we can already instantiate one:
// Raycaster
displacement.raycaster = new THREE.Raycaster()
If you remember from the Raycaster and Mouse Events lesson, we also need the cursor coordinates. Since we did that in previous lessons, we are going to move through this quite quickly.
Create a Vector2 and save it as screenCursor:
// Coordinates
displacement.screenCursor = new THREE.Vector2()
If we keep the Vector2 like this, the cursor's default position will be at the center of the picture, which won’t look very good when we start the experience.
To fix that, set it to 9999, 9999:
// Coordinates
displacement.screenCursor = new THREE.Vector2(9999, 9999)
When the cursor moves, we want to update the coordinates, but we want to do it even if it’s a touch screen. We can do that by listening to the pointermove event:
window.addEventListener('pointermove', (event) =>
{
})
In there, we are going to do the usual math in order to convert the screen coordinates (which are in pixels) to clip space coordinates (from -1 to +1):
window.addEventListener('pointermove', (event) =>
{
    displacement.screenCursor.x = (event.clientX / sizes.width) * 2 - 1
    displacement.screenCursor.y = - (event.clientY / sizes.height) * 2 + 1
})
In the tick function, after updating the controls, prepare the raycaster using setFromCamera():
const tick = () =>
{
    // Update controls
    controls.update()

    /**
     * Raycaster
     */
    displacement.raycaster.setFromCamera(displacement.screenCursor, camera)

    // ...
}
Next, we want to test the intersection with the interactivePlane and since it’s a single object, we can use intersectObject() (singular) :
const tick = () =>
{
    // ...
    displacement.raycaster.setFromCamera(displacement.screenCursor, camera)
    const intersections = displacement.raycaster.intersectObject(displacement.interactivePlane)

    // ...
}
Even though we test only one object, intersectObject() will return an array in case there are multiple intersections. But since we are testing on a plane, we know there can be only one intersection.
Test the intersections.length using an if statement and console.log() the first (and only) intersection:
const tick = () =>
{
    // ...
    displacement.raycaster.setFromCamera(displacement.screenCursor, camera)
    const intersections = displacement.raycaster.intersectObject(displacement.interactivePlane)

    if(intersections.length)
    {
        console.log(intersections[0])
    }

    // ...
}
And here comes the good news. When intersecting with a geometry including a uv attribute, we get the uv coordinates. No need for complex calculations.
Save it in a uv variable and console.log() it:
const tick = () =>
{
    // ...

    displacement.raycaster.setFromCamera(displacement.screenCursor, camera)
    const intersections = displacement.raycaster.intersectObject(displacement.interactivePlane)

    if(intersections.length)
    {
        const uv = intersections[0].uv
        console.log(uv)
    }

    // ...
}
Draw the glow on the canvas
If you remember when we drew our glow earlier, we were using pixel coordinates and the uv coordinates we’ve just got are normalized (from 0 to 1).
We need to do some mathematics, but we also need to save the result somewhere.
Where you’ve created the screenCursor, create canvasCursor also using a Vector2:
// Coordinates
displacement.screenCursor = new THREE.Vector2(9999, 9999)
displacement.canvasCursor = new THREE.Vector2(9999, 9999)
Back to our tick where we retrieved the uv coordinate: update the canvasCursor using the uv and multiply by the canvas.width and canvas.height so that we transform from normalized coordinates to canvas coordinates:
const tick = () =>
{
    // ...

    if(intersections.length)
    {
        const uv = intersections[0].uv

        displacement.canvasCursor.x = uv.x * displacement.canvas.width
        displacement.canvasCursor.y = uv.y * displacement.canvas.height
    }

    // ...
}
We made a small mistake, but let’s move forward until we notice the problem.
We can now draw the glow and we are going to do it in the tick, after the whole Raycaster. Call the drawImage() method and use displacement.canvasCursor for the x and y parameters:
const tick = () =>
{
    // ...

    /**
     * Raycaster
     */
    // ...

    /**
     * Displacement
     */
    // Draw glow
    displacement.context.drawImage(
        displacement.glowImage,
        displacement.canvasCursor.x,
        displacement.canvasCursor.y,
        32,
        32
    )

    // ...
}
That’s a start, but we have a few things to fix.
First, the glow gets drawn on top of the previous glows, and the black area covers what’s behind.
We want the color to accumulate, a bit like the AdditiveBlending from Three.js. The good news? We have access to such a thing in 2D canvas and all we need to do is set the globalCompositeOperation to 'lighten' on the context:
const tick = () =>
{
    // ...

    /**
     * Displacement
     */
    // Draw glow
    displacement.context.globalCompositeOperation = 'lighten'
    displacement.context.drawImage(
        displacement.glowImage,
        displacement.canvasCursor.x,
        displacement.canvasCursor.y,
        32,
        32
    )

    // ...
}
You can see that the horizontal coordinate works fine, but the vertical coordinate is inverted. And this is the mistake we made earlier.
uv coordinates are positive when going up while canvas coordinates are positive when going down:
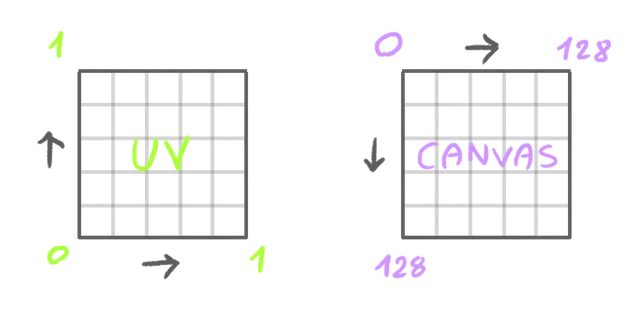
In the if statement, replace uv.y by (1 - uv.y):
const tick = () =>
{
// ...
if(intersections.length)
{
const uv = intersections[0].uv
displacement.canvasCursor.x = uv.x * displacement.canvas.width
displacement.canvasCursor.y = (1 - uv.y) * displacement.canvas.height
}
// ...
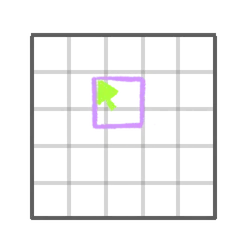
}Finally, we are drawing the glow at the bottom right of the actual cursor coordinates, meaning that the glow isn’t centered on the cursor:
Also, the size of the glow is set to 32, but if we change the size of the canvas, let’s say we reduce it, the glow will look proportionally too big.
To fix that, create a glowSize variable based on the canvas.width:
const tick = () =>
{
    // ...

    /**
     * Displacement
     */
    // Draw glow
    const glowSize = displacement.canvas.width * 0.25

    // ...
}
Use it in the drawImage() for the width and height but also subtract half of it from the x and y so that it’s centered:
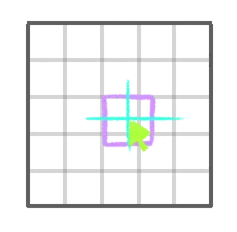
const tick = () =>
{
    // ...

    /**
     * Displacement
     */
    // Draw glow
    const glowSize = displacement.canvas.width * 0.25
    displacement.context.globalCompositeOperation = 'lighten'
    displacement.context.drawImage(
        displacement.glowImage,
        displacement.canvasCursor.x - glowSize * 0.5,
        displacement.canvasCursor.y - glowSize * 0.5,
        glowSize,
        glowSize
    )

    // ...
}
Fade out 01:06:17
Our glow keeps on being drawn but never disappears.
To fade it out, we are going to fill the whole canvas with a black rectangle as we did at the beginning, but that black rectangle will have a low opacity so that it doesn’t occlude everything in its draw.
But first, before drawing the glow, let’s try to draw the black rectangle again:
const tick = () =>
{
    // ...

    /**
     * Displacement
     */
    // Fade out
    displacement.context.fillRect(0, 0, displacement.canvas.width, displacement.canvas.height)

    // Draw glow
    // ...
}
That’s odd: it’s not working. The reason is that we set the globalCompositeOperation to 'lighten', but we never reverted to the default one.
We can fix that by adding it back in right before the fillRect(). The default value is 'source-over':
const tick = () =>
{
    // ...

    /**
     * Displacement
     */
    // Fade out
    displacement.context.globalCompositeOperation = 'source-over'
    displacement.context.fillRect(0, 0, displacement.canvas.width, displacement.canvas.height)

    // ...
}
It’s working, but right now it’s covering everything with a perfectly opaque black. We want to fade the black out.
To do that, set the globalAlpha to 0.1:
const tick = () =>
{
    // ...

    /**
     * Displacement
     */
    // Fade out
    displacement.context.globalCompositeOperation = 'source-over'
    displacement.context.globalAlpha = 0.1
    displacement.context.fillRect(0, 0, displacement.canvas.width, displacement.canvas.height)

    // ...
}
It seems to be working, but the glow looks faded out too. Just like we put back the globalCompositeOperation before drawing the rectangle, we also need to change the globalAlpha back to 1 before drawing the glow:
const tick = () =>
{
    // ...

    /**
     * Displacement
     */
    // ...
    displacement.context.globalAlpha = 1
    displacement.context.drawImage(
        // ...
    )

    // ...
}
At this moment, you might see a different result according to your frame rate.
Although it’ll change the final result slightly once we use it to animate the particles, it’s almost not noticeable and we can ignore that.
Our glowy trail is working. Let’s try to make the trail even longer by setting a globalAlpha to 0.02:
const tick = () =>
{
    // ...
    displacement.context.globalAlpha = 0.02
    displacement.context.fillRect(0, 0, displacement.canvas.width, displacement.canvas.height)

    // ...
}
As you can see, the trail never completely disappears. This is a common issue with 2D canvas where the precision of the color makes it hard to introduce small variations.
Do not worry, there is an easy fix that we will see once we use it in WebGL.
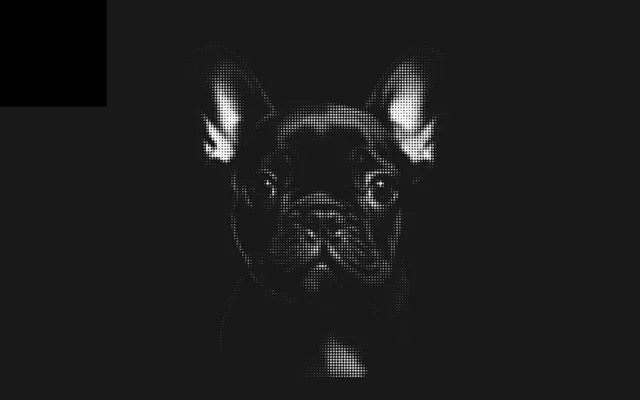
We are almost done with the canvas and we can make the interactivePlane invisible:
// Interactive plane
displacement.interactivePlane = new THREE.Mesh(
    // ...
)
displacement.interactivePlane.visible = false
Reduce the size of the canvas using the style so that it doesn’t cover the particles:
displacement.canvas.style.width = '256px'
displacement.canvas.style.height = '256px'
We are going to keep the 2D canvas visible in the lesson to showcase the technique and keep an eye on it, but you would probably want to remove it before going live.
Displacement as a texture 01:13:58
Our displacement canvas is ready and we now need to send it to our particle shader.
To convert it to a Three.js texture, we can use the CanvasTexture.
At the end of the Displacement part, create a texture property, to which we assign a CanvasTexture instance, which is being sent the canvas itself (not the context):
// Texture
displacement.texture = new THREE.CanvasTexture(displacement.canvas)
Canvases are perfectly compatible with Three.js textures and the CanvasTexture is actually nothing but a Texture updating itself as soon as it is instantiated.
Still, we need to update the texture after updating the canvas.
In the tick function, after drawing the glow, set the needsUpdate property of the texture to true:
const tick = () =>
{
    // ...

    /**
     * Displacement
     */
    displacement.context.globalCompositeOperation = 'source-over'
    displacement.context.globalAlpha = 0.02
    displacement.context.fillRect(0, 0, displacement.canvas.width, displacement.canvas.height)

    // Draw glow
    // ...

    // Texture
    displacement.texture.needsUpdate = true

    // ...
}
We can now send the texture to the shader.
Create a uDisplacementTexture uniform using the usual Uniform class and send it the displacement.texture:
const particlesMaterial = new THREE.ShaderMaterial({
    // ...
    uniforms:
    {
        // ...
        uDisplacementTexture: new THREE.Uniform(displacement.texture)
    }
})
In vertex.glsl, retrieve the uDisplacementTexture as a sampler2D:
uniform sampler2D uDisplacementTexture;And, just to test that it’s working, use it for the pictureIntensity instead of the uPictureTexture:
void main()
{
    // ...

    // Picture
    float pictureIntensity = texture(uDisplacementTexture, uv).r;

    // ...
}
uDisplacementTexture does contain the canvas, we can move forward.
Put back the uPictureTexture:
void main()
{
    // ...

    // Picture
    float pictureIntensity = texture(uPictureTexture, uv).r;

    // ...
}
Displacement animation 01:17:50
All of this led us to this moment. We can finally move the particles according to the displacement texture.
We are going to update the position before we send it to the modelPosition.
Start by creating a vec3 newPosition variable based on the position and send it to the modelPosition:
void main()
{
    // Displacement
    vec3 newPosition = position;

    // Final position
    vec4 modelPosition = modelMatrix * vec4(newPosition, 1.0);
    // ...
}
We do this because position is an attribute, and we can’t modify an attribute directly.
Elevation
First, we want to retrieve the displacement value from uDisplacementTexture.
We can do that exactly like we did with uPictureTexture by using texture() according to the uv and only keeping the r channel because it’s a grayscale image. Save the result in a float displacementIntensity variable:
void main()
{
    // Displacement
    vec3 newPosition = position;
    float displacementIntensity = texture(uDisplacementTexture, uv).r;

    // ...
}
Next, create a vec3 displacement variable, set the x and y to 0.0 and only the z to 1.0:
void main()
{
    // Displacement
    vec3 newPosition = position;
    float displacementIntensity = texture(uDisplacementTexture, uv).r;

    vec3 displacement = vec3(
        0.0,
        0.0,
        1.0
    );

    // ...
}
This is the direction of the displacement and although it’s only on the z for now, later we are going to play with the x and y to add randomness, which is why we are using a vec3.
We have the direction as displacement, we have the intensity as displacementIntensity, and we can multiply displacement by the displacementIntensity and add it to the newPosition:
void main()
{
    // Displacement
    vec3 newPosition = position;
    float displacementIntensity = texture(uDisplacementTexture, uv).r;

    vec3 displacement = vec3(
        0.0,
        0.0,
        1.0
    );
    displacement *= displacementIntensity;

    newPosition += displacement;

    // ...
}
Make the effect stronger by multiplying displacement by 3.0:
void main()
{
    // ...

    vec3 displacement = vec3(
        0.0,
        0.0,
        1.0
    );
    displacement *= displacementIntensity;
    displacement *= 3.0;

    // ...
}
Random intensity
That’s a start, but the effect is way too regular. First, we are going to randomize the intensity.
In script.js create a aIntensity attribute filled with random values from 0 to 1. Since we have done this a bunch of times, we are going to move through this part swiftly:
const particlesGeometry = new THREE.PlaneGeometry(10, 10, 128, 128)

const intensitiesArray = new Float32Array(particlesGeometry.attributes.position.count)

for(let i = 0; i < particlesGeometry.attributes.position.count; i++)
{
    intensitiesArray[i] = Math.random()
}

particlesGeometry.setAttribute('aIntensity', new THREE.BufferAttribute(intensitiesArray, 1))
In vertex.glsl, retrieve it as a float and multiply the displacement by it:
attribute float aIntensity;

void main()
{
    // ...
    displacement *= displacementIntensity;
    displacement *= 3.0;
    displacement *= aIntensity;

    // ...
}
That looks much better already.
Random angle
The effect looks quite nice as it is right now, but let’s add even more randomness.
We are going to move the particles at various angles, but the angle of one particle will always be the same, meaning we need a new attribute.
Similar to how we created a intensitiesArray and sent it as an 'aIntensity' attribute, create an anglesArray filled with random values and send it to the 'aAngle' attribute:
const intensitiesArray = new Float32Array(particlesGeometry.attributes.position.count)
const anglesArray = new Float32Array(particlesGeometry.attributes.position.count)

for(let i = 0; i < particlesGeometry.attributes.position.count; i++)
{
    intensitiesArray[i] = Math.random()
    anglesArray[i] = Math.random()
}

particlesGeometry.setAttribute('aIntensity', new THREE.BufferAttribute(intensitiesArray, 1))
particlesGeometry.setAttribute('aAngle', new THREE.BufferAttribute(anglesArray, 1))
But if you remember from previous lessons and school, we need to use radians and since a full circle is 2 times PI, we need to multiply Math.random() by Math.PI * 2:
for(let i = 0; i < particlesGeometry.attributes.position.count; i++)
{
    // ...
    anglesArray[i] = Math.random() * Math.PI * 2
}
In vertex.glsl, retrieve the aAngle attribute as a float:
attribute float aAngle;And this is why we set the displacement as a vec3. It’s already moving on the z and we can use the aAngle to move on the x and the y.
aAngle being an angle, we want to use it as if it was to position something on a circle. To do that, we need to use the same angle on cosine for the x and sine for the y:
void main()
{
    // ...

    vec3 displacement = vec3(
        cos(aAngle),
        sin(aAngle),
        1.0
    );
    // ...
}
It’s looking great, but a bit too intense. Multiply both cos() and sin() by 0.2:
void main()
{
    // ...

    vec3 displacement = vec3(
        cos(aAngle) * 0.2,
        sin(aAngle) * 0.2,
        1.0
    );
    // ...
}
Finally, to make sure that we start from a vector of length 1, normalize displacement right after creating it:
void main()
{
    // ...

    vec3 displacement = vec3(
        cos(aAngle) * 0.2,
        sin(aAngle) * 0.2,
        1.0
    );
    displacement = normalize(displacement);
    // ...
}
Fix the canvas bug 01:30:09
If you move the cursor for a while, you’ll notice that the particles don’t come back to their initial position.
This is because of the trail that does not fade out perfectly in the 2D canvas as shown earlier.
To fix that, we are going to remap the displacementIntensity so that we ignore everything below 0.1:
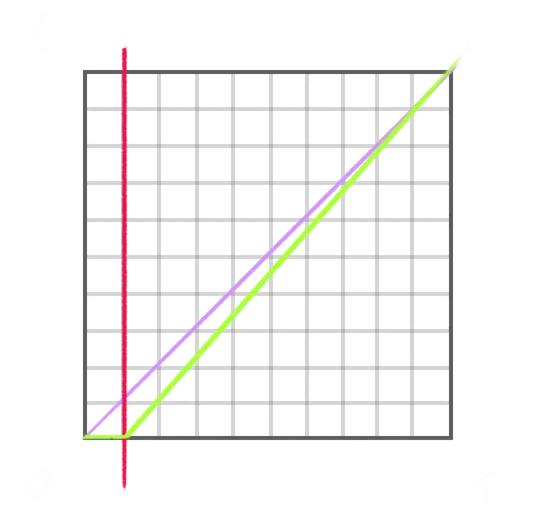
Now, this is the perfect opportunity to smooth the value using a smoothstep:
void main()
{
    // Displacement
    vec3 newPosition = position;
    float displacementIntensity = texture(uDisplacementTexture, uv).r;
    displacementIntensity = smoothstep(0.1, 1.0, displacementIntensity);

    // ...
}
Particles now come back to their initial position.
Trail 01:32:00
Our particle animation looks done, but wait, there is even more. What if we could make the particles hold their position for a while before getting back to their initial position?
Using the smoothstep, we can also ignore the values above, let’s say 0.3. This means that when the displacementIntensity is above 0.3, it’ll actually stay at 1.0 until it goes down to 0.3 and below:

void main()
{
    // Displacement
    vec3 newPosition = position;
    float displacementIntensity = texture(uDisplacementTexture, uv).r;
    displacementIntensity = smoothstep(0.1, 0.3, displacementIntensity);

    // ...
}
Performance improvements 01:33:38
Although you can’t notice it, there are a lot more particles being rendered than what we see.
There is a trick to see it and it’s by setting a blending to THREE.AdditiveBlending on the material:
const particlesMaterial = new THREE.ShaderMaterial({
    // ...
    blending: THREE.AdditiveBlending
})
See how the particles look much brighter?
If there was only one particle at each position on the grid, they should keep the same color, with or without blending. But since there are multiple ones, their color gets added and we end up with brighter particles.
This occurs because the geometry uses an index.
Remember that geometry is normally used to draw triangles, and one triangle is composed of three vertices. Without indexing, the amount of vertices would be equal to 3 times the amount of triangles:
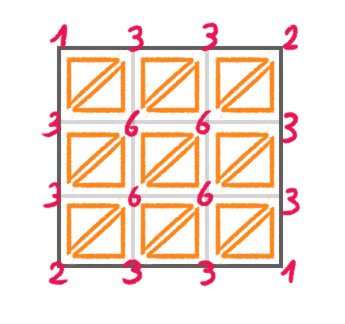
With indexing, the vertices are unique, but the triangles are composed by the index to those vertices, which can result in considerably smaller buffers:
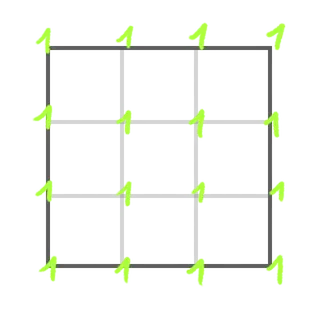
It’s a great technique, but we don’t care about triangles since we are drawing particles.
To get rid of the indices, use the setIndex() method on the geometry and set it to null:
const particlesGeometry = new THREE.PlaneGeometry(10, 10, 128, 128)
particlesGeometry.setIndex(null)
The brightness is back to normal, meaning that we have only one particle at each position on the grid.
And since we are here, let’s remove the normal attribute that we don’t use:
const particlesGeometry = new THREE.PlaneGeometry(10, 10, 128, 128)
particlesGeometry.setIndex(null)
particlesGeometry.deleteAttribute('normal')
Fix the back side 01:40:56
Currently, the effect doesn’t work if we move the camera to the other side:
This is due to the Raycaster only working on the front side of the triangles.
Fortunately, we can instruct the Raycaster to check both sides by setting the side property of the interactivePlane material to THREE.DoubleSide:
displacement.interactivePlane = new THREE.Mesh(
    new THREE.PlaneGeometry(10, 10),
    new THREE.MeshBasicMaterial({ color: 'red', side: THREE.DoubleSide })
)
Speed alpha 01:42:07
If we stop moving the cursor, the particles stay up:
It looks a bit weird and we would like the effect to vary according to the speed of the cursor.
To calculate the speed, on each frame, we are going to calculate the distance between the cursor current position and its previous position:

The higher the distance, the faster the cursor.
First, since we want to compare the cursor position to its previous value, we need to save that previous value somewhere.
Where we created the canvasCursor, create a canvasCursorPrevious using another Vector2 with the same value:
// Coordinates
displacement.screenCursor = new THREE.Vector2(9999, 9999)
displacement.canvasCursor = new THREE.Vector2(9999, 9999)
displacement.canvasCursorPrevious = new THREE.Vector2(9999, 9999)
In the tick function, right before drawing the glow, copy the canvasCursor value into the canvasCursorPrevious using the copy() method available on Vector2:
const tick = () =>
{
    // ...

    /**
     * Displacement
     */
    // Fade out
    // ...

    // Speed alpha
    displacement.canvasCursorPrevious.copy(displacement.canvasCursor)

    // Draw glow
    // ...
}
The copy() method takes the values from one vector (x and y in our case) and assign them to the other vector without replacing the instance.
And now, before the copy(), we are going to calculate the distance between the two vectors using the distanceTo() method available on Vector2, and save it as a cursorDistance variable:
const tick = () =>
{
    // ...
    // ...

    // Speed alpha
    const cursorDistance = displacement.canvasCursorPrevious.distanceTo(displacement.canvasCursor)
    displacement.canvasCursorPrevious.copy(displacement.canvasCursor)

    // ...
}
It’s important to do it before the copy() so that we compare to the previous value, otherwise it would be 0 all the time.
console.log() the cursorDistance out of curiosity:
const tick = () =>
{
    // ...

    // Speed alpha
    const cursorDistance = displacement.canvasCursorPrevious.distanceTo(displacement.canvasCursor)
    displacement.canvasCursorPrevious.copy(displacement.canvasCursor)
    console.log(cursorDistance)

    // ...
}
Remove the console.log(), create an alpha variable and assign the cursorDistance multiplied by 0.1 so that the alpha doesn’t get too high:
const tick = () =>
{
    // ...

    // Speed alpha
    const cursorDistance = displacement.canvasCursorPrevious.distanceTo(displacement.canvasCursor)
    displacement.canvasCursorPrevious.copy(displacement.canvasCursor)
    const alpha = cursorDistance * 0.1

    // ...
}
Although it’s not necessary, we are going to clamp it to 1 using Math.min():
const tick = () =>
{
    // ...

    // Speed alpha
    const cursorDistance = displacement.canvasCursorPrevious.distanceTo(displacement.canvasCursor)
    displacement.canvasCursorPrevious.copy(displacement.canvasCursor)
    const alpha = Math.min(cursorDistance * 0.1, 1)

    // ...
}
And finally, we can assign the alpha to the globalAlpha property right before we call drawImage():
const tick = () =>
{
    // ...

    // Draw glow
    // ...
    displacement.context.globalAlpha = alpha
    displacement.context.drawImage(
        // ...
    )

    // ...
}
The effect now stops if we stop moving the cursor.
Going further 01:46:52
We are finally done, but the experience can be improved.
Here are suggestions:
- Add more tweaks (particle count, particle size, various intensities, and thresholds).
- Add color to the particles like a nice gradient from one corner to the other.
- Make the particles move slowly all the time to add more life.
- Try other pictures.