Introduction 00:00
Post-processing is about adding effects on the final image (the render). People mostly use this technique in filmmaking, but we can do it in WebGL too.
Post-processing can be subtle to improve the image slightly or to create huge effects.
Here are some examples of what you can use post-processing for:
- Depth of field
- Bloom
- God ray
- Motion blur
- Glitch effect
- Outlines
- Color variations
- Antialiasing
- Reflections and refractions
- Etc.
Setup 01:24
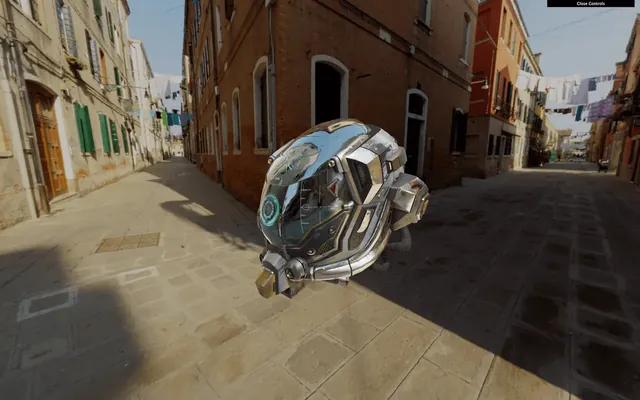
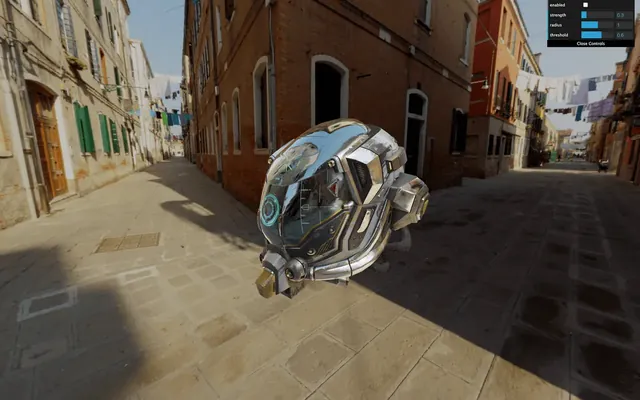
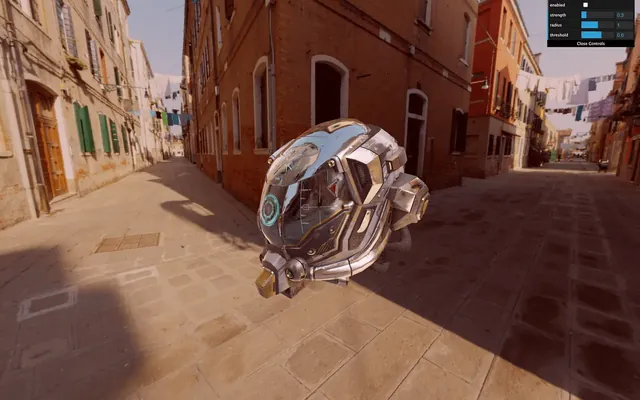
We will use the same setup as the Realistic Model Render lesson but with the Damaged Helmet model by Leonardo Carrion. It's a popular model with many details and good textures that should go well with our post-processing.
How it works 01:57
Most of the time, post-processing works the same way.
Render target
Instead of rendering in the canvas, we do the render in what we call a render target. That render target will give us a texture very similar to the usual texture. In a simpler way, we render in a texture instead of the canvas on the screen.
The term "render target" is specific to Three.js. Other contexts mostly use the word "buffer".
This texture is then applied to a plane facing the camera and covering the whole view. This plane uses a material with a special fragment shader that will do the post-processing effect. If the post-processing effect consists of redden the image, it would merely multiply the red value of the pixel in that fragment shader.
Most post-process effects are doing more than just tweaking the color values, but you get the idea.
In Three.js those "effects" are called "passes". We will refer to that term from now on.
Ping-pong buffering
We can have multiple passes on our post-process: one doing the motion blur, one doing the color changes, one doing the depth of field, etc. Because we can have multiples passes, the post-processing needs two render targets. The reason is that we can't get the texture of a render target while drawing in it at the same time. The idea is to draw in the first render target while taking the texture from the second one. At the next pass, we switch those render targets, take the texture from the second, and draw on the first. And again at the next pass, we switch them, and again, and again. That is what we call ping pong buffering.
Final pass on the canvas
The last pass won't be in a render target because we can put it directly on the canvas so the user can see the final result.
In the end
All of these can be very complicated for beginners, but, fortunately, we don't have to do it on our own.
Actually, we could have start without even explaining those render target, textures, ping pong buffering, etc. but it's always good to understand what is really going on behind the scene.
All we have to do is use the EffectComposer class that will handle most of the heavy lifting for us.
EffectComposer 13:11
As we said, EffectComposer will handle all the process of creating the render targets, doing the ping-pong thing, sending the texture of the previous pass to the current pass, drawing the last one on the canvas, etc.
First, we need to import it because it's not available in the THREE variable:
import { EffectComposer } from 'three/examples/jsm/postprocessing/EffectComposer.js'We will also need a first pass called RenderPass. This pass is in charge of the first render of our scene, but instead of doing it in the canvas, it will happen in a render target created inside the EffectComposer:
import { RenderPass } from 'three/examples/jsm/postprocessing/RenderPass.js'We can now instantiate our EffectComposer and use our renderer as parameter. Like the WebGLRenderer, we need to provide a pixel ratio with setPixelRatio(...) and resize it with setSize(...). We will use the same parameters as for the renderer:
/**
 * Post processing
 */
const effectComposer = new EffectComposer(renderer)
effectComposer.setSize(sizes.width, sizes.height)
effectComposer.setPixelRatio(Math.min(window.devicePixelRatio, 2))
Then we can instantiate our first pass and add it to our effectComposer with the addPass(...) method. The RenderPass needs the scene and the camera as parameters:
const renderPass = new RenderPass(scene, camera)
effectComposer.addPass(renderPass)
In the tick function, instead of doing the renders like we used to, we will achieve the renders with effectComposer. Replace the renderer.render(...) with the following code:
const tick = () =>
{
    // ...

    // Render
    // renderer.render(scene, camera)
    effectComposer.render()

    // ...
}
The effectComposer will start doing the renders with the ping pong thing and its render targets. But because we only have one pass —the renderPass— it will render it directly in the canvas like before.
It's time to add some neat post-process passes.
You can find a list of available passes in the documentation: https://threejs.org/docs/index.html#examples/en/postprocessing/EffectComposer
We will use some of them to see how we can set things up, and then we will create our own pass.
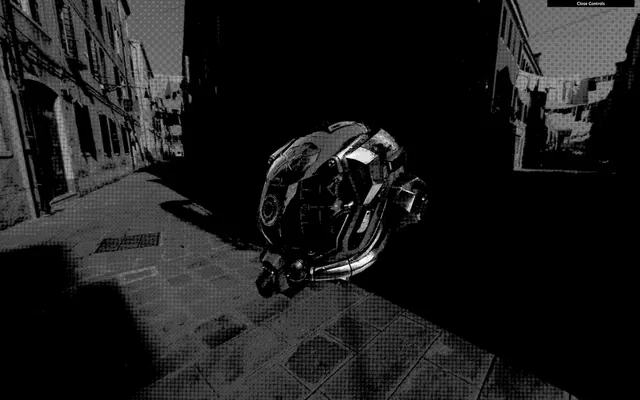
DotScreenPass 22:06
The DotScreenPass will apply some kind of black and white raster effect. We just need to import the DotScreenPass:
import { DotScreenPass } from 'three/examples/jsm/postprocessing/DotScreenPass.js'Instantiate it and add it to the effectComposer. Make sure to add it after the renderPass:
const dotScreenPass = new DotScreenPass()
effectComposer.addPass(dotScreenPass)
To disable a pass, simply comment it or change its enabled property to false:
const dotScreenPass = new DotScreenPass()
dotScreenPass.enabled = false
effectComposer.addPass(dotScreenPass)
Use this to test the different passes separately.
GlitchPass 23:44
The GlitchPass will add screen glitches like when the cameras get hacked in the movies.
Import it and add it just like the DotScreenPass:
import { GlitchPass } from 'three/examples/jsm/postprocessing/GlitchPass.js'

// ...

const glitchPass = new GlitchPass()
effectComposer.addPass(glitchPass)
Some passes also have editable properties. The GlitchPass have a goWild property that, if true, will result in a non-stop glitch:
Be careful if you are sensible to flashes or fast movements!
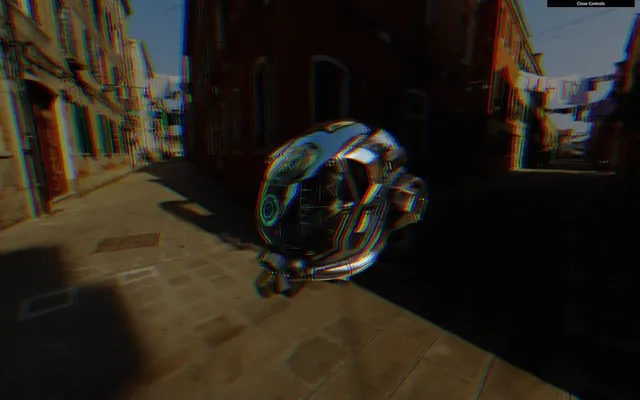
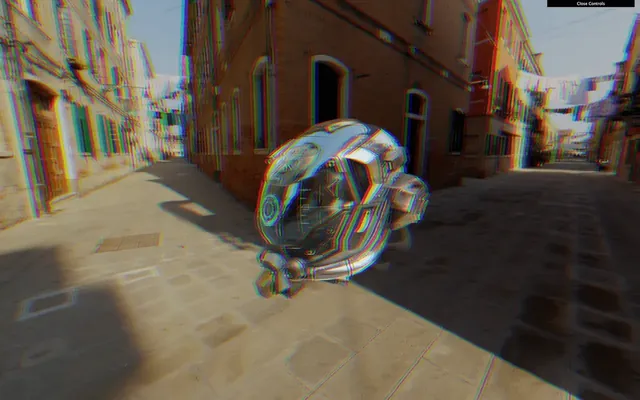
glitchPass.goWild = trueRGBShiftPass 25:41
Some passes need extra work like the RGBShift pass.
The RGBShift isn't available as a pass but as a shader. We need to import this shader and apply it to a ShaderPass and then add this ShaderPass to the effectComposer. That is precisely what happens in the DotScreenPass and the GlitchPass but we have to do it ourselves this time.
First, import the ShaderPass and the RGBShiftShader located in three/examples/jsm/shaders/:
import { ShaderPass } from 'three/examples/jsm/postprocessing/ShaderPass.js'
import { RGBShiftShader } from 'three/examples/jsm/shaders/RGBShiftShader.js'
Then instantiate the ShaderPass with the RGBShiftShader as parameter and add it to the effectComposer:
// ...

const rgbShiftPass = new ShaderPass(RGBShiftShader)
effectComposer.addPass(rgbShiftPass)
And that's all.
Fixing the color 28:34
You might have noticed a color change in the render, as if everything became darker, and you are right. Disable the previous shaders dotScreenPass and the rgbShiftPass to see it more clearly with the glitchPass —without the goWild.
What's happening here is that the renderer.colorSpace = THREE.SRGBColorSpace doesn't work anymore. You can comment it, and you'll see no difference. Passes are rendered in render targets, and those don't support color space the same way.
We need to add one more pass named GammaCorrectionShader that will converter the colors space to SRGB.
This pass works exactly like the RGBShiftShader pass. First, we need to import it:
import { GammaCorrectionShader } from 'three/examples/jsm/shaders/GammaCorrectionShader.js'Then, we can instantiate a ShaderPass with the GammaCorrectionShader as a parameter. Make sure to do it as the last pass:
// ...

const gammaCorrectionPass = new ShaderPass(GammaCorrectionShader)
effectComposer.addPass(gammaCorrectionPass)
The color should be fixed.
If you want to learn more about Gamma color correction check this What Every Coder Should Know About Gamma article.
Resizing 33:02
Reduce the window to a minimal resolution, refresh and increase the resolution to the maximum size. Everything should look bad, like a small image that we stretched up.
That is because the EffectComposer and its passes need to be resized. We also need to set the appropriate pixel ratio like we do for the renderer.
In the window.addEventListener('resize', ...) callback function, call the setSize(...) and the setPixelRatio(...) methods as we did when we instantiated EffectComposer:
window.addEventListener('resize', () =>
{
    // ...

    // Update effect composer
    effectComposer.setSize(sizes.width, sizes.height)
    effectComposer.setPixelRatio(Math.min(window.devicePixelRatio, 2))
})
You can resize the window as you want; the resolution should be fine.
Fixing the antialias 36:05
There's another feature that seems to stop working. If you look at edges on the helmet, you'll see that the aliasing is back —if you are using a screen with a pixel ratio above 1, you probably can't see the problem.
Be careful; if you only have the renderPass available, you won't see the problem because the render is done in the canvas with antialias support. Enable at least one pass to see the problem.
That is because the render target used by EffectComposer does not support the default antialias. We have four available options:
- Say goodbye to the antialias.
- Provide our own render target on which we add the antialias, but that won't work on all the modern browsers.
- Use a pass to do the antialias but with lesser performances and a slightly different result.
- A combination of the two previous options where we test if the browser supports the antialias on the render target, and if not, we use an antialias pass.
Things suddenly got complicated.
Adding the antialias to the render target
By default EffectComposer is using a WebGLRenderTarget without the antialias.
Fortunately, we can provide our own render target as the second parameter of EffectComposer. We are going to provide the same render target to begin with and make sure that everything is working. Then, we are going to add the antialias.
If you look at the code of the EffectComposer located in /node_modules/three/examples/jsm/postprocessing/EffectComposer.js you'll see the renderTarget being instantiated with specific parameters.
The first two parameters are the width and height. We can use random values because the render target will be resized when the setSize(...) function will be called on effectComposer:
const renderTarget = new THREE.WebGLRenderTarget(
    800,
    600
)
Then, we can send that renderTarget to effectComposer:
const effectComposer = new EffectComposer(renderer, renderTarget)We should get the exact same result, but now, we have control over the render target.
The WebGLRenderTarget class can actually receive a third parameter that is an object and that will contain some options.
The only option that we need to provide is the samples property that will enable the antialias:
const renderTarget = new THREE.WebGLRenderTarget(
    800,
    600,
    {
        samples: 2
    }
)
The more samples, the better the antialias with 0 corresponding to no samples at all. Be careful, every increase on that value will lower the performance.
As we said earlier, if the user has a pixel ratio above 1, the pixel density is already high enough to not be able to distinguish the aliasing. In that case, we don’t really need an antialias and we should let the samples property to 1.
We can retrieve the pixel ratio from the renderer with samples: renderer.getPixelRatio():
const renderTarget = new THREE.WebGLRenderTarget(
    800,
    600,
    {
        samples: renderer.getPixelRatio() === 1 ? 2 : 0
    }
)
And that’s it!
Sadly, this won't work for every browsers. That is a matter of WebGL 2 support. People updated WebGL a few years ago, and browsers slowly add support to the different features. You can see how the support is going on here: https://caniuse.com/#feat=webgl2
At the moment of writing this lesson, major browsers like Safari and iOS Safari only supported it recently.
Using an antialias pass
Let’s comment the samples property in order to test the antialias pass properly:
const renderTarget = new THREE.WebGLRenderTarget(
    800,
    600,
    {
        // samples: renderer.getPixelRatio() === 1 ? 2 : 0
    }
)
We have different choices for the antialias pass:
- FXAA: Performant, but the result is just "ok" and can be blurry
- SMAA: Usually better than FXAA but less performant —not to be confused with MSAA
- SSAA: Best quality but the worst performance
- TAA: Performant but limited result
- And many others.
Choosing the best antialias pass is a matter of performance and visual expectations. Try them until you're satisfied with what you see at a reasonable frame rate.
For this lesson, we will go for the SMAA.
Earlier, we said that we should add the gammaCorrectionPass at the very end, but the antialias pass should be added after it in order to optimise it.
Import the SMAAPass, instantiate it and add it to effectComposer:
import { SMAAPass } from 'three/examples/jsm/postprocessing/SMAAPass.js'

// ...

const smaaPass = new SMAAPass()
effectComposer.addPass(smaaPass)
The aliasing should be gone.
Combining the two solutions
The cool thing with the samples property that we added earlier to the WebGLRenderTarget is that if it’s not supported (because the browser is using WebGL 1) it’ll be ignored without triggering any error.
This means that we can let it like that and add the SMAAPass only if the user has a screen with a pixel ratio equal to 1 and his configuration doesn’t support WebGL 2.
To know if the browser supports WebGL 2 we can use the capabilities property on the renderer. This property contains many details about what is supported. The property we need is isWebGL2:
if(renderer.getPixelRatio() === 1 && !renderer.capabilities.isWebGL2)
{
    const smaaPass = new SMAAPass()
    effectComposer.addPass(smaaPass)

    console.log('Using SMAA')
}
And we get a nice picture on every browsers with a minimal drawback.
If you want to test your code with WebGL1, you can replace your WebGLRenderer by WebGL1Renderer:
const renderer = new THREE.WebGL1Renderer({
    // ...
})
Don’t forget to put it back once you are done testing.
UnrealBloomPass 01:04:16
Let's get back to our passes with probably the coolest one, the UnrealBloomPass.
This pass will add bloom on our render that looks amazing. It's useful to recreate things like light glows, fire heat, lasers, lightsabers or radioactive stuff.
Import the UnrealBloomPass and add it to the effectComposer:
import { UnrealBloomPass } from 'three/examples/jsm/postprocessing/UnrealBloomPass.js'

// ...

const unrealBloomPass = new UnrealBloomPass()
effectComposer.addPass(unrealBloomPass)
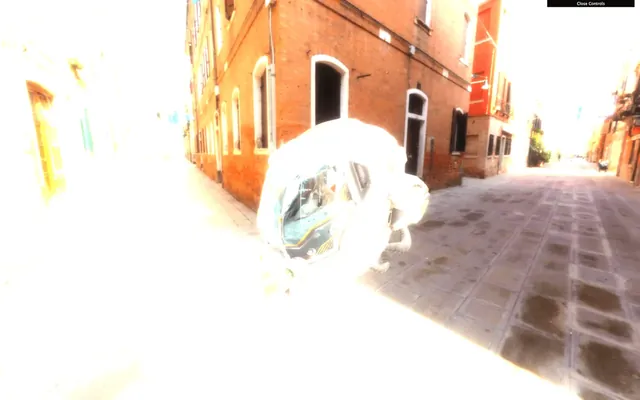
Everything appears way too bright. We need to tweak some parameters. There are 3 main parameters:
strength: How strong is the glow.radius: How far that brightness can spread.threshold: At what luminosity limit things start to glow.
Use the following parameters and add the tweaks to your Dat.GUI:
unrealBloomPass.strength = 0.3
unrealBloomPass.radius = 1
unrealBloomPass.threshold = 0.6

gui.add(unrealBloomPass, 'enabled')
gui.add(unrealBloomPass, 'strength').min(0).max(2).step(0.001)
gui.add(unrealBloomPass, 'radius').min(0).max(2).step(0.001)
gui.add(unrealBloomPass, 'threshold').min(0).max(1).step(0.001)
This is probably too much glow but you get the idea.
Creating our own pass 01:07:18
Creating our own pass is as easy as making a custom shader.
Tint pass
We are going to start with an effortless pass that lets us control the color tint.
First, we create a shader. The shader is a simple object with the following properties:
uniforms: Same format as the uniforms we are used too.vertexShader: This one has almost always the same code and will put the plane in front of the view.fragmentShader: The fragment shader that will do the post-processing effect.
Let's create that shader with minimal code:
const TintShader = {
    uniforms:
    {
    },
    vertexShader: `
        void main()
        {
            gl_Position = projectionMatrix * modelViewMatrix * vec4(position, 1.0);
        }
    `,
    fragmentShader: `
        void main()
        {
            gl_FragColor = vec4(1.0, 0.0, 0.0, 1.0);
        }
    `
}
Then we create the pass with ShaderPass and add it to our effectComposer:
const tintPass = new ShaderPass(TintShader)
effectComposer.addPass(tintPass)
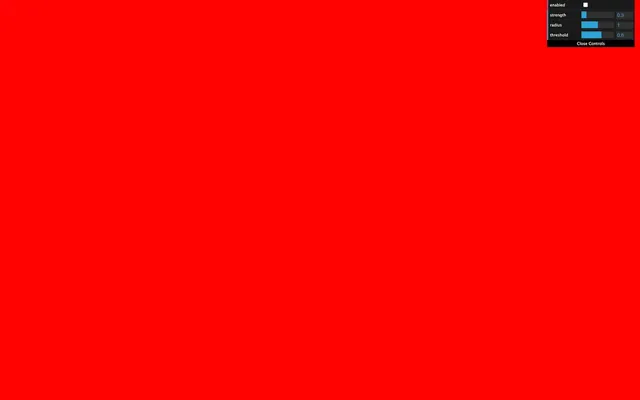
The screen should become red because our fragment shader sets the gl_FragColor to a red color.
We need to get the texture from the previous pass. This texture is automatically stored in the tDiffuse uniform. We must add the uniform with a null value —EffectComposer will update it— and retrieve the value in the fragmentShader:
const TintShader = {
    uniforms:
    {
        tDiffuse: { value: null }
    },

    // ...

    fragmentShader: `
        uniform sampler2D tDiffuse;

        void main()
        {
            gl_FragColor = vec4(1.0, 0.0, 0.0, 1.0);
        }
    `
}
Now that we have the texture of the previous pass, we need to retrieve the pixels as we've already done in a previous lesson. To get the pixels from a sampler2D (a texture), we need to use texture2D(...). It would require a texture as the first parameter and UV coordinates as the second parameter.
The problem is that we don't have those UV coordinates right now. We need to do as usual and create a varying named vUv containing the uv from the vertex shader:
const TintShader = {

    // ...

    vertexShader: `
        varying vec2 vUv;

        void main()
        {
            gl_Position = projectionMatrix * modelViewMatrix * vec4(position, 1.0);

            vUv = uv;
        }
    `,
    fragmentShader: `
        uniform sampler2D tDiffuse;

        varying vec2 vUv;

        void main()
        {
            vec4 color = texture2D(tDiffuse, vUv);
            gl_FragColor = color;
        }
    `
}
The render is back. But now, we can play with the texture in the fragmentShader.
To change the tint, play with the r, g, and b properties of color:
const TintShader = {

    // ...

    fragmentShader: `
        uniform sampler2D tDiffuse;

        varying vec2 vUv;

        void main()
        {
            vec4 color = texture2D(tDiffuse, vUv);
            color.r += 0.1;

            gl_FragColor = color;
        }
    `
}
To go further, let's create a uniform to control the tint. First, add the uTint to the uniforms:
const TintShader = {
    uniforms:
    {
        tDiffuse: { value: null },
        uTint: { value: null }
    },

    // ...

    fragmentShader: `
        uniform sampler2D tDiffuse;
        uniform vec3 uTint;

        varying vec2 vUv;

        void main()
        {
            vec4 color = texture2D(tDiffuse, vUv);
            color.rgb += uTint;

            gl_FragColor = color;
        }
    `
}
As you can see, we let the value to null. Do not set the values directly in the shader object. You must set them on the material once you have created the pass because the shader is intended to be used multiple times —even if you don't. It's like a template for the pass:
const tintPass = new ShaderPass(TintShader)
tintPass.material.uniforms.uTint.value = new THREE.Vector3()
Then we can add the tweaks to our lil-gui:
gui.add(tintPass.material.uniforms.uTint.value, 'x').min(- 1).max(1).step(0.001).name('red')
gui.add(tintPass.material.uniforms.uTint.value, 'y').min(- 1).max(1).step(0.001).name('green')
gui.add(tintPass.material.uniforms.uTint.value, 'z').min(- 1).max(1).step(0.001).name('blue')
Displacement pass
Let's try another custom pass. This time, we won't fiddle with the color but with the UV to produce what we call a displacement.
Create a new shader named DisplacementShader, then a new pass named displacementPass from the ShaderPass and add it to effectComposer:
const DisplacementShader = {
    uniforms:
    {
        tDiffuse: { value: null }
    },
    vertexShader: `
        varying vec2 vUv;

        void main()
        {
            gl_Position = projectionMatrix * modelViewMatrix * vec4(position, 1.0);

            vUv = uv;
        }
    `,
    fragmentShader: `
        uniform sampler2D tDiffuse;

        varying vec2 vUv;

        void main()
        {
            vec4 color = texture2D(tDiffuse, vUv);

            gl_FragColor = color;
        }
    `
}

const displacementPass = new ShaderPass(DisplacementShader)
effectComposer.addPass(displacementPass)
Now, let's create a newUv based on vUv but with some distortion:
const DisplacementShader = {

    // ...

    fragmentShader: `
        uniform sampler2D tDiffuse;

        varying vec2 vUv;

        void main()
        {
            vec2 newUv = vec2(
                vUv.x,
                vUv.y + sin(vUv.x * 10.0) * 0.1
            );
            vec4 color = texture2D(tDiffuse, newUv);

            gl_FragColor = color;
        }
    `
}
Here, we solely applied a sin(...) on the y axis based on the x axis. You should see the render waving.
Let's animate it. Add a uTime uniform:
const DisplacementShader = {
    uniforms:
    {
        tDiffuse: { value: null },
        uTime: { value: null }
    },

    // ...

    fragmentShader: `
        uniform sampler2D tDiffuse;
        uniform float uTime;

        varying vec2 vUv;

        void main()
        {
            vec2 newUv = vec2(
                vUv.x,
                vUv.y + sin(vUv.x * 10.0 + uTime) * 0.1
            );
            vec4 color = texture2D(tDiffuse, newUv);

            gl_FragColor = color;
        }
    `
}
Set its value to 0 after creating the pass:
const displacementPass = new ShaderPass(DisplacementShader)
displacementPass.material.uniforms.uTime.value = 0
effectComposer.addPass(displacementPass)
And as always, update it in the tick function:
const clock = new THREE.Clock()

const tick = () =>
{
    const elapsedTime = clock.getElapsedTime()

    // Update passes
    displacementPass.material.uniforms.uTime.value = elapsedTime

    // ...
}
The waves are now animated.
Futuristic interface displacement
Instead of a sinus displacement, we can use a texture. You can find a very plain beehive futuristic interface with normal texture in /static/textures/interfaceNormalMap.png.
Add a uNormalMap uniform:
const DisplacementShader = {
    uniforms:
    {
        // ...
        uNormalMap: { value: null }
    },

    // ...
}
Update it while loading the texture —the TextureLoader is already in the code:
displacementPass.material.uniforms.uNormalMap.value = textureLoader.load('/textures/interfaceNormalMap.png')Now update the fragmentShader of the DisplacementShader:
const DisplacementShader = {
    // ...

    fragmentShader: `
        uniform sampler2D tDiffuse;
        uniform float uTime;
        uniform sampler2D uNormalMap;

        varying vec2 vUv;

        void main()
        {
            vec3 normalColor = texture2D(uNormalMap, vUv).xyz * 2.0 - 1.0;
            vec2 newUv = vUv + normalColor.xy * 0.1;
            vec4 color = texture2D(tDiffuse, newUv);

            vec3 lightDirection = normalize(vec3(- 1.0, 1.0, 0.0));
            float lightness = clamp(dot(normalColor, lightDirection), 0.0, 1.0);
            color.rgb += lightness * 2.0;

            gl_FragColor = color;
        }
    `
}
We won't disclose what's happening here because it's not the proper way to achieve this effect, but you should see a compelling interface displacement. Regrettably, the texture fits the screen, and if your resolution isn't proportional, it won't look terrific. No worries, it was just for the show anyway.
Go further 01:35:36
What you can do now is try other passes and possibly add new custom passes if you get some ideas or if there are things you want to try.
Keep in mind that each pass you add will have to be rendered on each frame. That can have severe performances drawback.
You could also separate the custom passes into different files and even split the shaders in the .glsl files. This way, you get a cleaner and reusable code.