Introduction 00:00
We know Three.js, we know React (at least the basics). Now it’s time to learn how to integrate Three.js into React. As we saw earlier, the best solution is to use React Three Fiber (or R3F).
R3F is a React renderer. We write JSX and it gets rendered into Three.js.
As an example, creating a Mesh composed of a BoxGeometry and a MeshBasicMaterial is as simple as this:
<mesh>
    <boxGeometry />
    <meshBasicMaterial />
</mesh>
You might think that we forgot to specify information like the size of the BoxGeometry but R3F will set default parameters to simplify our life. And that’s just one of the many life improvements we get with R3F.
Setup 02:01
For starters, we have a very simple React project:

The /src/index.jsx renders “Soon to be a badass R3F application”.
We load the style.css file from index.jsx but it’s currently empty.
Note that, most React projects start by rendering an App component, but there is no real reason, especially in this learning context.
We can start with npm run dev from the terminal.
React Three Fiber setup 03:47
It’s time to add R3F and it’s actually quite easy.
First, add the @react-three/fiber and the three dependencies from the terminal with npm install three@0.166 @react-three/fiber@8.16 (we force the versions to prevent surprises, you can ignore potential vulnerability warnings).
As you can see, the R3F dependency is written in a very specific way.
The presence of the @ at the beginning means that it’s part of a bigger system (which we call “scope”) named react-three and the /fiber is the part that we are currently retrieving.
This means that there are other parts in the @react-three scope and we are going to use them too.
In a way, “React Three Fiber” should be called “React Three” when speaking about the general scope and, here, we are only adding Fiber to our project.
The syntax 07:19
As we mentioned earlier, R3F is a React renderer (we write JSX and it gets converted to Three.js).
Let’s have a look at some examples. Don’t worry if you don’t understand or remember everything, we are going to cover those in detail later.
A simple mesh
Native Three.js:
const mesh = new THREE.Mesh()
mesh.geometry = new THREE.BoxGeometry(1, 1, 1)
mesh.material = new THREE.MeshBasicMaterial({ color: 'red' })

scene.add(mesh)
R3F:
<mesh>
    <boxGeometry />
    <meshBasicMaterial color="red" />
</mesh>
The geometry and the material are automatically associated with the mesh.
The syntax is shorter and easier to understand.
Default parameters are automatically set for us.
Position and rotation
Native Three.js:
const mesh = new THREE.Mesh()
mesh.position.set(1, 2, 3)
mesh.rotation.x = 0.5
mesh.geometry = new THREE.BoxGeometry(1, 1, 1)
mesh.material = new THREE.MeshBasicMaterial({ color: 'red' })

scene.add(mesh)
R3F:
<mesh position={ [ 1, 2, 3 ] } rotation-x={ 0.5 }>
    <boxGeometry />
    <meshBasicMaterial color="red" />
</mesh>
Again, things are much shorter.
The set function seems to be called automatically and we can still change individual properties like the rotation.x
Nested objects
Native Three.js:
const group = new THREE.Group()
scene.add(group)

const mesh1 = new THREE.Mesh()
mesh1.geometry = new THREE.BoxGeometry(1, 1, 1)
mesh1.material = new THREE.MeshBasicMaterial({ color: 'red' })

const mesh2 = new THREE.Mesh()
mesh2.geometry = new THREE.SphereGeometry(0.5)
mesh2.material = new THREE.MeshBasicMaterial({ color: 'orange' })

group.add(mesh1, mesh2)
R3F:
<group>
    <mesh>
        <boxGeometry />
        <meshBasicMaterial color="red" />
    </mesh>
    <mesh>
        <sphereGeometry />
        <meshBasicMaterial color="orange" />
    </mesh>
</group>
And that’s where the tag based structure gets really handy. Before, we had to struggle a moment before understanding what is inside what.
Now, we can see it clearly from the indentation.
And this is just the tip of the iceberg.
How does R3F know how to combine components?
Because JSX is a tag based language, we end up with things inside other things.
Let’s use the previous example again:
<group>
    <mesh>
        <boxGeometry />
        <meshBasicMaterial color="red" />
    </mesh>
    <mesh>
        <sphereGeometry />
        <meshBasicMaterial color="orange" />
    </mesh>
</group>
Here, we clearly have two <mesh> inside a <group>.
R3F will create the group, then call add() on it and pass it the two meshes:
const group = new THREE.Group()
scene.add(group)

const mesh1 = new THREE.Mesh()
const mesh2 = new THREE.Mesh()
group.add(mesh1, mesh2)
This is the default behaviour, but what about the <boxGeometry>, <sphereGeometry> and <meshBasicMaterial>?
To understand that, we need to talk about the attach attribute.
The attach attribute allows the developer to assign the component to a specific property of the parent instead of trying to add() it.
If we write our previous example with the attach attribute, it would look like this:
<group>
    <mesh>
        <boxGeometry attach="geometry" />
        <meshBasicMaterial attach="material" color="red" />
    </mesh>
    <mesh>
        <sphereGeometry attach="geometry" />
        <meshBasicMaterial attach="material" color="orange" />
    </mesh>
</group>
The <boxGeometry> and <sphereGeometry> are assigned to the geometry property of the <mesh>.
The <meshBasicMaterial> is assigned to the material property of the parent <mesh>.
R3F won’t try to add() them to the <mesh>.
But wait, we didn’t have to write those attach attributes before, right?
Yes, and it’s because R3F will first check the name of the component:
- If it ends with
"Material", it’ll automatically assign it to thematerialproperty. - If it ends with
"Geometry", it’ll automatically assign it to thegeometryproperty.
Again, this is one of the many features which are intended to make the developer’s life easier.
Which Three.js classes are supported?
You might have noticed that we wrote the various components in camelCase (<mesh>, <boxGeometry>, etc.) and those components match Three.js classes (THREE.Mesh, THREE.BoxGeometry, etc.)
But which Three.js classes are supported exactly?
All of them!
R3F will implement all classes automatically. This is great because, when Three.js is being updated, and classes are being added or changed, R3F won’t break and those new classes will be supported without doing anything.
But why camelCase then? Can’t we write <Mesh> instead of <mesh>?
This is a React convention. Native host elements (the ones available in the renderer) are in camelCase while custom components are written in PascalCase.
In the case of R3F, we can think of it like:
- Automatically generated primitive components are in camelCase
- More specific components are in PascalCase
First scene 19:44
Enough talking, more coding. Let’s create our first R3F scene.
Canvas
To create the canvas, we need to import the Canvas dependency.
In /src/index.jsx, import Canvas from @react-three/fiber:
import { Canvas } from '@react-three/fiber'We can now add it to our JSX instead of the text:
root.render(
<>
<Canvas></Canvas>
</>
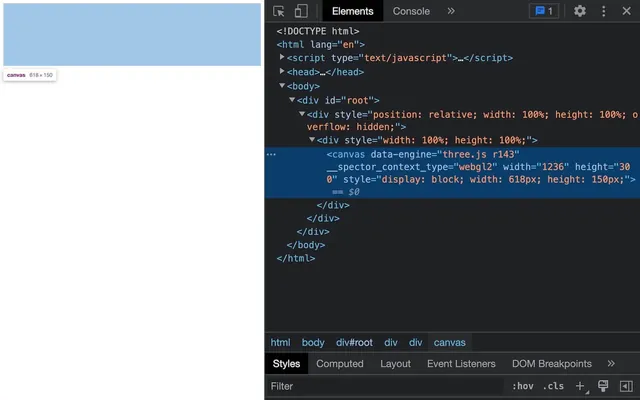
)There is nothing on the screen, but if you check the DOM, you’ll see that the canvas has been created:
Let’s make something appear on the screen.
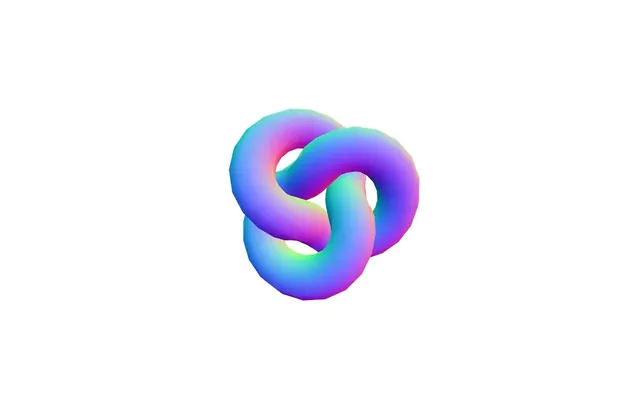
Add the following code:
root.render(
    <>
        <Canvas>
            <mesh>
                <torusKnotGeometry />
                <meshNormalMaterial />
            </mesh>
        </Canvas>
    </>
)
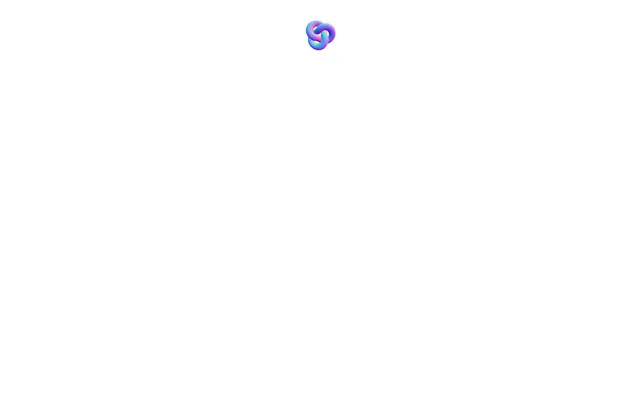
You should see a small sphere at the top of the screen.
Resizing
By default, the <canvas> created by R3F will take the size of the parent of <Canvas> which is the #root element.
To fix that, we can make the #root fill the viewport and do the same with the <html> and the <body>.
In /src/style.css add the following code:
html,
body,
#root
{
    position: fixed;
    top: 0;
    left: 0;
    width: 100%;
    height: 100%;
    overflow: hidden;
}
It’s kind of a silly technique to make sure that everything fills the viewport and that there is no scroll.
The <canvas> should fill the viewport.
And that’s it, we have already completed our Three.js app!
Features
Let’s talk a bit about what’s happening here:
- You can’t really see it because nothing is moving, but the scene is being rendered on each frame.
- We didn’t have to create a
Scene. - We didn’t have to create the
WebGLRendererand the default settings are actually making sure that it looks appealing (antialias, colorSpace, etc.) - We didn’t have to place a
PerspectiveCameraand, even better, we didn’t have to pull it back from the center of the scene. - When you resize the viewport, everything that needs resizing is handled automatically.
- We didn’t have to provide any specific value for the
<torusKnotGeometry>because R3F provides default parameters for most components. - We didn’t have to import the
Mesh, nor theSphereGeometry, nor theMeshNormalMaterial. - Most of the time, we don’t even have to reload the page. React and R3F implement hot reloading and auto dispose. This means that we can add an object or change a color while our application is running. Be careful though, as some changes require reloading the page. If you don’t see the expected behaviour, hit reload.
Neat and efficient way to start a project, isn’t it ?
Refactoring
Before going further, let’s refactor our application a bit.
Currently, we have a Fragment (<></>) and then the <Canvas>
It’s a bit useless and we can get rid of the Fragment:
root.render(
    <Canvas>
        <mesh>
            <torusKnotGeometry />
            <meshNormalMaterial />
        </mesh>
    </Canvas>
)
Later in the course, we are going to use hooks that will only work in components created inside the Canvas.
Let’s create an Experience component in order to encapsulate everything related to R3F in it.
Create a /src/Experience.jsx file and put the <mesh> in it:
export default function Experience()
{
    return <>
        <mesh>
            <torusKnotGeometry />
            <meshNormalMaterial />
        </mesh>
    </>
}
We used a fragment (<></>) in order to add more stuff to it (don’t forget that a component can only return one element).
Import the Experience in index.jsx and add it inside the <Canvas>:
// ...
import Experience from './Experience.jsx'

// ...

root.render(
    <Canvas>
        <Experience />
    </Canvas>
)
We are now able to use those specific hooks inside the Experience, but that’s for a little later.
Creating and handling meshes 32:57
We created our first mesh with tags and we didn’t have to import those tags.
We call that way of coding “declarative”.
R3F will create the corresponding instances automatically and add them to the scene (also created automatically).
In Experience.jsx, replace the geometry and the material by a <sphereGeometry> and a <meshBasicMaterial>
<mesh>
    <sphereGeometry />
    <meshBasicMaterial />
</mesh>

And it’s still working.
If you check the SphereGeometry class documentation, the first three parameters are:
radiuswidthSegmentsheightSegments
R3F provided default parameters, but what if we want to change those?
We can change the constructor parameters by providing an array to the args attribute and follow the parameters order (radius, widthSegments, heightSegments):
<mesh>
    <sphereGeometry args={ [ 1.5, 32, 32 ] } />
    <meshBasicMaterial />
</mesh>

The values we send to the args attribute are always in the same order as the original Three.js class. It’s the case for geometries, for materials and for any other automatically generated components. This means that you can still use the Three.js documentation as a reference.
In the case of the geometry, be careful not to update those values too much or animate them because each change will result in the whole geometry being rebuilt.
For the <meshBasicMaterial>, it’s slightly different because the MeshBasicMaterial requires only one parameter and it’s an object.
We could provide an object inside an array to the args attribute:
<meshBasicMaterial args={ [ { ... } ] } />But a better way of changing the values is to set the properties directly with the corresponding attributes.
As an example, we can control the color and the wireframe with attributes having the same names:
<mesh>
    <sphereGeometry args={ [ 1.5, 32, 32 ] } />
    <meshBasicMaterial color="mediumpurple" wireframe />
</mesh>
- Writing
color="mediumpurple"is like writingmaterial.color.set('mediumpurple') - Writing
wireframewithout any value is like setting it totrue. We can still set it tofalseif needed:
<meshBasicMaterial color="mediumpurple" wireframe={ false } />
Let’s switch to a <boxGeometry> with no parameters and remove the false on the wireframe attribute:
<mesh>
    <boxGeometry />
    <meshBasicMaterial color="mediumpurple" wireframe />
</mesh>

Just like we changed the color or wireframe on the material, we can also play with the position, rotation and scale on the <mesh>.
Change the scale:
<mesh scale={ [ 3, 2, 1 ] }>

Doing this is the same as mesh.scale.set(3, 2, 1).
If we want to send the same value to x, y and z, we can provide a single value:
<mesh scale={ 1.5 }>
Then we can move it by changing the position:
<mesh position={ [ 2, 0, 0 ] } scale={ 1.5 }>
Here, we are only changing the mesh.position.x property because the other axes are at 0.
We can do it even more easily by targeting a specific axis:
<mesh position-x={ 2 } scale={ 1.5 }>
And even by sending an attribute without {}:
<mesh position-x="2" scale={ 1.5 }>
Values provided like this are considered as strings. In our case it’s not a big deal, but it might generate bugs in very specific cases which is why we should avoid doing it.
And we can do the same with the rotation:
<mesh rotation-y={ Math.PI * 0.25 } position-x={ 2 } scale={ 1.5 }>
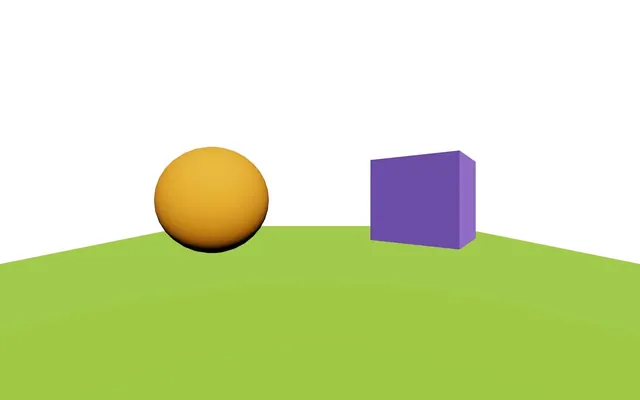
Practice 44:12
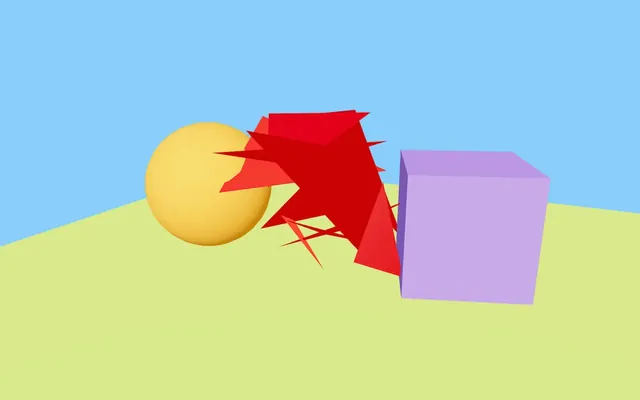
Let’s practice a little. Now would be a good time to try to do the following exercise yourself.
Create an orange sphere on the left, keep the purple cube on the right (without wireframe) and add a green plane below them as if it was the floor.
Here’s the solution:
<mesh position-x={ - 2 }>
    <sphereGeometry />
    <meshBasicMaterial color="orange" />
</mesh>

<mesh rotation-y={ Math.PI * 0.25 } position-x={ 2 } scale={ 1.5 }>
    <boxGeometry />
    <meshBasicMaterial color="mediumpurple" />
</mesh>

<mesh position-y={ - 1 } rotation-x={ - Math.PI * 0.5 } scale={ 10 }>
    <planeGeometry />
    <meshBasicMaterial color="greenyellow" />
</mesh>

Note that the order isn’t relevant just like in native Three.js.
Animate 49:15
Our little scene is nice, but we want things to move.
As we said earlier, the scene is already being drawn on each frame but we can’t see it because nothing is moving.
We are going to rotate the cube, and to do that, we are going to use the useFrame hook provided by R3F.
useFrame can only be called from a component that is inside the <Canvas> which is why we created the Experience component.
Import useFrame from @react-three/fiber:
import { useFrame } from '@react-three/fiber'Then call it inside the Experience component and send it a function:
export default function Experience()
{
    useFrame(() =>
    {
        console.log('tick')
    })

    // ...
}
As you’ve probably guessed, that function will be called on each frame regardless of the current frame rate.
But how can we access the cube here to update its rotation property?
We are going to use a reference
Import useRef from react:
import { useRef } from 'react'Create a cubeRef with it (adding Ref at the end of the variable is optional but it makes the purpose of the variable clear):
export default function Experience()
{
    const cubeRef = useRef()

    // ...
}
Use the ref attribute to associate it with the <mesh> corresponding to the cube.
<mesh ref={ cubeRef } rotation-y={ Math.PI * 0.25 } position-x={ 2 } scale={ 1.5 }>We can now access the Mesh with cubeRef.current and update it in the useFrame.
Increment its rotation.y property in the useFrame:
useFrame(() =>
{
    cubeRef.current.rotation.y += 0.01
})
But aren’t we forgetting something?
Some of you might have noticed that your cube is rotating faster than mine.
We are incrementing the rotation.y without taking care of the frame rate. If a device has a higher frame rate, useFrame will be called at a higher frequency and the cube will rotate faster.
To fix that, we need to know how much time has passed since the last frame, just like we did in previous lessons.
Good news: useFrame is already sending us this information as an argument of our function. But it also sends us another information named state first, which is why we need to specify two arguments:
useFrame((state, delta) =>
{
    console.log(delta)
    cubeRef.current.rotation.y += 0.01
})statecontains information about our Three.js environment like the camera, the renderer, the scene, etc. and we will talk about that later.deltacontains the time spent since the last frame in seconds and we can use it directly on therotation.y:
useFrame((state, delta) =>
{
    cubeRef.current.rotation.y += delta
})
We now have the same rotation speed regardless of the device frame rate.
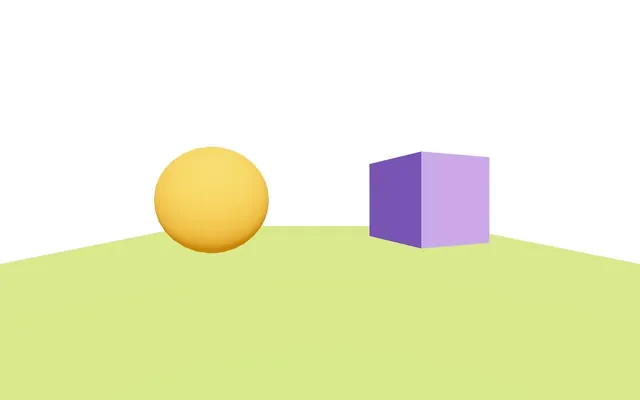
Groups 58:43
Like in Three.js, we can group objects with the Group class.
We are going to group the cube and the sphere (not the floor) and then animate that group like a carousel.
Wrap the cube and sphere in a <group> tag:
<group>
    <mesh position-x={ - 2 }>
        <sphereGeometry />
        <meshBasicMaterial color="orange" />
    </mesh>

    <mesh ref={ cubeRef } rotation-y={ Math.PI * 0.25 } position-x={ 2 } scale={ 1.5 }>
        <boxGeometry />
        <meshBasicMaterial color="mediumpurple" />
    </mesh>
</group>
Because we want to animate it, we need to associate it with a reference.
Create a groupRef reference:
export default function Experience()
{
    const cubeRef = useRef()
    const groupRef = useRef()

    // ...
}
Associate it with the <group> using the ref attribute:
<group ref={ groupRef }>We can now animate it in the useFrame like we did for the cubeRef:
useFrame((state, delta) =>
{
    cubeRef.current.rotation.y += delta
    groupRef.current.rotation.y += delta
})
As you can see, it’s not the sphere or the cube that we are moving around the center, it’s the group.
Let’s remove the group rotation before we get sick.
useFrame((state, delta) =>
{
    cubeRef.current.rotation.y += delta
    // groupRef.current.rotation.y += delta
})
OrbitControls 01:00:59
We would like to add our OrbitControls in order to rotate the camera around the scene.
As you’ll see, implementing it ourselves is a bit more complicated than adding a simple <mesh>, but we will see a much faster solution in a later lesson.
As discussed in previous lessons, OrbitControls isn’t part of the default Three.js classes (those available in the THREE variable).
This means that we can’t simply declare it like we declare a <mesh>, a <meshBasicMaterial> or a <sphereGeometry>.
We are going to import it and “convert” it to a declarative version.
First, import the OrbitControls from the three/examples like we did in the previous lessons:
import { OrbitControls } from 'three/examples/jsm/controls/OrbitControls.js'Then import extend from @react-three/fiber:
import { extend, useFrame } from '@react-three/fiber'Extend will try to automatically convert a Three.js class into a declarative version and make it available in JSX.
Call extend() on the OrbitControls class:
import { useFrame, extend } from '@react-three/fiber'
import { OrbitControls } from 'three/examples/jsm/controls/OrbitControls.js'

extend({ OrbitControls: OrbitControls })
Note that we need to provide an object to extend() so that R3F also knows what it should be named. And because we are providing the same value as the key, we can write it like this:
import { useFrame, extend } from '@react-three/fiber'
import { OrbitControls } from 'three/examples/jsm/controls/OrbitControls.js'

extend({ OrbitControls })
We are now able to use <orbitControls> (in camelCase) inside our JSX, but let’s not forget that we need to send the camera and the DOM element to it.
But where can we find those?
If you remember from earlier, we found them in the state variable when we used useFrame.
But we don’t want to get the state on each frame; we want it once when everything is ready.
We can do that with the useThree hook;
Import useThree from @react-three/fiber:
import { useThree, extend, useFrame } from '@react-three/fiber'Now call it at the beginning of the component:
export default function Experience()
{
    const three = useThree()
    console.log(three)

    // ...
}
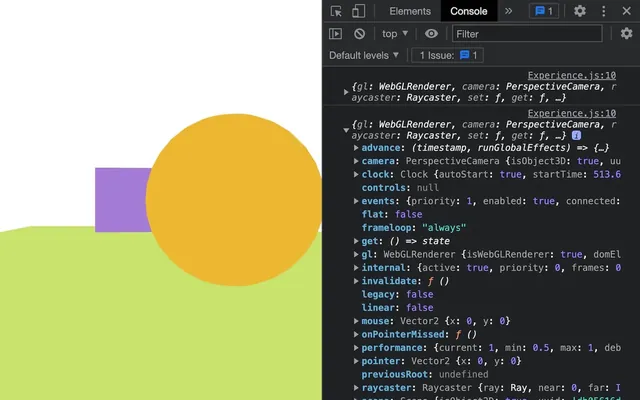
three contains everything we need like:
three.camera: thePerspectiveCamerathree.gl: theWebGLRendererthat contains adomElement, in other words, the<canvas>three.clock: An instance of the Clock- Etc.
Let’s destructure three in order to only get the camera and the gl:
export default function Experience()
{
    const { camera, gl } = useThree()

    // ...
}
And declare our <orbitControls> with them:
export default function Experience()
{
    const { camera, gl } = useThree()

    // ...

    return <>

        <orbitControls args={ [ camera, gl.domElement ] } />

        {/* ... */}
    </>
}
We can now rotate as we did before.
As you can see, the process was a bit tedious and we didn’t even add features like damping, but don’t worry, we are going to see a much easier way of implementing it later.
Lights 01:10:45
Let’s make our scene more realistic and add some lights.
Add a <directionalLight>:
export default function Experience()
{
    // ...

    return <>

        <directionalLight />

        {/* ... */}
    </>
}
No change? It’s because we are using <meshBasicMaterial> on our objects and this material doesn’t react to light.
Replace all <meshBasicMaterial> by <meshStandardMaterial> (we can keep the color attributes):
<directionalLight />

<group ref={ groupRef }>
    <mesh position-x={ - 2 }>
        <sphereGeometry />
        <meshStandardMaterial color="orange" />
    </mesh>

    <mesh ref={ cubeRef } rotation-y={ Math.PI * 0.25 } position-x={ 2 } scale={ 1.5 }>
        <boxGeometry />
        <meshStandardMaterial color="mediumpurple" />
    </mesh>
</group>

<mesh position-y={ - 1 } rotation-x={ - Math.PI * 0.5 } scale={ 10 }>
    <planeGeometry />
    <meshStandardMaterial color="greenyellow" />
</mesh>

By default, the lights come from straight above.
We can change that with the position property which, itself, can be changed with the position attribute:
<directionalLight position={ [ 1, 2, 3 ] } />
Just like we changed the position, we can change other properties like the color or the intensity:
<directionalLight position={ [ 1, 2, 3 ] } intensity={ 4.5 } />
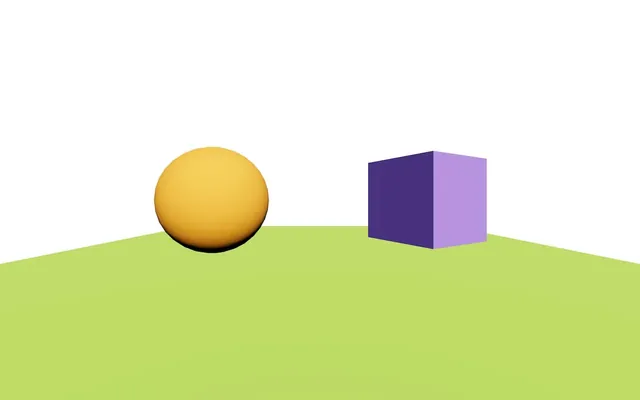
The core shadows are a little too dark.
We can change that by adding an <ambientLight>:
export default function Experience()
{
    // ...

    return <>

        <directionalLight />
        <ambientLight intensity={ 1.5 } />

        {/* ... */}
    </>
}
We could go further and talk about other lights, environment maps, shadows, etc. but that will be a topic for a later lesson.
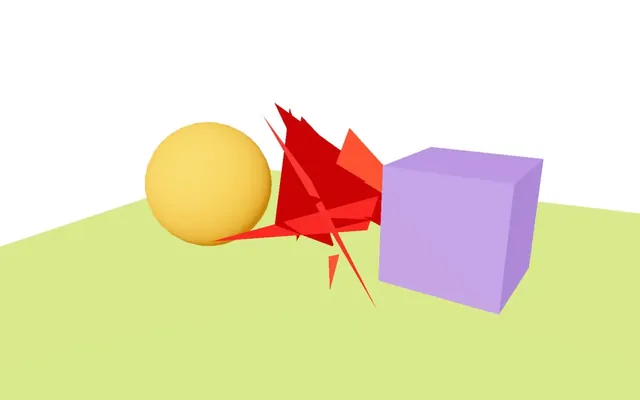
Custom geometry 01:14:33
Creating a custom geometry is a bit harder, but still very convenient once you understand how it works.
Here, we are going to create a mesh with its geometry composed of random triangles like we did in one of the first lessons.
If you remember, we needed to create a Float32Array, put a bunch of values in it, create a BufferAttribute out of this Float32Array and then add it to the attributes of the BufferGeometry.
In R3F, it works the same, but with a different syntax as you’ll see.
This is also a good opportunity to use useMemo.
Separate component
In order to practice structuring a little, we are going to put our custom object in a different component.
In the /src/ folder, create a CustomObject.jsx file and export as default a CustomObject function component:
export default function CustomObject()
{
    return null
}
In Experience.jsx, import CustomObject and add it to the JSX:
import CustomObject from './CustomObject.jsx'

// ...

export default function Experience()
{
    // ...

    return <>
        {/* ... */}

        <CustomObject />
    </>
}
Nothing shows up since we are returning null.
Replace null by a default <mesh> with a <boxGeometry> and a red <meshBasicMaterial> so that we can see something:
export default function CustomObject()
{
    return <mesh>
        <boxGeometry />
        <meshBasicMaterial color="red" />
    </mesh>
}
And that’s all it takes to separate our scene into smaller components. Whenever something becomes complex, if you want to reuse it, or if it just makes sense to separate it, don’t hesitate to create a dedicated component.
Positions array
We can now work on the attribute.
In CustomObject create a verticesCount variable. We want 10 triangles and we need 3 points per triangle:
export default function CustomObject()
{
    const verticesCount = 10 * 3

    // ...
}
We can now create the Float32Array that will contain all vertices positions, and we need to specify the size of the array.
We do have 30 positions, but remember that we need 3 values per vertex (x, y, z) which is why we need to multiply it by 3:
export default function CustomObject()
{
    const verticesCount = 10 * 3
    const positions = new Float32Array(verticesCount * 3)

    // ...
}
Now we can fill that array with random values (we don’t really care about the triangles position):
export default function CustomObject()
{
    const verticesCount = 10 * 3
    const positions = new Float32Array(verticesCount * 3)

    for(let i = 0; i < verticesCount * 3; i++)
        positions[i] = (Math.random() - 0.5) * 3

    // ...
}
BufferGeometry and BufferAttribute
Now that we have our positions array, we can replace the <boxGeometry> by a <bufferGeometry>:
<mesh>
    <bufferGeometry />
    <meshBasicMaterial color="red" />
</mesh>
The red cube disappeared because our geometry doesn’t have any vertices set.
To add the BufferAttribute, we can directly add a <bufferAttribute> inside the <bufferGeometry>:
<bufferGeometry>
    <bufferAttribute />
</bufferGeometry>
We can now add some attributes.
Remember that position is only one of the many possible attributes. There are also color, normal, uv, uv2, and even custom attributes.
We need a way to specify that this attribute that we are declaring is the position attribute.
We can do that with the attach attribute (don’t save yet):
<bufferGeometry>
    <bufferAttribute
        attach="attributes-position"
    />
</bufferGeometry>
attributes-position will result in the BufferAttribute attaching itself to the geometry.attribute.position.
We can then specify 3 attributes to our <bufferAttribute>:
count: how many verticesitemSize: how many items from the array compose one vertexarray: the actual array
<bufferGeometry>
    <bufferAttribute
        attach="attributes-position"
        count={ verticesCount }
        itemSize={ 3 }
        array={ positions }
    />
</bufferGeometry>
You might need to reload here:
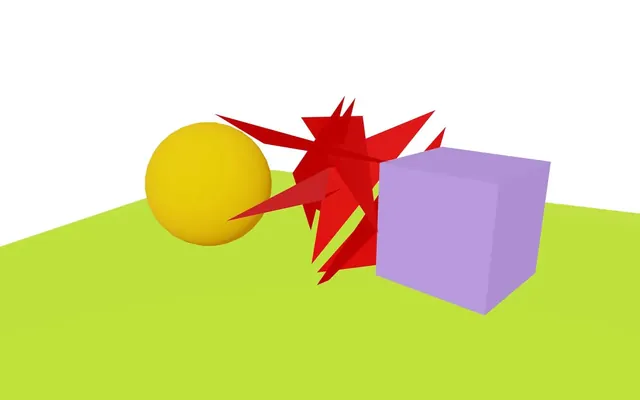
And this way, you obtain your custom geometry.
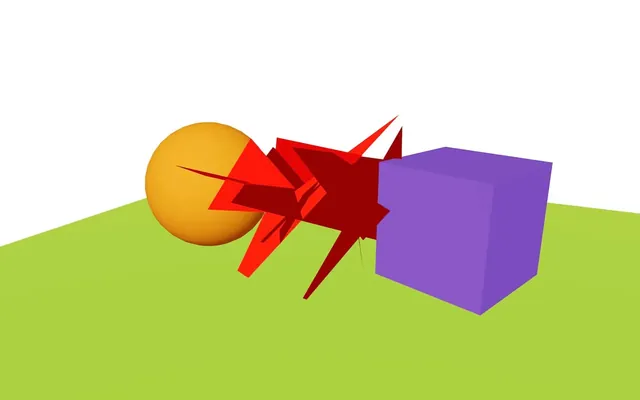
Double side
Observing the triangles is a bit hard since, by default, we can only see their frontside.
If you remember how Three.js materials work, we need to set the side property to THREE.DoubleSide, but we don’t have access to the THREE variable yet.
We need to import THREE from three first:
import * as THREE from 'three'Then, we can add the side attribute to the <meshBasicMaterial> with THREE.DoubleSide as the value:
<meshBasicMaterial color="red" side={ THREE.DoubleSide } />Note that we could have imported DoubleSide only like this:
import { DoubleSide } from 'three'It’s up to you.
Optimise vertices with useMemo
It’s working, but we made a mistake.
Remember that the code inside the CustomObject function will be called every time the component needs to be drawn.
As an example, any state change (when we use useState) in the component will trigger a re-draw and we don’t want to recalculate the whole geometry. We only have 10 triangles, but we could have had thousands of them.
In our case, there is no reason to re-draw the CustomObject, but in other contexts this could happen, which is why we are going to learn how to optimise it.
And this is where useMemo, which we have seen in the previous lesson, comes to the rescue.
As a reminder, useMemo is a React hook to which we send a function. It’ll call that function and remember the value. If the component is being re-render, useMemo will return the value it already got from the first function call. It acts kind of like a cache.
We can also specify variables that, if changed, would force useMemo to forget about the saved value and call the function again.
Import useMemo from react:
import { useMemo } from 'react'Call useMemo() and assign it to a positions variable (do not save yet because we have two positions variables):
export default function CustomObject()
{
    const verticesCount = 10 * 3
    const positions = new Float32Array(verticesCount * 3)

    for(let i = 0; i < verticesCount * 3; i++)
        positions[i] = (Math.random() - 0.5) * 3

    const positions = useMemo()

    // ...
}
Send it a function as the first parameter and an empty array as the second:
const positions = useMemo(() =>
{
}, [])
Here, the only variable that could change our positions is verticesCount, but since it’s a fixed value, we can leave the array empty.
React will remember the value and never call the function again.
Finally, we need to move the positions array instructions in that function (keep the verticesCount outside the function since we are using it in the <bufferAttribute>):
export default function CustomObject()
{
    const verticesCount = 10 * 3

    const positions = useMemo(() =>
    {
        const positions = new Float32Array(verticesCount * 3)

        for(let i = 0; i < verticesCount * 3; i++)
            positions[i] = (Math.random() - 0.5) * 3

        return positions
    })

    // ...
}
We get the same result, but now we’ve made sure that the positions array won’t be recalculated if the component is being re-render.
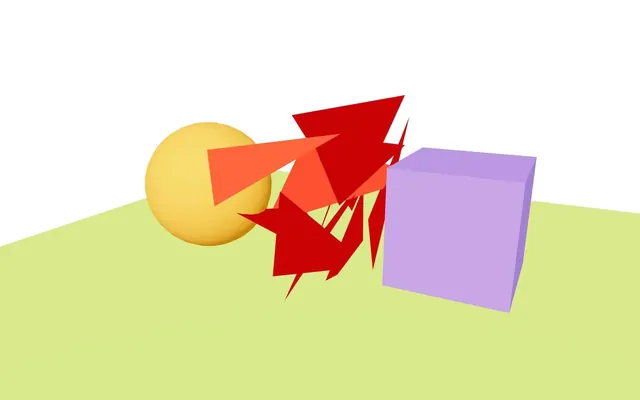
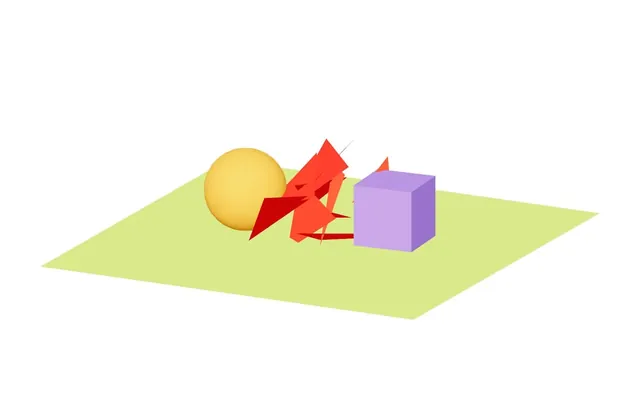
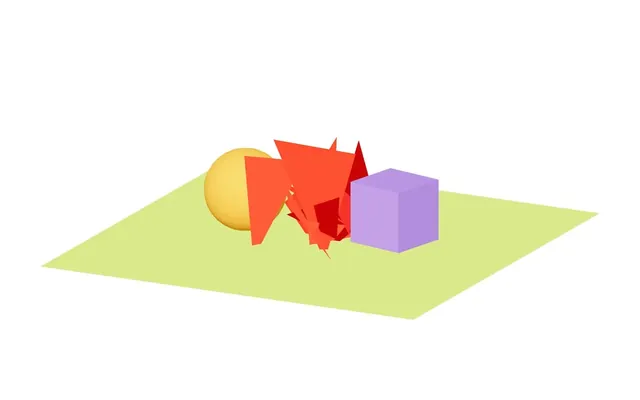
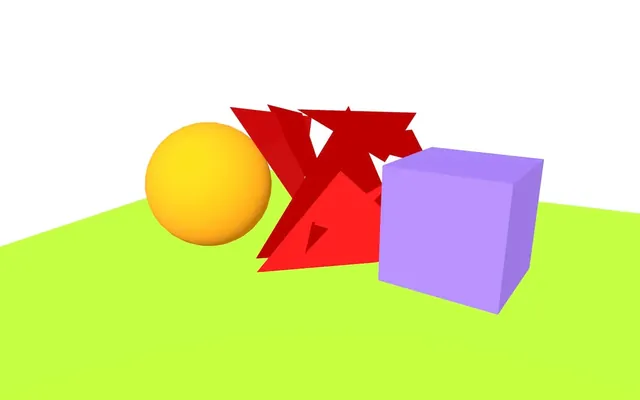
Compute vertex normal
Let’s test our custom object with a <meshStandardMaterial> instead of <meshBasicMaterial>:
<mesh>
    {/* ... */}
    <meshStandardMaterial color="red" side={ THREE.DoubleSide } />
</mesh>
As you can see, there is an issue with our triangles although we have lights in the scene.
It’s because we didn’t provide any normal to the geometry and the triangles don’t know where they are oriented.
Instead of calculating and sending our own normal attribute, we can ask Three.js to do it with computeVertexNormals on BufferGeometry.
Import useRef from react:
import { useRef, useMemo } from 'react'Create a geometryRef reference
export default function CustomObject()
{
    const geometryRef = useRef()

    // ...
}
Associate it with <bufferGeometry> using the ref attribute:
<bufferGeometry ref={ geometryRef }>
    {/* ... */}
</bufferGeometry>
A naive approach would be to call computeVertexNormals() on the geometryRef.current (don’t do it):
export default function CustomObject()
{
    // ...

    const geometryRef = useRef()

    geometryRef.current.computeVertexNormals()

    // ...
}
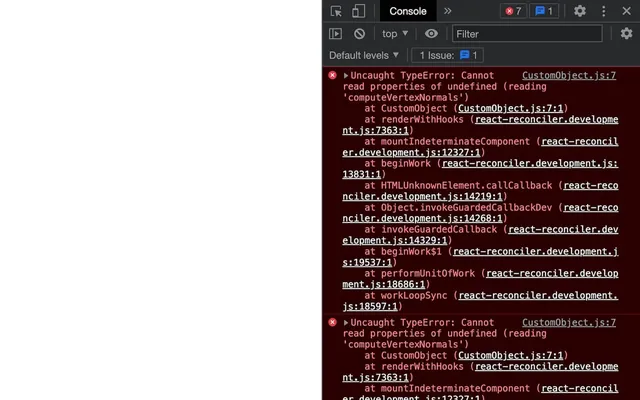
While this could work if the application were already running and our geometryRef already contained the geometry, we would still get an error when reloading because, on the first draw, geometryRef.current is undefined.
To fix that, we can use useEffect.
Import useEffect from react:
import { useEffect, useRef, useMemo } from 'react'Call it after useMemo:
export default function CustomObject()
{
    // ...

    const positions = useMemo(() =>
    {
        // ...
    })

    useEffect(() =>
    {

    }, [])

    // ...
}
Although it should not change, we can send the positions in the dependencies array:
useEffect(() =>
{

}, [ positions ])
In that function, we can call computeVertexNormals() on geometryRef.current:
useEffect(() =>
{
    geometryRef.current.computeVertexNormals()
}, [ positions ])
And we don’t need to test if current is undefined because useEffect will be called after the first draw.
We are done with the custom geometry and you might think that the final code is a bit complex and convoluted, but it’s mostly because it’s new.
Canvas settings 01:38:46
As we said earlier, the <Canvas> component is setting up a bunch of things for us (scene, camera, renderer, antialias, colorSpace, etc.) so that it looks good with minimal effort.
But sometimes, we need to change those settings.
Don’t worry, those settings are still accessible and most of them can be changed with attributes right on the <Canvas>.
Camera
Let’s start with the camera.
Settings and position
To change the camera, in index.jsx, add a camera attribute to the <Canvas> and send it an object:
<Canvas camera={ {} }>
    <Experience />
</Canvas>
Inside this object, we can send parameters by following the camera default structure like the fov, the near or the far:
<Canvas camera={ { fov: 45, near: 0.1, far: 200 } }>

But now the camera is too close when the experience starts.
We can move it with the usual position property:
<Canvas camera={ { fov: 45, near: 0.1, far: 200, position: [ 3, 2, 6 ] } }>
We are starting to have a lot of properties and it’s getting hard to read.
We can improve that by adding some line breaks:
root.render(
    <Canvas
        camera={ {
            fov: 45,
            near: 0.1,
            far: 200,
            position: [ 3, 2, 6 ]
        } }
    >
        <Experience />
    </Canvas>
)
Again, this depends on your personal preference, as I know that many people won’t like the way I write code. Code however you prefer, but my recommendation is to stick to the same way throughout the project.
Changing to an OrthographicCamera
But what if we want an OrthographicCamera instead?
Add an orthographic attribute to the <Canvas>:
<Canvas
    orthographic
    camera={ {
        fov: 45,
        near: 0.1,
        far: 200,
        position: [ 3, 2, 6 ]
    } }
>
    <Experience />
</Canvas>
Doing so makes the fov useless and the view seems very far from the scene.
Playing with the top, right, bottom and left properties is a bad idea because R3F is already updating those to keep a ratio adapted to the viewport.
Instead, we can use the zoom property:
<Canvas
    orthographic
    camera={ {
        fov: 45,
        zoom: 100,
        near: 0.1,
        far: 200,
        position: [ 3, 2, 6 ]
    } }
>
    <Experience />
</Canvas>
We could have also created a variable containing the settings before the render():
const cameraSettings = {
    fov: 45,
    zoom: 100,
    near: 0.1,
    far: 200,
    position: [ 3, 2, 6 ]
}

root.render(
    <Canvas
        orthographic
        camera={ cameraSettings }
    >
        <Experience />
    </Canvas>
)
But let’s stick to the attributes and get back to the default PerspectiveCamera without zoom:
<Canvas
    camera={ {
        fov: 45,
        near: 0.1,
        far: 200,
        position: [ 3, 2, 6 ]
    } }
>

Animating the camera
Currently, we are using <orbitControls>, but what if we want to animate the camera instead of letting the user control it?
Comment the <orbitControls>:
{/* <orbitControls args={ [ camera, gl.domElement ] } /> */}Earlier, we saw that the first parameter of the function we send to useFrame is the state of our Three.js experience.
This state contains our camera:
useFrame((state, delta) =>
{
    console.log(state.camera)

    cubeRef.current.rotation.y += delta
    // groupRef.current.rotation.y += delta
})
We are going to make the camera rotate around the scene while it remains focused on the center.
This means that the camera is moving along a circular trajectory. First, we need an angle and then use that angle on a sin() and cos() in order to get the x and z coordinates.
To get that angle, we can use the elapsed time since the experience started. R3F implements a Three.js Clock that will contain the elapsed time and we can access that Clock in the state as state.clock:
useFrame((state, delta) =>
{
    console.log(state.clock)

    // ...
})
All we have to do is save its elapsedTime property in an angle variable:
useFrame((state, delta) =>
{
    const angle = state.clock.elapsedTime
    console.log(angle)

    // ...
})
(note that there is also a getElapsedTime method).
Now we can change the camera.position.x and camera.position.z with a sin() and a cos() using the same angle:
useFrame((state, delta) =>
{
    const angle = state.clock.elapsedTime
    state.camera.position.x = Math.sin(angle)
    state.camera.position.z = Math.cos(angle)

    // ...
})
Let’s make the circle radius slightly bigger by multiplying the sin() and cos():
useFrame((state, delta) =>
{
    const angle = state.clock.elapsedTime
    state.camera.position.x = Math.sin(angle) * 8
    state.camera.position.z = Math.cos(angle) * 8

    // ...
})
And now, we can tell the camera to lookAt() the center:
useFrame((state, delta) =>
{
    const angle = state.clock.elapsedTime
    state.camera.position.x = Math.sin(angle) * 8
    state.camera.position.z = Math.cos(angle) * 8
    state.camera.lookAt(0, 0, 0)

    // ...
})
This was just a quick exercise for the sake of learning. Let’s get back to the orbit controls by commenting what we wrote in the useFrame and uncommenting the <orbitControls>:
useFrame((state, delta) =>
{
    // const angle = state.clock.elapsedTime
    // state.camera.position.x = Math.sin(angle) * 8
    // state.camera.position.z = Math.cos(angle) * 8
    // state.camera.lookAt(0, 0, 0)

    cubeRef.current.rotation.y += delta
    // groupRef.current.rotation.y += delta
})

return <>

    <orbitControls args={ [ camera, gl.domElement ] } />

    {/* ... */}

</>
Antialias
The antialias is on by default, which looks better.
But if we want to remove it, we can add a gl attribute to the <Canvas> and send it an object, as we did with the camera:
<Canvas
    gl={ {} }
    camera={ {
        fov: 45,
        near: 0.1,
        far: 200,
        position: [ 3, 2, 6 ]
    } }
>
The gl refers to the WebGLRenderer and we can deactivate the antialias by setting that property to false:
<Canvas
    gl={ {
        antialias: false
    } }
    camera={ {
        fov: 45,
        near: 0.1,
        far: 200,
        position: [ 3, 2, 6 ]
    } }
>
But it looks bad, so let’s put it back to true or remove it:
<Canvas
    gl={ {
        antialias: true
    } }
    camera={ {
        fov: 45,
        near: 0.1,
        far: 200,
        position: [ 3, 2, 6 ]
    } }
>
Tone mapping
By default, R3F sets the toneMapping to ACESFilmicToneMapping.
As a reminder, the toneMapping mimics the HDR (High Dynamic Range) to LDR (Low Dynamic Range) effect.
It’s not a true HDR to LDR since the default render is already in LDR. However, it tweaks the color to make it look like HDR.
Anyway, to remove it, we can add the flat attribute to the <Canvas>:
<Canvas
    flat
    gl={ {
        antialias: true
    } }
    camera={ {
        fov: 45,
        near: 0.1,
        far: 200,
        position: [ 3, 2, 6 ]
    } }
>
This will result in NoToneMapping being assigned to toneMapping (which is the same as NoToneMapping).
And if we want to send a specific tone mapping like CineonToneMapping, we can add it to the gl attribute. But first, we need to import it from Three.js.
To import Three.js, we can do the usual:
import * as THREE from 'three'Or we can import specific classes and properties that we need:
import { CineonToneMapping } from 'three'I personally prefer to import the whole THREE object so that we understand where the property we are using comes from, but choose the solution you prefer.
We can now remove the flat attribute and set the toneMapping in the gl attribute:
<Canvas
    gl={ {
        antialias: true,
        toneMapping: THREE.CineonToneMapping
    } }
    camera={ {
        fov: 45,
        near: 0.1,
        far: 200,
        position: [ 3, 2, 6 ]
    } }
>
It’s up to you, but I personally prefer the ACESFilmicToneMapping, which is why we are going to put back THREE.ACESFilmicToneMapping:
<Canvas
    gl={ {
        antialias: true,
        toneMapping: THREE.ACESFilmicToneMapping
    } }
    camera={ {
        fov: 45,
        near: 0.1,
        far: 200,
        position: [ 3, 2, 6 ]
    } }
>
Output color space
The outputColorSpace is already set to SRGBColorSpace.
As discussed in previous lessons, the color space is a way of encoding and decoding colors so that we store color information in a more optimised way since we are limited by the amount of possible values per channel.
We usually want to output color space as SRGBColorSpace, but we can change it to LinearSRGBColorSpace if needed:
<Canvas
    gl={ {
        antialias: true,
        toneMapping: THREE.ACESFilmicToneMapping,
        outputColorSpace: THREE.LinearSRGBColorSpace
    } }
    camera={ {
        fov: 45,
        near: 0.1,
        far: 200,
        position: [ 3, 2, 6 ]
    } }
>
We can get the same result by adding the linear attribute to the <Canvas>:
<Canvas
    linear
    gl={ {
        antialias: true,
        toneMapping: THREE.ACESFilmicToneMapping,
        // outputColorSpace: THREE.LinearSRGBColorSpace
    } }
    camera={ {
        fov: 45,
        near: 0.1,
        far: 200,
        position: [ 3, 2, 6 ]
    } }
>
But we don’t need it right now, so let’s get back to the default SRGBColorSpace:
<Canvas
    gl={ {
        antialias: true,
        toneMapping: THREE.ACESFilmicToneMapping,
        outputColorSpace: THREE.LinearSRGBColorSpace
    } }
    camera={ {
        fov: 45,
        near: 0.1,
        far: 200,
        position: [ 3, 2, 6 ]
    } }
>

Alpha
By default, the background of the render is transparent.
This means that we can place things behind it like DOM elements or a CSS background-color:
html,
body,
#root
{
    position: fixed;
    top: 0;
    left: 0;
    width: 100%;
    height: 100%;
    overflow: hidden;
    background: LightSkyBlue;
}
In a later lesson, we’ll cover a case where we want to change transparent behaviour.
Pixel ratio
If you are testing on a high pixel ratio screen or have the luxury of having multiple screens with different pixel ratios, you might notice that the renderer handles it automatically.
Still, in previous lessons, we discovered that it’s good practice to clamp it in order to avoid performance issues on devices with a very high pixel ratio.
We can force it by sending a specific value to the dpr attribute on the <Canvas>:
<Canvas
    dpr={ 1 }
    gl={ {
        antialias: true,
        toneMapping: THREE.ACESFilmicToneMapping,
        outputColorSpace: THREE.LinearSRGBColorSpace
    } }
    camera={ {
        fov: 45,
        near: 0.1,
        far: 200,
        position: [ 3, 2, 6 ]
    } }
>
Or we can send an array containing the minimum and maximum values:
<Canvas
    dpr={ [ 1, 2 ] }
    gl={ {
        antialias: true,
        toneMapping: THREE.ACESFilmicToneMapping,
        outputColorSpace: THREE.LinearSRGBColorSpace
    } }
    camera={ {
        fov: 45,
        near: 0.1,
        far: 200,
        position: [ 3, 2, 6 ]
    } }
>
But [ 1, 2 ] is actually the default value, meaning that we can remove it.
Performance 02:02:20
Everything we learned about performance with Three.js still applies here (minimise draw calls, simplify models, avoid big textures, etc.)
But R3F and React also made possible some interesting features to improve performance.
Those improvements are well explained on the following page from the R3F documentation: Scaling performance
Have a look in case you need it at some point, but we are going to put some of those into practice later.
Going further 02:03:30
In the next lessons, we are going to dive deeper into R3F, but if you want to discover things on your own, here are some resources.
- The documentation is very complete and easy to use https://docs.pmnd.rs/react-three-fiber/getting-started/introduction
- Paul Henschel (@0xca0a) made a great tutorial that will guide you in creating an “Awwwards-type” website with R3F https://0xca0a.gumroad.com/l/B4N4N4S
- The PMNDRS’ Discord is full of awesome people that will be glad to help you if you need them to: https://discord.com/invite/poimandres
- Hazem (@HazemOIbrahim) recreated some of the Three.js Journey lessons with R3F https://journey.pmnd.rs/