Introduction 00:00
We’ve been using React and React Three Fiber, but we haven’t really discussed monitoring and debugging.
This concerns both React and React Three Fiber and it’s important to make our developer life as easy as possible so that we can focus on the application and not on debugging or on understanding why the frame rate suddenly drops.
We are going to talk about React debugging first, then focus on React Three Fiber debugging and monitoring.
Setup 00:33
The starter is very similar to the previous starter with a sphere, a cube and a green floor.
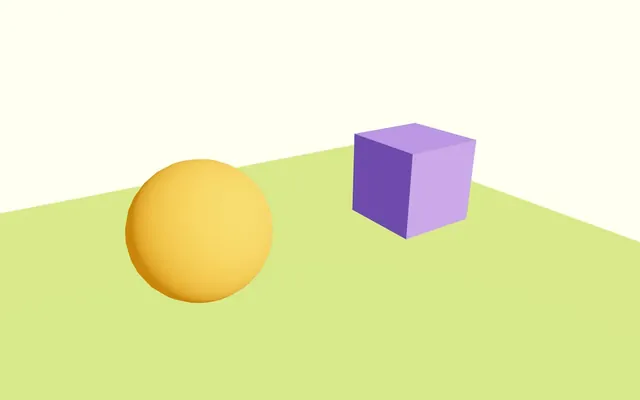
The @react-three/drei dependency is already installed within the project and we are using the OrbitControls helper to be able to move the camera around.
StrictMode 00:59
There is one important React feature that we haven’t used yet for the sake of simplification, but that you should add to all your React projects and it’s the StrictMode.
The StrictMode will warn you about potential problems in your application.
Here are some examples:
- Unused import
- Infinite render loop
- Forgotten
useEffectdependencies - Deprecated practices
- Etc.
Adding it to your application is as simple as adding a tag around it.
In /src/index.jsx, import StrictMode from react:
import { StrictMode } from 'react'Wrap the <Canvas> in a <StrictMode>:
root.render(
    <StrictMode>
        <Canvas
            camera={ {
                fov: 45,
                near: 0.1,
                far: 50,
                position: [ - 4, 3, 6 ]
            } }
        >
            <Experience />
        </Canvas>
    </StrictMode>
)
And that’s all.
Potential errors will now be shown as a warning in the terminal and in the console.
In the following lessons, we should not encounter specific errors, which is why we are not going to use it, but you should retain the StrictMode when you start adventuring on your own.
Don’t worry about the impact of the StrictMode in production. It’ll be ignored once the application is built.
Browser extension 03:54
We can install an extension named React Developer Tools that will help us check and modify our components live.
It’s available for both Chrome and Firefox
Add it to your browser.
Close and re-open the tab corresponding to your React application and check your developer for the ⚛️ Components tab (we are not going to talk about the ⚛️ Profile tab).
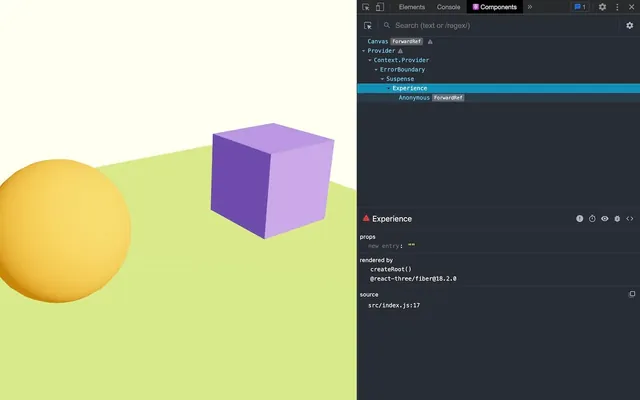
Here, you’ll find a tree of your components and you’ll be able to play with their props and states.
Note that R3F elements (<mesh> or <meshBasicMaterial>) won’t show up in the tree.
Still, if we were to create our own component containing R3F, we would be able to debug their props and states from here.
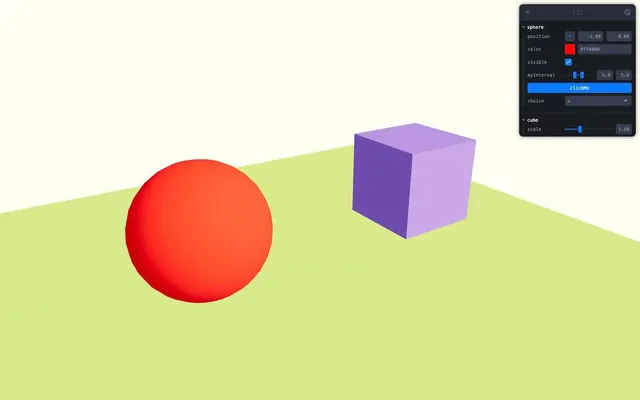
Debug UI with Leva 12:27
Until now, we haven’t used any Debug UI though it could have been useful to play with all those attributes like for the <Text> or the <MeshReflectorMaterial>.
We could use the classic lil-gui or any other alternative like TweakPane, control-panel, Guifiy, etc.
But there is a new one made possible by React, named Leva.
As I’m writing and recording these lessons, Leva is still in “heavy” development by the PMNDRS team and might change, but as for the previous lessons, we are going to force the version in order to avoid any surprises.
Installation
In the terminal, install leva with npm install leva@0.9.34 (we force the version to prevent surprises, you can ignore potential vulnerability warnings).
Adding it to our project is as simple as adding a hook.
In Experience.jsx Import useControls from leva:
import { useControls } from 'leva'We did it in the Experience but we could have done it in any other component and even in multiple ones at a time.
First tweak
To start with, we are going to create a tweak that lets us change the sphere position.
In the Experience, call useControls as follows:
export default function Experience()
{
    const controls = useControls({ position: - 2 })
    console.log(controls.position)

    // ...
}
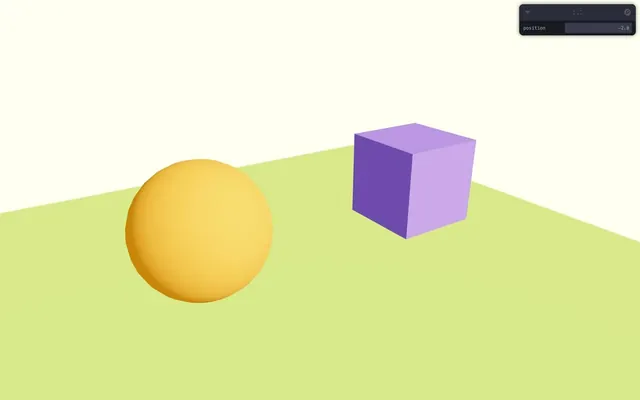
As you can see, the Debug UI automatically showed up in the top right corner.
We can move it, reduce it and even search for specific tweaks.
And if you change the value directly in the tweak, you’ll see that the console logs again with the new value. This means that the component is being re-rendered.
Though it’s something that should be avoided it’s not necessarily bad, and here it makes sense because a value did change.
Also, React and R3F know what has changed and will only update what is strictly necessary.
Before using the position value, we can destructure it in order to get only the position:
export default function Experience()
{
    const { position } = useControls({ position: - 2 })

    console.log(position)

    // ...
}
We can now use it in the position-x attribute of the orange sphere <mesh>:
<mesh position-x={ position }>
And if you change the Tweak value, you’ll see that the sphere position changes.
Range
Nice, but not very convenient. Instead of having to write a value, we would like to have a range.
This can be done by sending an object with specific properties to the position of the useControls:
const { position } = useControls({
    position:
    {
        value: - 2,
        min: - 4,
        max: 4,
        step: 0.01
    }
})
We can now drag and drop the slider to change the values.
Vectors
Much better. But what if we want to do the same on the y axis?
Instead of adding a second range tweak, we are going to use a vector 2 tweak:
const { position } = useControls({
    position:
    {
        value: { x: - 2, y: 0 },
        step: 0.01
    }
})
And don’t forget to update the <mesh> component:
<mesh position={ [ position.x, position.y, 0 ] }>We can now move it with some kind of joystick.
But can we go even further?
Add a z value in the useControls:
const { position } = useControls({
    position:
    {
        value: { x: - 2, y: 0, z: 0 },
        step: 0.01
    }
})
And update the <mesh> accordingly:
<mesh position={ [ position.x, position.y, position.z ] }>As you can see, yes it’s working, but we’ve lost the joystick which makes sense since a 3D joystick wouldn’t be very convenient.
Too bad, let’s get back to a vector 2 tweak:
const { position } = useControls({
    position:
    {
        value: { x: - 2, y: 0 },
        step: 0.01
    }
})
And the update the <mesh>:
<mesh position={ [ position.x, position.y, 0 ] }>You might have noticed that the y axis seems inverted.
We can fix that by adding joystick: 'invertY' to the tweak:
const { position } = useControls({
    position:
    {
        value: { x: - 2, y: 0 },
        step: 0.01,
        joystick: 'invertY'
    }
})
The joystick has a limited range, but sticking the cursor to the edges will allow the value to go beyond the initial range.
Color
We can use colors by sending a string that looks like a color.
Add a color property in the useControls:
const { position } = useControls({
    // ...
    color: '#ff0000'
})
When adding a tweak, don’t forget to retrieve it as a variable in the destructuring:
const { position, color } = useControls({
    // ...
})
And add it to the <meshStandardMaterial> of the sphere:
<meshStandardMaterial color={ color } />We can use various color formats:
'rgb(255, 0, 0)''orange''hsl(100deg, 100%, 50%)''hsla(100deg, 100%, 50%, 0.5)'{ r: 200, g: 106, b: 125, a: 0.4 }
Note that the alpha channel won’t work when expressing colors like this because Three.js handles alpha with the opacity and transparent properties.
Leva will keep the input format and Three.js supports them the same way.
Boolean
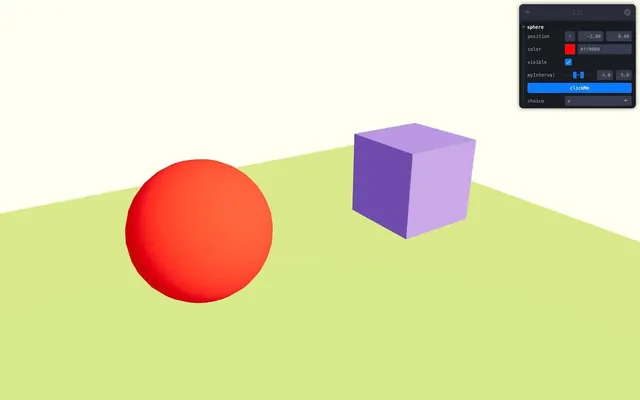
Add a visible property to the useControls and destructure it:
const { position, color, visible } = useControls({
    // ...
    visible: true
})
Use it on the sphere <mesh> for its visible attribute:
<mesh visible={ visible } position={ [ position.x, position.y, 0 ] }>We can now toggle the visibility of the sphere.
Interval
Though we are not going to use it in our scene, we can set an interval which is like a range but with two cursors (no need to destructure it):
const { position, color, visible } = useControls({
    // ...
    myInterval:
    {
        min: 0,
        max: 10,
        value: [4, 5],
    }
})
Button
Again, we are not going to use it in our scene, but we can create a button that will call a function once clicked.
To do that, we need to import button from leva:
import { button, useControls } from 'leva'Call it as the value of the property and sent it the function to call as a parameter:
const { position, color, visible } = useControls('sphere', {
	  // ...
	  clickMe: button(() => { console.log('ok') })
})
Select
We can create a select input by setting an array on the options property:
const { position, color, visible } = useControls('sphere', {
    // ...
    choice: { options: [ 'a', 'b', 'c' ] }
})
Folders
And similar to lil-gui, if things are getting a little too complex with too many tweaks, we can organise them in folders.
To do that, send a string as the first parameter of useControls:
const { position, color, visible } = useControls('sphere', {
    position:
    {
        value: { x: - 2, y: 0 },
        step: 0.01,
        joystick: 'invertY'
    },
    color: 'orange',
    visible: true
})
To create another folder, call useControls again but with a different name and put whatever you want in it like a scale (although we don’t associate it with the cube you can try to do it yourself):
const { scale } = useControls('cube', {
    scale:
    {
        value: 1.5,
        step: 0.01,
        min: 0,
        max: 5
    }
})
If you need to create a folder inside a folder, you can do it with the folder function that you can import from leva, but we won’t cover it here.
Configuration
To finish, we can configure Leva.
First, we need to add the component ourselves to our application so that we can tweak its attributes.
We can’t add it in the Experience because it is inside <Canvas> and everything in <Canvas> is intended for R3F. Instead, we need to add it in the index.jsx file outside of the <Canvas>.
In index.jsx, import Leva from leva:
import { Leva } from 'leva'Add it outside the <Canvas>:
root.render(
    <StrictMode>
        <Leva />
        <Canvas
            camera={ {
                fov: 45,
                near: 0.1,
                far: 50,
                position: [ - 4, 3, 6 ]
            } }
        >
            <Experience />
        </Canvas>
    </StrictMode>
)
Now we can add attributes like collapsed:
<Leva collapsed />
Check the documentation for more attributes https://github.com/pmndrs/leva/blob/main/docs/configuration.md
And if you want more examples https://codesandbox.io/examples/package/leva
Monitoring with r3f-perf 43:16
When it comes to monitoring, we can still use a traditional solution like Stats.js, but Renaud Rohlinger (@onirenaud) has developed a more advanced solution specifically made for R3F, called R3F-Perf.
In your terminal, add the r3f-perf dependency with npm install r3f-perf@7.2 (we force the version to prevent surprises, you can ignore potential vulnerabilities warnings).
In Experience.jsx, import Perf from r3f-perf:
import { Perf } from 'r3f-perf'And add it to your JSX:
export default function Experience()
{
    // ...

    return <>

        <Perf />

        {/* ... */}

    </>
}
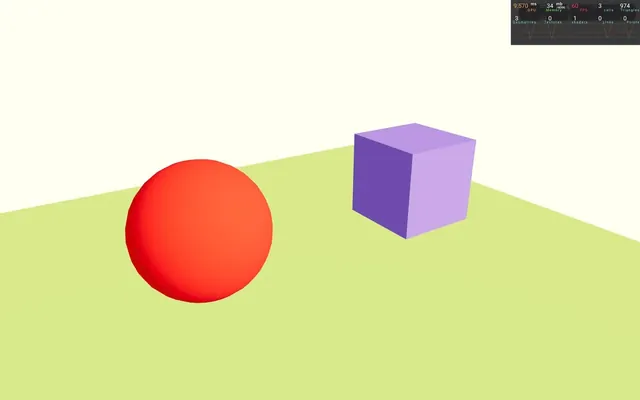
By default, the interface is in the top right corner which conflicts with Leva, but we can change that with the position attribute:
<Perf position="top-left" />
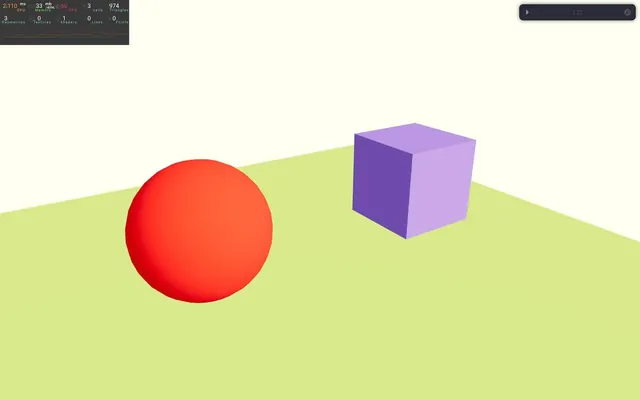
R3F-Perf displays a crazy amount of useful information.
We even have access to the number of draw calls, the memory usage, how long it took to render the scene, etc.
To spice things up a little, we can add a perfVisible checkbox to our Leva:
const { perfVisible } = useControls({
    perfVisible: true
})
And make <Perf> conditional:
{ perfVisible && <Perf position="top-left" /> }This way, we can toggle it from our debug UI
Check the documentation for more info about R3F-Perf https://github.com/utsuboco/r3f-perf