Introduction 00:00
Until now, we’ve been using a very simple environment with one directional light source and one ambient light source.
In this lesson, we are going to see some of the many environmental features available and how to implement them in R3F.
Setup 00:45
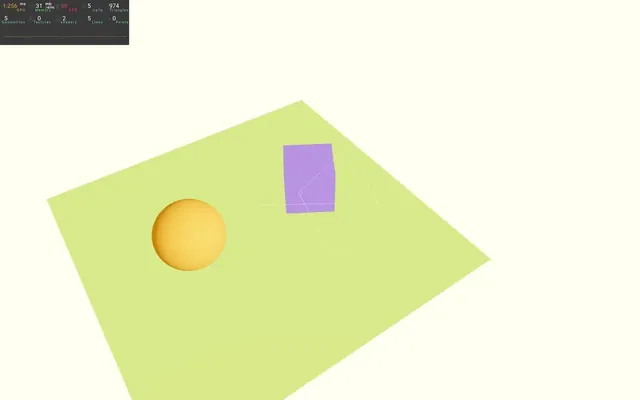
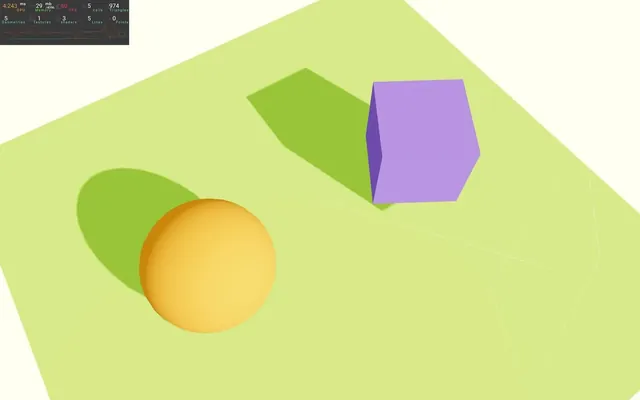
The starter is very similar to the previous lesson with a sphere, a cube and a green floor.

In addition, the cube is rotating thanks to the useFrame and we’ve also added <Perf /> from r3f-perf in order to keep an eye on performance.
The @react-three/drei dependency is already installed within the project and we are using the OrbitControls helper to be able to move the camera around.
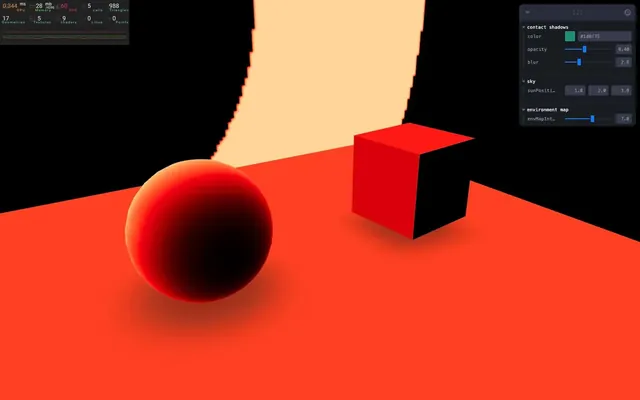
Background color 01:32
For the sake of learning, we are going to discover multiple ways of changing the background color.
Note that if all you want is a uniform color, any of those techniques are viable solutions. It’s up to you and your preferences. In some very specific cases, like when using postprocessing, the technique you chose to use can have a different result, but we are going to see that in a future lesson.
With CSS
The default background color seems to be white, but as we saw in a previous lesson, it’s actually transparent and what we are seing is the page HTML background.
This means that we can change the color directly in CSS.
In /src/style.css, change set the background-color (or just background) to red:
html,
body,
#root
{
    position: fixed;
    top: 0;
    left: 0;
    width: 100%;
    height: 100%;
    background: red;
}
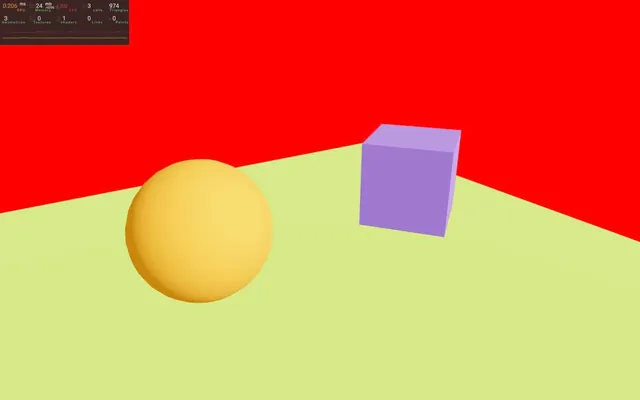
And that’s all. Quite easy, right? But let’s discover the other techniques.
Comment or remove the background property:
html,
body,
#root
{
    position: fixed;
    top: 0;
    left: 0;
    width: 100%;
    height: 100%;
    // background: red;
}
With setClearColor on the renderer
The WebGLRenderer has a method named setClearColor. It’s a way of filling the <canvas> with a color before rendering the various objects in the scene.
To use setClearColor, we need to have access to the renderer and we need to do that only once when the renderer has been created.
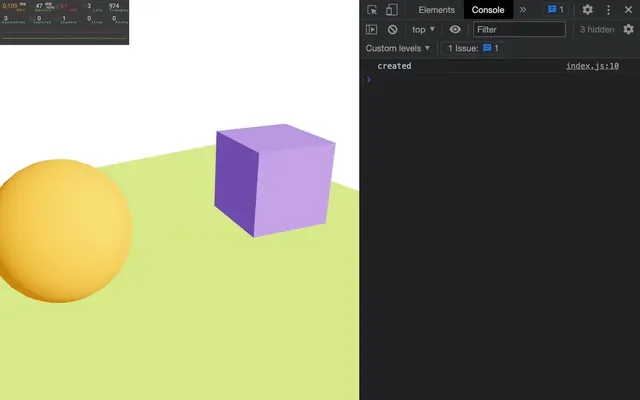
In index.jsx create a created function and send it to the <Canvas> attribute named onCreated:
const created = () =>
{
    console.log('created')
}

root.render(
    <Canvas
        camera={ {
            fov: 45,
            near: 0.1,
            far: 200,
            position: [ - 4, 3, 6 ]
        } }
        onCreated={ created }
    >
        <Experience />
    </Canvas>
)
The state will be sent as an argument of the function and the renderer will be available in the gl property:
const created = (state) =>
{
    console.log(state.gl)
}
And if you like to destructure:
const created = ({ gl }) =>
{
console.log(gl)
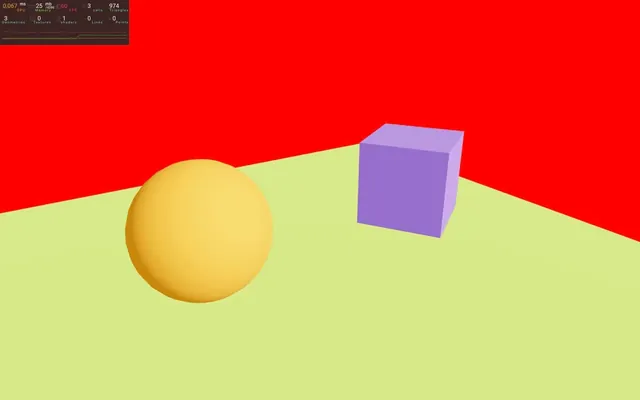
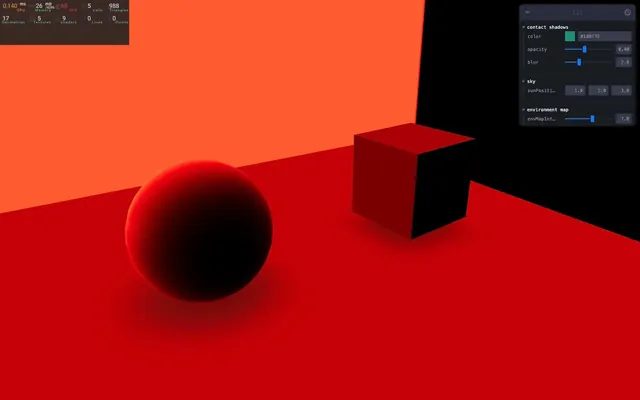
}We can then call the setClearColor with the color as the first parameter and the alpha as the second parameter:
const created = ({ gl }) =>
{
    gl.setClearColor('#ff0000', 1)
}
With the scene background
That was a viable solution, but let's check out another one.
Instead of doing it on the renderer, we can do it on the scene and we can access it in the created function the same way:
const created = ({ scene }) =>
{
    console.log(scene)
}
We can now instantiate a Color using Three.js and assign it to the background property (don’t forget to import THREE or just Color from three)
import * as THREE from 'three'

// ...

const created = ({ scene }) =>
{
    scene.background = new THREE.Color('#ff0000')
}
With R3F color
That’s also a good solution, but wait, there is an even better alternative.
Instead of listening to events and importing Three.js, we can create the color directly in the JSX.
First, let’s do some clean-up and comment or remove the THREE import, the created function and the onCreated attribute:
import './style.css'
import ReactDOM from 'react-dom/client'
import { Canvas } from '@react-three/fiber'
import Experience from './Experience.jsx'

const root = ReactDOM.createRoot(document.querySelector('#root'))

root.render(
    <Canvas
        camera={ {
            fov: 45,
            near: 0.1,
            far: 200,
            position: [ - 4, 3, 6 ]
        } }
    >
        <Experience />
    </Canvas>
)
Then, create a <color> inside the <Canvas>:
<Canvas
    camera={ {
        fov: 45,
        near: 0.1,
        far: 200,
        position: [ 1, 2, 6 ]
    } }
>
    <color args={ [ '#ff0000' ] } />
    <Experience />
</Canvas>
Doing so will automatically create a Color instance, but that instance isn’t assigned to the scene.background.
And here’s the trick.
We can add an attach attribute to specify what that component should be attached to.
<color args={ [ '#ff0000' ] } attach="background" />
Here, the scene is implied because it’s the only parent.
We can actually put that code anywhere, as long as the direct parent is the scene which is still the case if we put it in Experience:
export default function Experience()
{
    // ...

    return <>

        <color args={ [ '#ff0000' ] } attach="background" />

        {/* ... */}

    </>
}
Let’s change it to a less annoying color like 'ivory':
<color args={ [ 'ivory' ] } attach="background" />
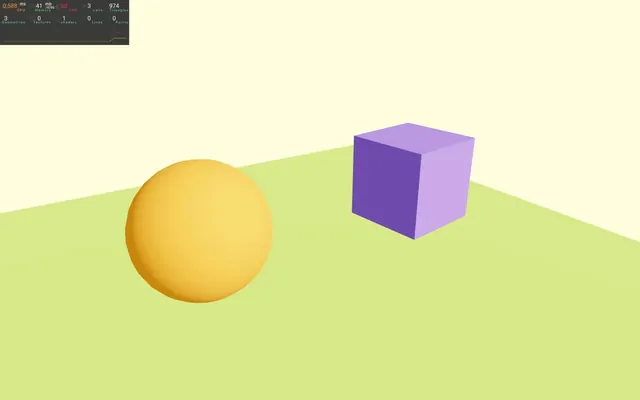
(The following screenshots aren’t using this background color which is why they will look more white).
Lights 13:43
All default Three.js lights are supported in R3F:
<ambientLight /><hemisphereLight /><directionalLight /><pointLight /><rectAreaLight /><spotLight />
We are not going to test them since we already saw how they work in the Lights lesson and they work just the same with R3F.
Light Helpers
We can still use Three.js light helpers too.
To do so, we are going to use useHelper from drei, but first, we need a reference to the <directionalLight>.
useRef is already import from react to animate the cube.
Create a directionalLight reference:
export default function Experience()
{
    const directionalLight = useRef()

    // ...
}
Associate it with the <directionalLight> using the ref attribute:
<directionalLight ref={ directionalLight } position={ [ 1, 2, 3 ] } intensity={ 4.5 } />Import useHelper from @react-three/drei:
import { useHelper, OrbitControls } from '@react-three/drei'The first parameter of useHelper is the reference to the light source and the second parameter is the helper class we want to use from Three.js.
This means that we first need to import THREE in order to get access to the DirectionalLightHelper class:
import * as THREE from 'three'(We could also have imported the DirectionalLightHelper class only).
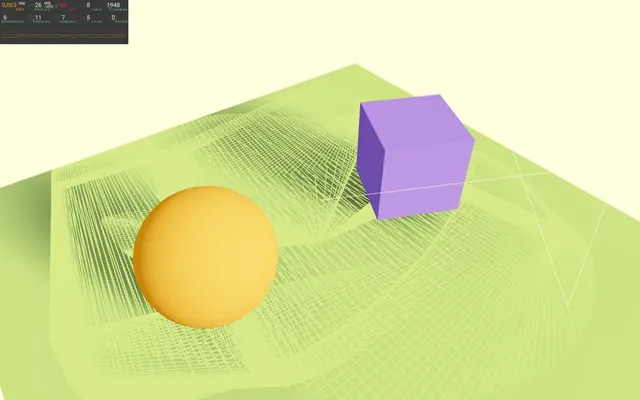
Finally, we can call useHelper() with the reference (directionLight), the helper class (THREE.DirectionalLightHelper) and the parameters of the helper (in our case, the size):
export default function Experience()
{
    const directionalLight = useRef()
    useHelper(directionalLight, THREE.DirectionalLightHelper, 1)

    // ...
}
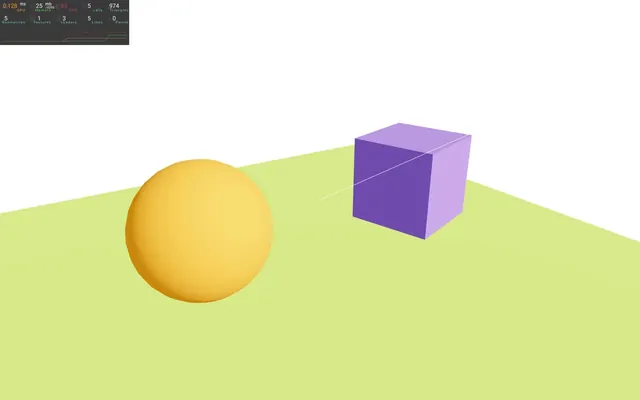
It’s barely visible since it’s composed of white lines, but move the camera and you should see it.
useHelper isn’t just for the light, as we could have used it for the camera with CameraHelper as an example.
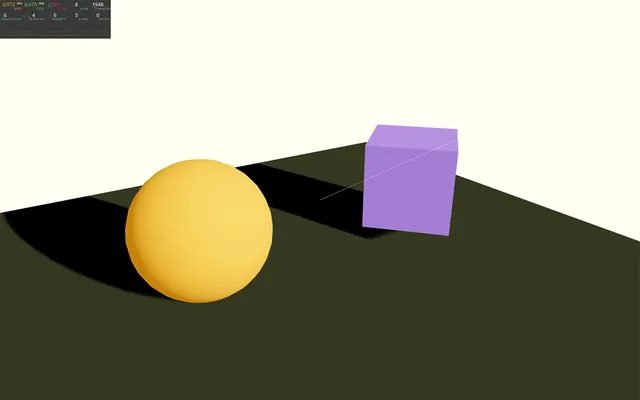
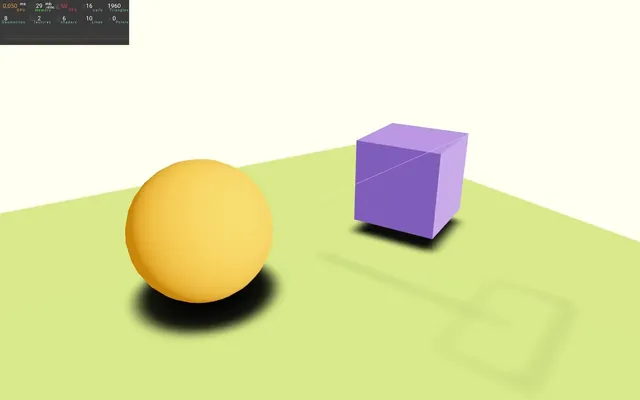
Shadows 18:28
To make the scene more realistic, we need shadows.
We are going to start with the default Three.js shadows system, but then we are going to see other shadow solutions made easier thanks to R3F and drei.
Default shadows
Activation
To activate shadow rendering on the WebGLRenderer, all we need to do is add a shadows attribute to the <Canvas> in index.jsx:
root.render(
    <Canvas
        shadows
        camera={ {
            fov: 45,
            near: 0.1,
            far: 200,
            position: [ - 4, 3, 6 ]
        } }
    >
        <Experience />
    </Canvas>
)
Back to Experience.jsx, we add castShadow to the <directionalLight>:
<directionalLight ref={ directionalLight } castShadow position={ [ 1, 2, 3 ] } intensity={ 4.5 } />Add castShadow on the sphere <mesh> and cube <mesh> (those objects only need to cast shadow since there is nothing above):
<mesh castShadow position-x={ - 2 }>
    {/* ... */}
</mesh>

<mesh castShadow position-x={ 2 } scale={ 1.5 }>
    {/* ... */}
</mesh>
Finally, add receiveShadow on the floor <mesh> (the floor only needs to receive shadow since there is nothing below):
<mesh receiveShadow position-y={ - 1 } rotation-x={ - Math.PI * 0.5 } scale={ 10 }>
    {/* ... */}
</mesh>
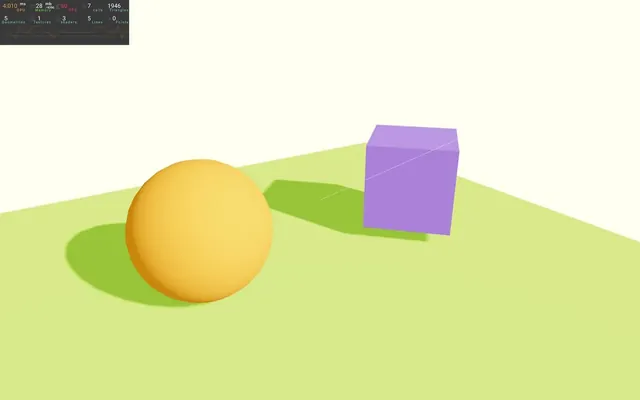
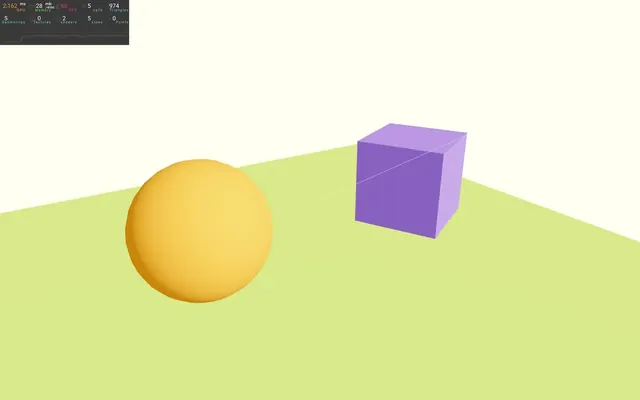
And that’s all it takes.
As you can see on the performance monitoring, the time it takes to render has risen significantly, although it’s still acceptable.
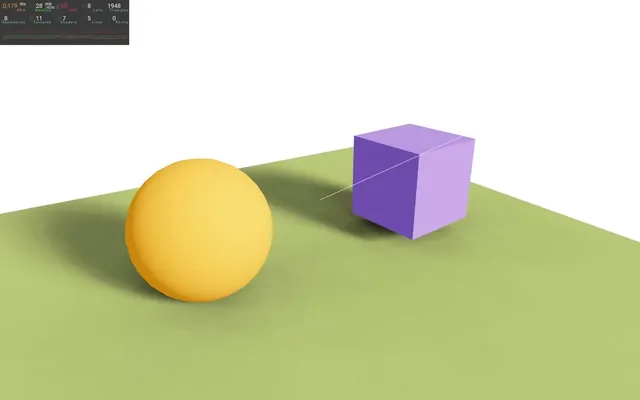
Baking
If our scene were static (which is not the case because the cube is rotating but we are going to do it anyway), we could have added the BakeShadows helper from drei.
This will render the shadows only once and not on each frame.
Import BakeShadows from @react-three/drei:
import { BakeShadows, useHelper, OrbitControls } from '@react-three/drei'Add it to the JSX:
export default function Experience()
{
// ...
return <>
<BakeShadows />
{/* ... */}
</>
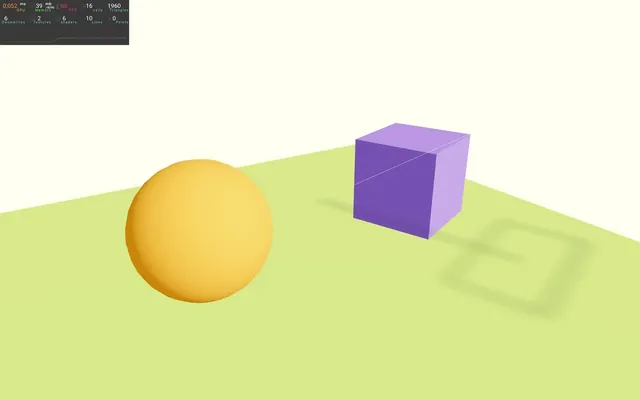
}
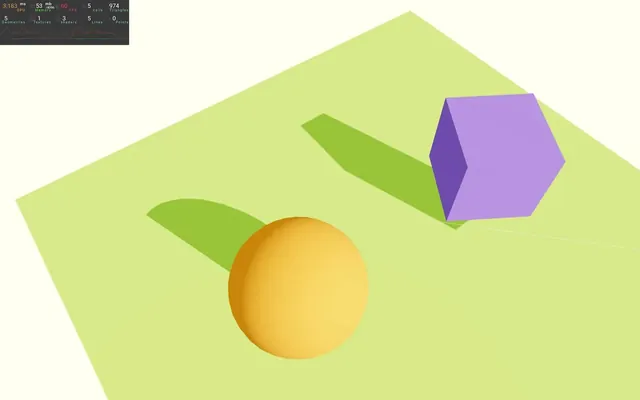
As you can see with the cube shadow, the shadows aren’t updated on each frame which improves performance.
If you check the performance monitoring, you’ll see that it takes less time to render than before, but still a bit more since that baked shadow still needs to be rendered in the final result.
Configuring the shadows
The default settings look pretty good, but we can tweak it.
As discussed in previous lessons, each light casting shadows will render the scene in a specific way and output that we call “shadow map”. This shadow map is then used to know if a surface is in the shade or not.
By default, that shadow map resolution is rather low in order to maintain solid performance.
Fortunately, we can change it.
In pure JavaScript, we can access it by doing directionalLight.shadow.mapSize.set(1024, 1024), but how can we do that in R3F?
The good news is that most properties (even deep ones) are still accessible right from the attributes, by separating the different depth levels with dashes -.
As an example, to change the shadow.mapSize property, we can use the shadow-mapSize attribute (you might need to reload):
<directionalLight
    ref={ directionalLight }
    position={ [ 1, 2, 3 ] }
    intensity={ 4.5 }
    castShadow
    shadow-mapSize={ [ 1024, 1024 ] }
/>
And we can do the same with the near, far, top, right, bottom and left properties (since a OrthographicCamera is used to render the shadow map):
<directionalLight
    ref={ directionalLight }
    position={ [ 1, 2, 3 ] }
    intensity={ 4.5 }
    castShadow
    shadow-mapSize={ [ 1024, 1024 ] }
    shadow-camera-near={ 1 }
    shadow-camera-far={ 10 }
    shadow-camera-top={ 2 }
    shadow-camera-right={ 2 }
    shadow-camera-bottom={ - 2 }
    shadow-camera-left={ - 2 }
/>
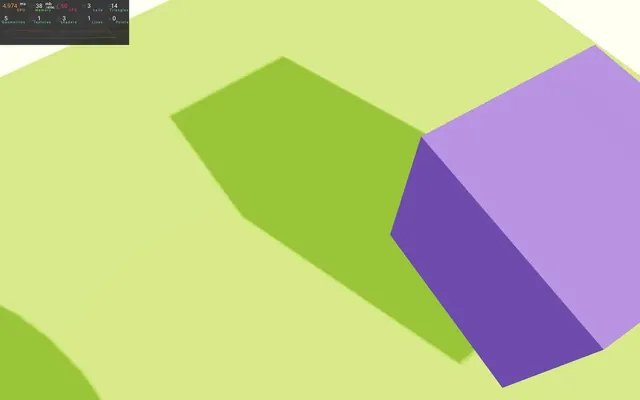
The shadow is cut because the values are too small, but the main purpose here was to explain how to tweak those shadows.
Let’s put back 5 to the top, right, bottom and left properties:
<directionalLight
    ref={ directionalLight }
    position={ [ 1, 2, 3 ] }
    intensity={ 4.5 }
    castShadow
    shadow-mapSize={ [ 1024, 1024 ] }
    shadow-camera-near={ 1 }
    shadow-camera-far={ 10 }
    shadow-camera-top={ 5 }
    shadow-camera-right={ 5 }
    shadow-camera-bottom={ - 5 }
    shadow-camera-left={ - 5 }
/>
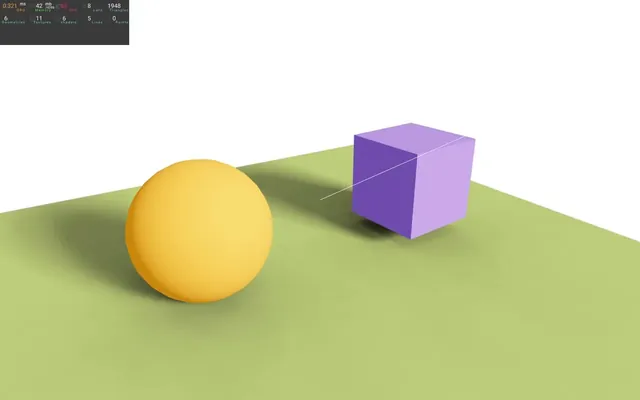
Soft shadows
The default shadows are too sharp. There are multiple ways of softening them and we are going to discover one technique called Percent Closer Soft Shadows (PCSS).
The idea is to make the shadow look blurry by picking the shadow map texture at an offset position according to the distance between the surface casting the shadow and the surface receiving the shadow, which is kind of how it happens in real life.
It is achieved in Three.js thanks to spidersharma03 and we can find an example here https://threejs.org/examples/#webgl_shadowmap_pcss
If you check the code, you’ll see that implementing this solution implies modifying the shader chunks of Three.js directly, which is a bit messy.
Fortunately, drei comes to the rescue with a helper named <SoftShadows>.
In Experience.jsx, import SoftShadows from @react-three/drei:
import { SoftShadows, BakeShadows, useHelper, OrbitControls } from '@react-three/drei'And add it right after the <BakeShadows /> with the following attributes:
export default function Experience()
{
    // ...

    return <>

        <BakeShadows />
        <SoftShadows size={ 25 } samples={ 10 } focus={ 0 } />

        {/* ... */}

    </>
}

Now check the shadows and see how gorgeous and soft they look.
Note that this helper will modify Three.js shaders directly and each change applied on its attributes will re-compile all the shaders supporting shadows. This will result in performance issues and a drastic frame rate drop.
Still, you can tweak those attributes and even add them to leva, but only to find the tweaks that suits you best. After that, do not change them.
Comment or remove the <BakeShadows /> in order to see the shadows moving again.
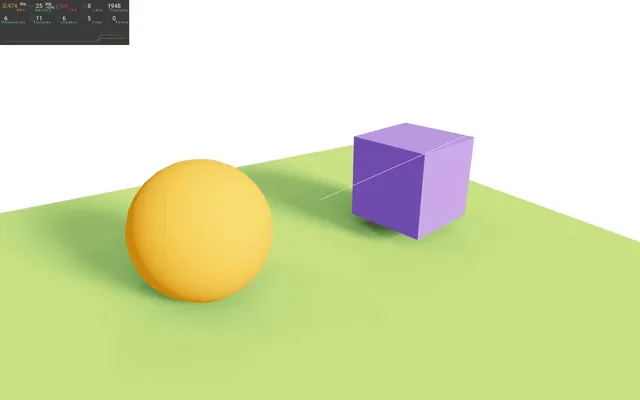
{/* <BakeShadows /> */}Accumulative Shadows
As its name suggests, the AccumulativeShadows will accumulate multiple shadow renders, and we are going to move the light randomly before each render. This way the shadow will be composed of a bunch of renders from various angles, making it look soft and very realistic.
The AccumulativeShadows will be rendered on a plane. It limits its usage, but it will look really good on the floor of your scene.
The best way to understand it is to see it in action.
Since the AccumulativeShadows will be a shadow on its own, we should deactivate the shadows on the <mesh> corresponding to the floor to prevent having two shadows.
Remove receiveShadow on the floor <mesh>:
<mesh position-y={ - 1 } rotation-x={ - Math.PI * 0.5 } scale={ 10 }>
    {/* ... */}
</mesh>
And comment the <SoftShadows>:
{/* <SoftShadows size={ 25 } samples={ 10 } focus={ 0 } /> */}
Import AccumulativeShadows from @react-three/drei:
import { AccumulativeShadows, SoftShadows, BakeShadows, useHelper, OrbitControls } from '@react-three/drei'Add it to the scene right after the <directionalLight> and don’t auto-close it, we are going to put stuff inside later:
<AccumulativeShadows></AccumulativeShadows>
We have some work to do as you can see.
First, let’s move it a little above the floor:
<AccumulativeShadows
    position={ [ 0, - 0.99, 0 ] }
>
</AccumulativeShadows>
The default scale is 10 units which matches our scene perfectly, but if you need a smaller or bigger AccumulativeShadows, you can use the scale attribute:
<AccumulativeShadows
    position={ [ 0, - 0.99, 0 ] }
    scale={ 10 }
>
</AccumulativeShadows>
Since the AccumulativeShadows will render shadow maps, we need to provide it actual lights. Note that it won’t use the lights already available in the scene which means we have to duplicate the directional light. A little later, we are going to replace the light by a better solution.
Create a <directionalLight> in the <AccumulativeShadows> and use the same position attribute as the <directionalLight> we already have. Also add the castShadow attribute:
<AccumulativeShadows
    position={ [ 0, - 0.99, 0 ] }
    scale={ 10 }
>
    <directionalLight
        position={ [ 1, 2, 3 ] }
        castShadow
    />
</AccumulativeShadows>
We have our shadow back, but it looks worst than before.
The AccumulativeShadows is currently doing a lot of shadow renders but always from the same directional light at the exact same position. We need to move it randomly on each frame.
Instead of doing it manually, we are going to use the RandomizedLight helper from drei that does exactly that while being super easy to setup.
Import RandomizedLight from @react-three/drei:
import { RandomizedLight, AccumulativeShadows, SoftShadows, BakeShadows, useHelper, OrbitControls } from '@react-three/drei'Add it to the <AccumulativeShadows> instead of the <directionalLight> and use the same position attribute:
<AccumulativeShadows
    position={ [ 0, - 0.99, 0 ] }
    scale={ 10 }
>
    <RandomizedLight
        position={ [ 1, 2, 3 ] }
    />
</AccumulativeShadows>
Much better.
The <RandomizedLight> has multiple attributes to control the behaviour of the light:
amount: how many lights (by default there is multiple lights)radius: the amplitude of the jiggleintensity: the intensity of the lightsambient: act like if a global light was illuminating the whole scene, making only tight spaces and crevices receiving shadows
And parameters related to the shadow map:
castShadow: If it should cast shadowsbias: the bias offset to fix the issue where the objects are casting shadows on themselves or not casting shadow on objects very close to their surfacemapSize: the shadow map size (the lower, the better for performances)size: the amplitude of the shadow (top,right,bottomandleftall at once)nearandfar: how close and how far the shadow map camera will render objects
Finding the best tweaks is complicated and this is where a Debug UI like Leva would be very helpful.
But let’s be lazy and put the following parameters:
<RandomizedLight
    amount={ 8 }
    radius={ 1 }
    ambient={ 0.5 }
    intensity={ 3 }
    position={ [ 1, 2, 3 ] }
    bias={ 0.001 }
/>
Back to the <AccumulativeShadows> where we also have access to some attributes:
colors: the color of the shadowopacity: the opacity of the shadow
Since we have a green floor, let’s make the shadow a dark green/blue-ish color with a slightly reduced opacity:
<AccumulativeShadows
    position={ [ 0, - 0.99, 0 ] }
    scale={ 10 }
    color="#316d39"
    opacity={ 0.8 }
>
    {/* ... */}
</AccumulativeShadows>
frames: How many shadow renders to dotemporal: spread the renders across multiple frames
First, let’s try to increase the frames:
<AccumulativeShadows
    position={ [ 0, - 0.99, 0 ] }
    scale={ 10 }
    color="#316d39"
    opacity={ 0.8 }
    frames={ 1000 }
>
    {/* ... */}
</AccumulativeShadows>

1000 is a lot, but as you can see, the shadow looks really smooth. The problem is that Three.js had to do those 1000 renders all at once on the first frame and you might have notice quite a long freeze.
It’s not necessarily a big deal and 1000 was way too much anyway, but we can prevent the freeze with temporal:
<AccumulativeShadows
    position={ [ 0, - 0.99, 0 ] }
    scale={ 10 }
    color="#316d39"
    opacity={ 0.8 }
    frames={ 1000 }
    temporal
>
    {/* ... */}
</AccumulativeShadows>
As you can see, it takes many seconds to get our shadow back, but at least we didn’t have any freeze since only one render is being done on each frame.
Another thing you might have noticed is a weird shape being drawn on the shadow if you move the camera. This is due to the directional light helper messing up with the shadow map.
Let’s remove or comment the helper:
// useHelper(directionalLight, THREE.DirectionalLightHelper, 1)

Reduce the amount of frames to 100 which will look good and take less than 2 seconds to show up if you are running at 60fps:
<AccumulativeShadows
    position={ [ 0, - 0.99, 0 ] }
    scale={ 10 }
    color="#316d39"
    opacity={ 0.8 }
    frames={ 100 }
>
    {/* ... */}
</AccumulativeShadows>
You might have notice that the shadow doesn’t seem to move according to the cube and it’s true.
To see that more clearly, let’s make the cube move left and right.
In the useFrame, retrieve the clock elapsedTime like we did in a previous lesson and assign it to a time variable:
useFrame((state, delta) =>
{
    const time = state.clock.elapsedTime
    // ...
})
Now use it on the cube position with a Math.sin() and add 2 to it so that it stays near its current position:
useFrame((state, delta) =>
{
		const time = state.clock.elapsedTime
    cube.current.position.x = 2 + Math.sin(time)
		// ...
})
The shadow seems to be moving for a moment (100 frames to be precise) and then stops. It’s because we specifically asked the AccumulativeShadows to render 100 frames only.
The solution is to tell the AccumulativeShadows to keep rendering the shadows and we can do that by setting the frames attribute to Infinity:
<AccumulativeShadows
    position={ [ 0, - 0.99, 0 ] }
    scale={ 10 }
    color="#316d39"
    opacity={ 0.8 }
    frames={ Infinity }
    temporal
>
    {/* ... */}
</AccumulativeShadows>
Not bad, but a bit jumpy. We can distinguish the different shadow maps fading in and out. The reason is that, when using infinite frames, the AccumulativeShadows is only blending the last 20 shadow renders. We can change this value with the blend attribute.
Set the blend attribute to 100:
<AccumulativeShadows
    position={ [ 0, - 0.99, 0 ] }
    scale={ 10 }
    color="#316d39"
    opacity={ 0.8 }
    frames={ Infinity }
    temporal
    blend={ 100 }
>
    {/* ... */}
</AccumulativeShadows>
Much better, but the higher the blend, the less chance you have to see shadows on fast moving objects.
Since the AccumulativeShadow is highly parametrable, you should add the various parameters to a debug UI like Leva in order to find the perfect tweaks.
That’s all for the AccumulativeShadow. Comment or remove the position animation we added to the cube and put back the light helper:
export default function Experience()
{
// ...
useHelper(directionalLight, THREE.DirectionalLightHelper, 1)
useFrame((state, delta) =>
{
// const time = state.clock.elapsedTime
// cube.current.position.x = 2 + Math.sin(time)
cube.current.rotation.y += delta * 0.2
})
// ...
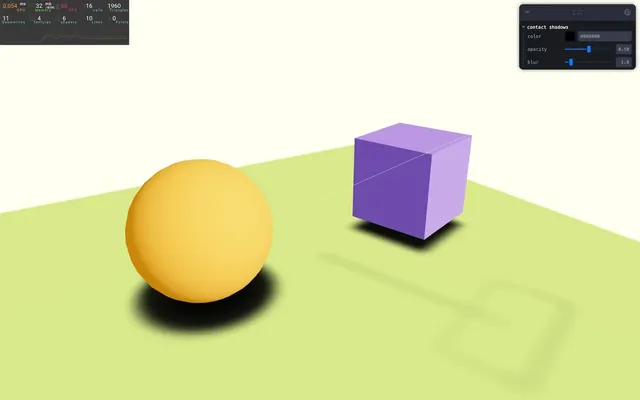
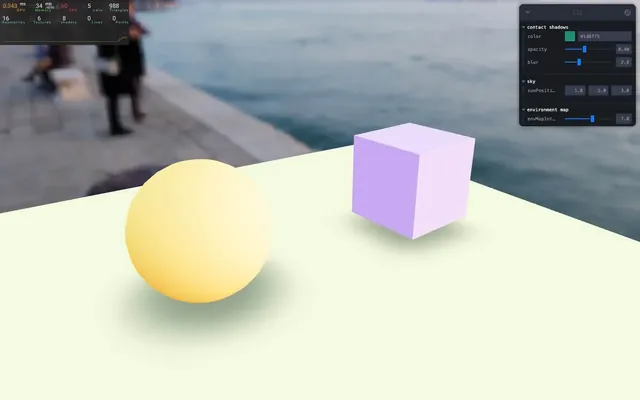
}Contact Shadows
The last shadow solution we are going to see is called ContactShadows.
Because it doesn’t rely on the default shadow system of Three.js, we are going to deactivate shadows on the <Canvas> (you can also remove the attribute):
<Canvas
    shadows={ false }
    camera={ {
        fov: 45,
        near: 0.1,
        far: 200,
        position: [ - 4, 3, 6 ]
    } }
>
    <Experience />
</Canvas>
And comment or remove the <AccumulativeShadows>:
{/* <AccumulativeShadows
    position={ [ 0, - 0.99, 0 ] }
    scale={ 10 }
    color="#316d39"
    opacity={ 0.8 }
    frames={ Infinity }
    temporal
    blend={ 100 }
>
    <RandomizedLight
        amount={ 8 }
        radius={ 1 }
        ambient={ 0.5 }
        intensity={ 1 }
        position={ [ 1, 2, 3 ] }
        bias={ 0.001 }
    />
</AccumulativeShadows> */}
The first thing to understand about ContactShadows is that it works without a light being involved. Weird, right?
Like for the AccumulativeShadows, it works on a plane which limits its usage but looks very good on a floor.
The ContactShadows will render the whole scene a bit like how the directional light does, but with the camera taking place of the floor instead of the light.
It’ll then blur the shadow map to make it look better.
To implement it, import ContactShadows from @react-three/drei:
import { ContactShadows, RandomizedLight, AccumulativeShadows, SoftShadows, BakeShadows, useHelper, OrbitControls } from '@react-three/drei'Then add <ContactShadows> anywhere in the JSX:
export default function Experience()
{
    // ...

    return <>

        {/* ... */}

        <ContactShadows />

        {/* ... */}

    </>
}
By default, it doesn’t fit with our setup and we need to apply some tweaks.
First, remember that it’s a plane and we need to move it right above the floor so that we don’t have z-fighting issue:
<ContactShadows
    position={ [ 0, - 0.99, 0 ] }
/>

The <ContactShadows> surface fits our floor, but we could have changed its scale:
<ContactShadows
    position={ [ 0, - 0.99, 0 ] }
    scale={ 10 }
/>
We can improve the quality with resolution:
<ContactShadows
    position={ [ 0, - 0.99, 0 ] }
    scale={ 10 }
    resolution={ 512 }
/>
We can choose how far the shadow will render objects above with the far attribute.
Our scene isn’t very high, but let’s choose 5 just in case:
<ContactShadows
    position={ [ 0, - 0.99, 0 ] }
    scale={ 10 }
    resolution={ 512 }
    far={ 5 }
/>
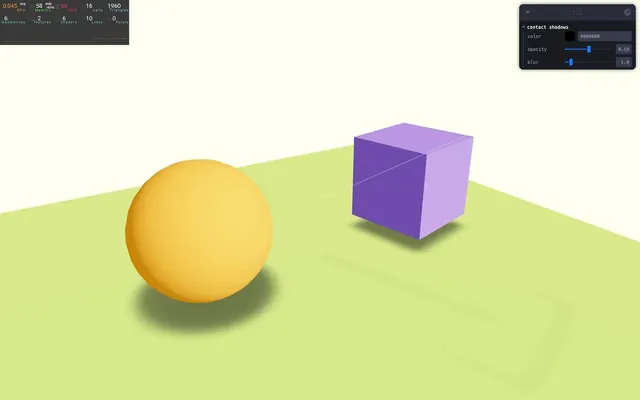
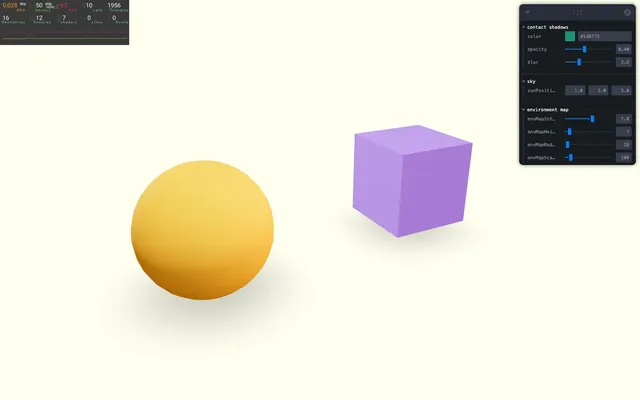
This time, we are going to add the rest of the parameters to Leva in order to find the best settings.
Now would be a good time to practice on your own. Add Leva to the project and create tweaks to control the following attributes:
coloropacityblur
Here’s the solution.
In the terminal, install leva with npm install leva@0.9.34.
In Experience.jsx, import useControls from leva:
import { useControls } from 'leva'Then create the color, opacity and blur tweaks in a 'contact shadows' folder (don’t forget to retrieve the values):
export default function Experience()
{
    // ...

    const { color, opacity, blur } = useControls('contact shadows', {
        color: '#000000',
        opacity: { value: 0.5, min: 0, max: 1 },
        blur: { value: 1, min: 0, max: 10 },
    })

    // ...
}
We can now use them on the <ContactShadows>:
<ContactShadows
    position={ [ 0, - 0.99, 0 ] }
    scale={ 10 }
    resolution={ 512 }
    far={ 5 }
    color={ color }
    opacity={ opacity }
    blur={ blur }
/>
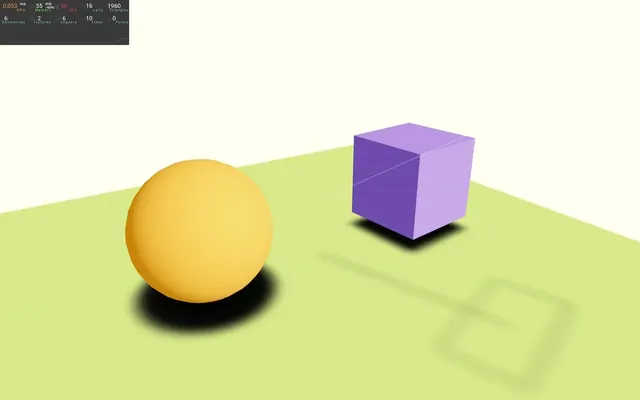
And tweak them until you are satisfied with the results.
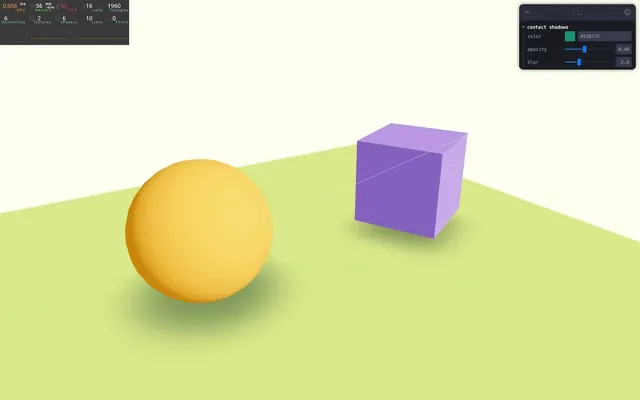
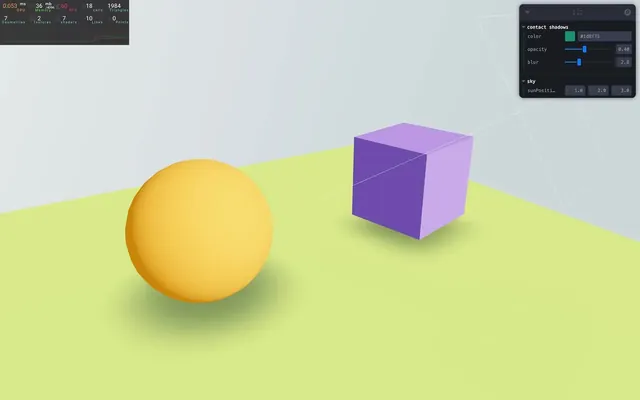
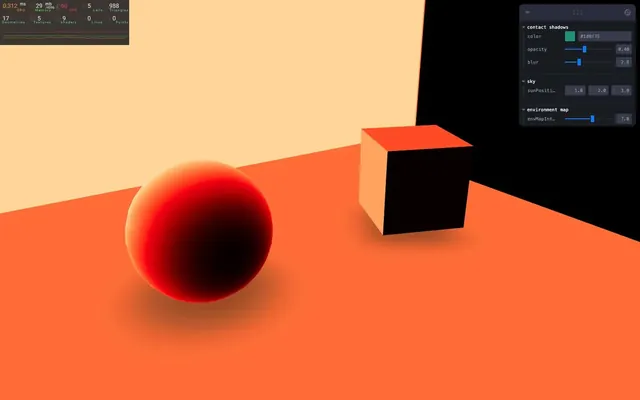
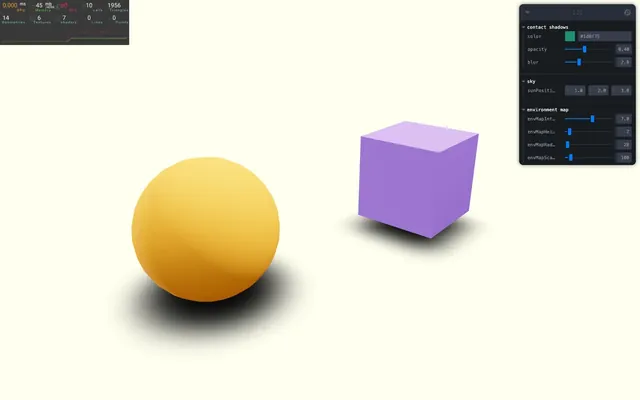
The following parameters work well:
const { color, opacity, blur } = useControls('contact shadows', {
    color: '#1d8f75',
    opacity: { value: 0.4, min: 0, max: 1 },
    blur: { value: 2.8, min: 0, max: 10 },
})
As we mentioned earlier, the ContactShadow will render our scene seen from below and use that information to generate the shadow. This shadow will then be blurred. For a small scene, the performances should be good, but for a more complex scene, this process might be too heavy and result in a frame rate drop especially since it has to be done on each frame.
Fortunately, there is a way to bake the shadow by setting the frames attribute on the <ContactShadow> to 1:
<ContactShadows
    position={ [ 0, - 0.99, 0 ] }
    scale={ 10 }
    resolution={ 512 }
    far={ 5 }
    color={ color }
    opacity={ opacity }
    blur={ blur }
    frames={ 1 }
/>
The number we choose correspond to the amount of frames in which the shadow will be generated. Since we only want to generate it once, we chose 1.
<ContactShadows> looks very good, but has limitations:
- The shadows always comes from the front of the plane (positive
yin our case). - It’s not physically accurate.
- It blurs the shadow regardless of the distance from the objects.
- It pulls quite a lot on the performance.
For simple object display, it’s great, but for more complex or realistic rendering, you might better use other shadow solutions.
Sky 01:20:07
To make the scene more realistic and in order to add a nice natural back, we can use the Sky class https://threejs.org/examples/webgl_shaders_sky.html
And as always, R3F and drei make the task very easy with the Sky helper.
Import Sky from @react-three/drei:
import { Sky, ContactShadows, RandomizedLight, AccumulativeShadows, SoftShadows, BakeShadows, useHelper, OrbitControls } from '@react-three/drei'Then add <Sky> anywhere in the JSX:
export default function Experience()
{
    // ...

    return <>

        {/* ... */}

        <Sky />

        {/* ... */}

    </>
}
We now have a nice looking sky.
This class is physics-based and tries to reproduce a realistic sky according to various parameters like mieCoefficient, mieDirectionalG, rayleigh and turbidity. We are not going to cover those and only play with the position of the sun.
To do that, we are going to add a tweak to Leva.
Call useControls, set the first parameter as 'sky' in order to create a folder with that name and send an object with a sunPosition property set to have a vector 3 tweak (don’t forget to retrieve the sunPosition):
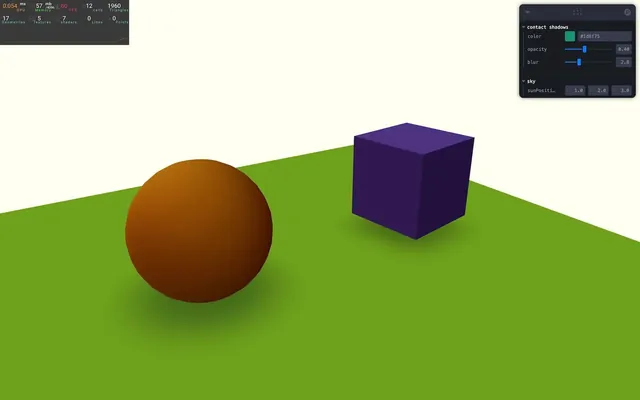
const { sunPosition } = useControls('sky', {
    sunPosition: { value: [ 1, 2, 3 ] }
})
We can now use that value in the <Sky>:
<Sky sunPosition={ sunPosition } />Be careful, this is not the usual way of setting a sun position. It’s better to use spherical coordinates and Three.js provides such a thing with the Spherical class. You can then create a Vector3 and use its setFromSpherical method to convert from the spherical coordinate to a vector 3 (x, y, z) coordinates.
Using spherical coordinates would make tweaking easier since you are playing with two angles (phi and theta), but we won’t do that here.
Finally, to make the scene more realistic and logical, we can use the sunPosition for the <directionalLight>:
<directionalLight
    ref={ directionalLight }
    position={ sunPosition }
    intensity={ 4.5 }
    castShadow
    shadow-mapSize={ [ 1024, 1024 ] }
    shadow-camera-near={ 1 }
    shadow-camera-far={ 10 }
    shadow-camera-top={ 5 }
    shadow-camera-right={ 5 }
    shadow-camera-bottom={ - 5 }
    shadow-camera-left={ - 5 }
/>
Environment Map 01:26:02
In the previous lessons, we implemented environment maps made out of 6 textures (one for each face of a cube).
But there are other ways to implement an environment map.
We can use HDRI textures which is like a 360° photo where the pixel data goes beyond the traditional color range. Those can be taken with special cameras or generated in 3D.
Implementing such environment maps is a bit more complicated, but, as always, drei makes the process easier thanks to the Environment helper.
Setup with cube texture
In the following part, we are going to use the environment map to illuminate the scene. And to prevent conflicts, we are going to remove the current lights and also the <Sky>.
In Experience.jsx, comment or remove the <directionalLight>, the <ambientLight> and the <Sky>:
{/* <directionalLight
    ref={ directionalLight }
    position={ sunPosition }
    intensity={ 4.5 }
    castShadow
    shadow-mapSize={ [ 1024, 1024 ] }
    shadow-camera-near={ 1 }
    shadow-camera-far={ 10 }
    shadow-camera-top={ 5 }
    shadow-camera-right={ 5 }
    shadow-camera-bottom={ - 5 }
    shadow-camera-left={ - 5 }
/> */}
{/* <ambientLight intensity={ 1.5 } /> */}
{/* <Sky sunPosition={ sunPosition } /> */}
Import Environment from @react-three/drei:
import { Environment, Sky, ContactShadows, RandomizedLight, AccumulativeShadows, SoftShadows, BakeShadows, useHelper, OrbitControls } from '@react-three/drei'First, we are going to use the traditional cube textures that you can find in the /public/environmentMaps/ folder.
Add the <Environment> to the JSX and also set its files attribute to contain an array of textures:
export default function Experience()
{
    // ...

    return <>

        <Environment
            files={ [
                './environmentMaps/2/px.jpg',
                './environmentMaps/2/nx.jpg',
                './environmentMaps/2/py.jpg',
                './environmentMaps/2/ny.jpg',
                './environmentMaps/2/pz.jpg',
                './environmentMaps/2/nz.jpg',
            ] }
        />

        {/* ... */}
    </>
}
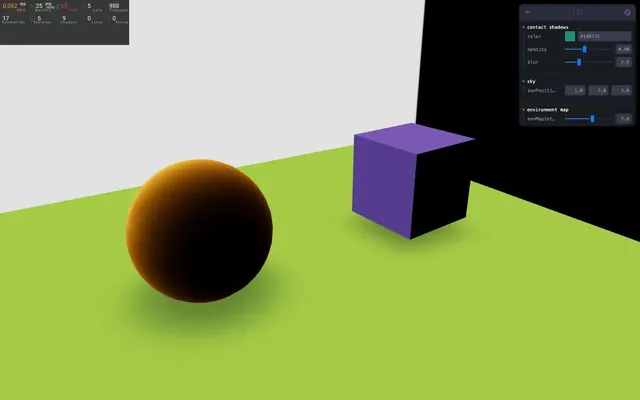
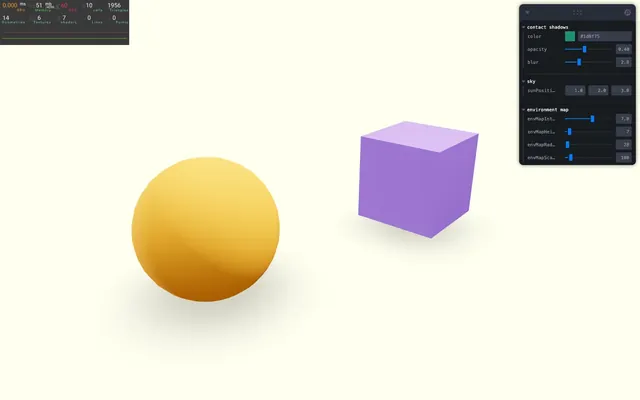
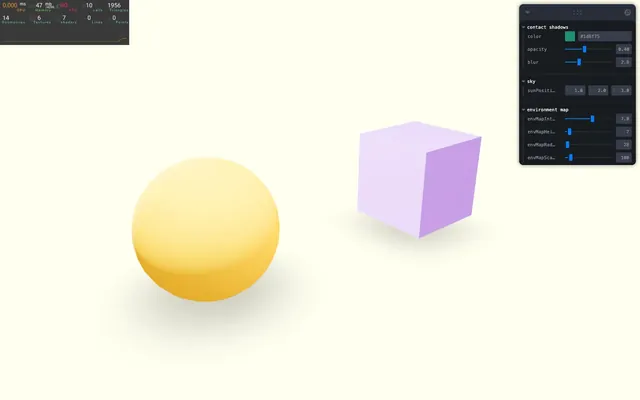
You should see the environment map illuminating the scene.
Intensity
The default envMapIntensity is set to 1, which isn’t much.
Let’s create a tweak to control it.
Call useControls, set the first parameter as 'environment map' in order to have a folder with that name and send an object with a envMapIntensity property that ranges between 0 and 12 (don’t forget to retrieve the envMapIntensity):
const { envMapIntensity } = useControls('environment map', {
    envMapIntensity: { value: 1, min: 0, max: 12 }
})
We can change the environment map intensity of all objects in the scene using the environmentIntensity property available on Scene.
To access the current Scene used by R3F, we can use the useThree helper.
Import useThree from @react-three/fiber:
import { useThree, useFrame } from '@react-three/fiber'Right after the useControls for the envMapIntensity, call useThree(), save it in a scene variable and provide the following function as the parameter:
const { envMapIntensity } = useControls('environment map', {
    // ...
})

const scene = useThree(state => state.scene)
This is a selector. The state contains a lot more than the Scene, but we only select the scene property.
Next, we want to update the environmentIntensity on scene. We could do it right away, but that would mean we update this property whenever the component re-renders, regardless of what triggered that re-render.
The right way is to do it when envMapIntensity (the one from useControls) changed. And we can do that using useEffect with [ envMapIntensity ] as the dependencies:
const scene = useThree(state => state.scene)
useEffect(() =>
{
    scene.environmentIntensity = envMapIntensity
}, [ envMapIntensity ])
Choose a value that suits you (3.5 in my case):
const { envMapIntensity } = useControls('environment map', {
    envMapIntensity: { value: 3.5, min: 0, max: 12 }
})
Background
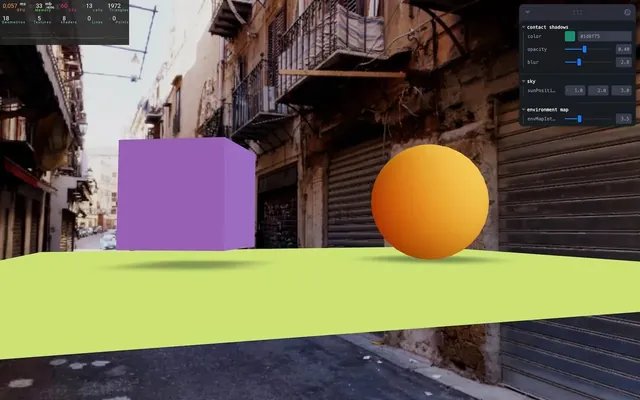
If you want to see the environment map in the background, simply add a background attribute:
<Environment
    background
    files={ [
        './environmentMaps/2/px.jpg',
        './environmentMaps/2/nx.jpg',
        './environmentMaps/2/py.jpg',
        './environmentMaps/2/ny.jpg',
        './environmentMaps/2/pz.jpg',
        './environmentMaps/2/nz.jpg',
    ] }
/>
HDRI texture
As mentioned earlier, instead of using 6 images, we can use one image covering the surrounding.
It’s like a 360 photo and it’s usually in High Dynamic Range in order to make the illumination data more accurate. It makes sense since light doesn’t really stop at a range. If you look at the sun, it’ll be much brighter than looking at a bulb light (don’t look at the sun).
There is already an HDR image named the_sky_is_on_fire_2k.hdr available in the /public/environmentMaps/ folder.
Replace the array of textures we’ve sent to the files attribute by one single string, the path to the hdr file:
<Environment
    background
    files="./environmentMaps/the_sky_is_on_fire_2k.hdr"
/>
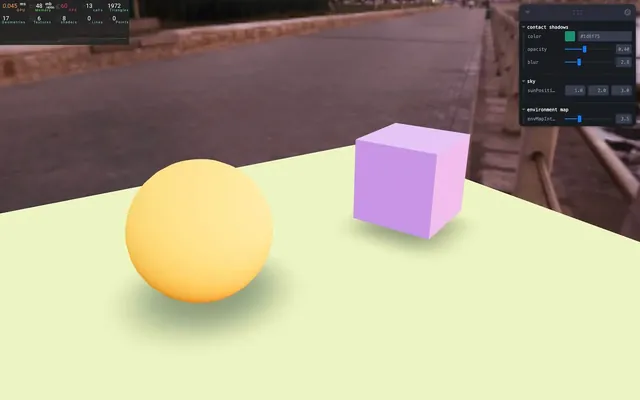
And as you can see, the Environment helper took care of it.
Feel free to tweak the envMapIntensity for a better result.
As a side note, if you are looking for HDRI content, on of the best place is Poly Haven (previously named HDRI Haven).
Make sure to download the HDR version and not EXR. Also try to keep the resolution as small as possible since the environment map uses a lot of resources.
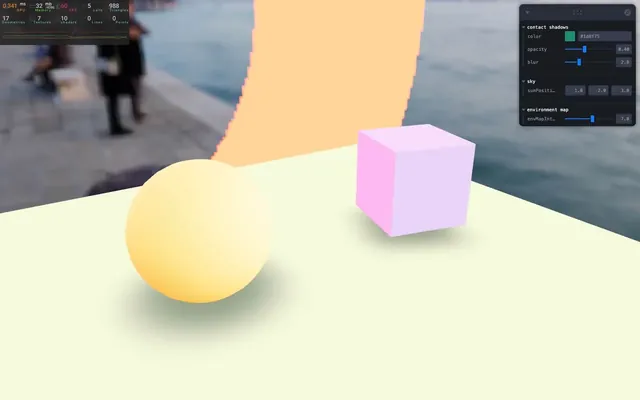
Presets
Even better than having to download those HDRI, drei created presets that will take the files directly from Poly Haven.
Replace files by preset and choose one among the following list https://github.com/pmndrs/drei/blob/master/src/helpers/environment-assets.ts
<Environment
    background
    preset="sunset"
/>

Custom environment
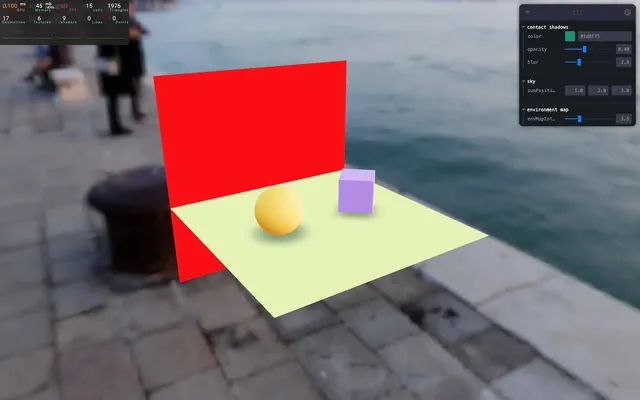
But what if we want to tweak it a little?
Let’s say that we would like to have some kind of big red rectangle on one side to ensure there’s red light illuminating our objects from this side.
Good news, it’s very simple.
All we have to do is position a <mesh> (or anything we want to be part of the environment map) inside the <Environment>.
A good practice would be to create the <mesh> outside the <Environment> first to make sure it’s well positioned:
<Environment
    background
    preset="sunset"
/>

<mesh position-z={ - 5 } scale={ 10 }>
    <planeGeometry />
    <meshBasicMaterial color="red" />
</mesh>
And then add it inside the <Environment>:
<Environment
    background
    preset="sunset"
>
    <mesh position-z={ - 5 } scale={ 10 }>
        <planeGeometry />
        <meshBasicMaterial color="red" />
    </mesh>
</Environment>
The red rectangle will be added on top of the initial environment map and we can see the impact on the objects.
We could have also created a scene that doesn’t rely on the initial environment map.
To do that, remove the preset attribute:
<Environment
    background
>
    <mesh position-z={ - 5 } scale={ 10 }>
        <planeGeometry />
        <meshBasicMaterial color="red" />
    </mesh>
</Environment>
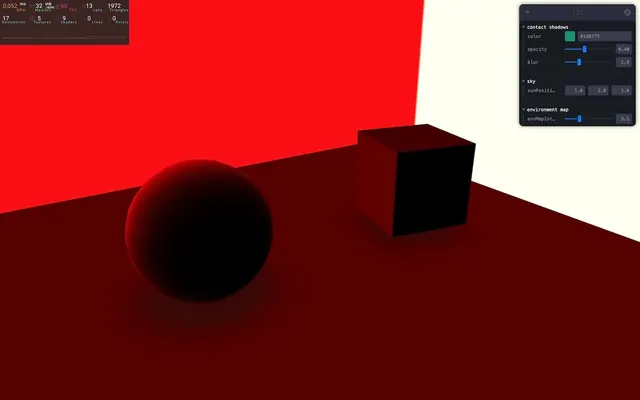
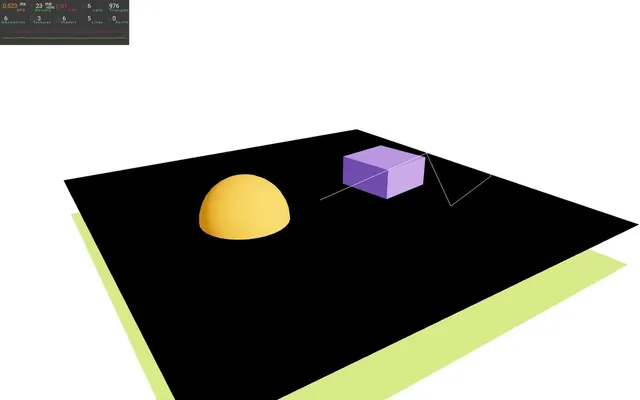
Note that, by default, the background of the environment map is black which is why only the red side is being illuminated.
We can change that by setting a background color on the scene that is being rendered in the <Environment> and we already learned how to do that.
Add a <color> inside the <Environment>, set its value to 'blue' and set its attach attribute to "background":
<Environment
    background
>
    <color args={ [ 'blue' ] } attach="background" />
    {/* ... */}
</Environment>
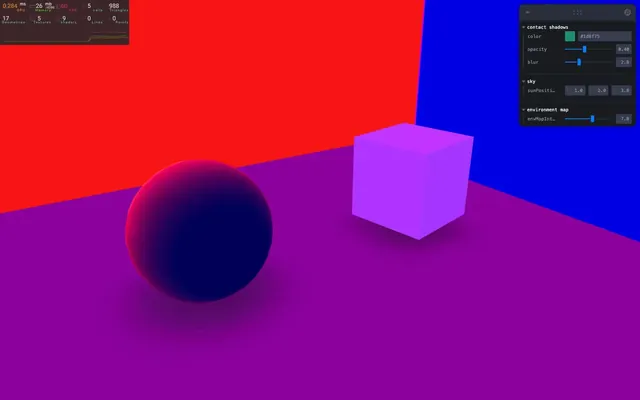
The background color is affecting the whole scene lighting.
Let’s change it too black:
<Environment
    background
>
    <color args={ [ '#000000' ] } attach="background" />
    {/* ... */}
</Environment>
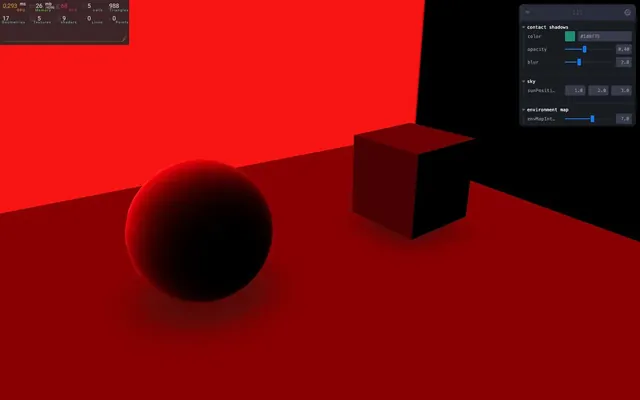
Using meshes to illuminate our scene sounds like a limited solution since light shouldn’t be limited to the color spectrum. In real life, we should be able to make the red plane brighter and brighter. To our eyes, it should become white like when a heated metal reaches very high temperatures.
The good news is, we can do that.
First, using a literal value like red on the <meshBasicMaterial> doesn’t let us control the actual intensity of the color. But since the color attribute is used to instantiate a Three.js Color, we can see from the documentation that we can also send an array containing the separated red, green and blue values.
Replace the "red" color of the <meshBasicMaterial> by [ 1, 0, 0 ]:
<Environment
    background
>
    <color args={ [ '#000000' ] } attach="background" />
    <mesh position-z={ - 5 } scale={ 10 }>
        <planeGeometry />
        <meshBasicMaterial color={ [ 1, 0, 0 ] } />
    </mesh>
</Environment>
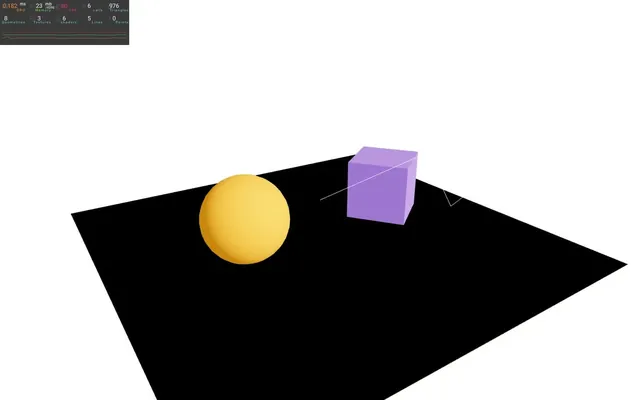
We get the exact same color, but now we go beyond 1:
<Environment
    background
>
    <color args={ [ '#000000' ] } attach="background" />
    <mesh position-z={ - 5 } scale={ 10 }>
        <planeGeometry />
        <meshBasicMaterial color={ [ 2, 0, 0 ] } />
    </mesh>
</Environment>
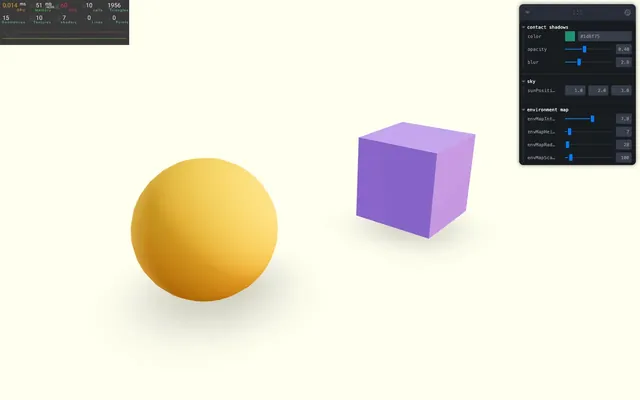
As you can see, the red plane started to get brighter and the scene is even more illuminated.
Let’s go crazy:
<Environment
    background
>
    <color args={ [ '#000000' ] } attach="background" />
    <mesh position-z={ - 5 } scale={ 10 }>
        <planeGeometry />
        <meshBasicMaterial color={ [ 10, 0, 0 ] } />
    </mesh>
</Environment>
While adding lights to our environment map this way is a viable solution, there is a helper made for this purpose named Lightformer.
Comment or remove the <mesh> inside the <Environment>:
<Environment
    background
>
    <color args={ [ '#000000' ] } attach="background" />
    {/* <mesh position-z={ - 5 } scale={ 10 }>
        <planeGeometry />
        <meshBasicMaterial color={ [ 10, 0, 0 ] } toneMapped={ false } />
    </mesh> */}
</Environment>
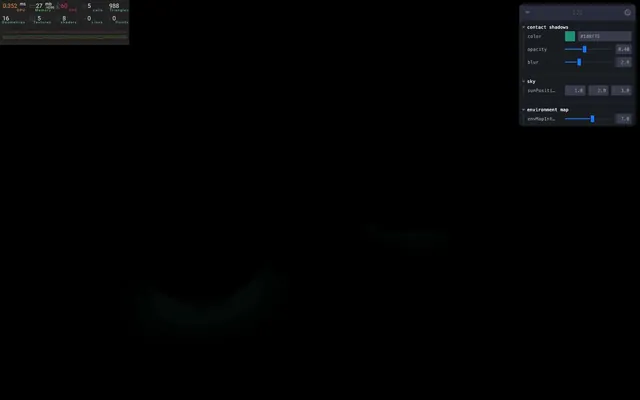
It’s all black because we don’t have any more light source.
Import Lightformer from @react-three/drei:
import { Lightformer, Environment, Sky, ContactShadows, RandomizedLight, AccumulativeShadows, SoftShadows, BakeShadows, useHelper, OrbitControls } from '@react-three/drei'And add it to the <Environment> with the same position and scale that we had on our <mesh>:
<Environment
    background
>
    <color args={ [ '#000000' ] } attach="background" />
    <Lightformer position-z={ - 5 } scale={ 10 } />
</Environment>
We can choose the color with the color attribute, but instead of sending an array with values that goes beyond 1 like we did for the <meshBasicMaterial>, we can send a literal color and then choose the intensity with the intensity attribute:
<Lightformer
    position-z={ - 5 }
    scale={ 10 }
    color="red"
    intensity={ 10 }
/>
And the cool part with Lightformer is that we can also use various shapes like a ring or a circle with the form attribute (reduce the scale to 5 if you want to see it more clearly):
<Lightformer
    position-z={ - 5 }
    scale={ 5 }
    color="red"
    intensity={ 10 }
    form="ring"
/>
While this ring example doesn’t make much of a difference, using it in realistic scenes with reflection will add a lot to the composition and realism as you can see in this example: https://codesandbox.io/s/lwo219?file=/src/App.js:917-1016
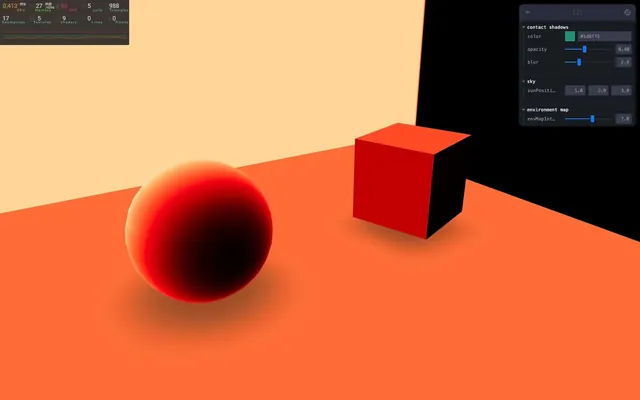
Let’s put back the preset:
<Environment
    background
    preset="sunset"
>
    <color args={ [ '#000000' ] } attach="background" />
    <Lightformer
        position-z={ - 5 }
        scale={ 5 }
        color="red"
        intensity={ 10 }
        form="ring"
    />
</Environment>
As you can see, the Lightformer is now part of the environment map. To do that the whole environment map had to be re-rendered. Although it takes some resources, it’s only done once on the first frame by default.
And since the environment map has been rendered, we can choose its resolution:
<Environment
    background
    preset="sunset"
    resolution={ 32 }
>
    <color args={ [ '#000000' ] } attach="background" />
    <Lightformer
        position-z={ - 5 }
        scale={ 5 }
        color="red"
        intensity={ 10 }
        form="ring"
    />
</Environment>
The smaller the resolution, the better for frame rate.
An environment map with a small resolution will look blurry, but it is not always bad. If it’s just there to illuminate your objects, you won’t notice it and you can use a very small resolution.
Let’s comment everything we had in the <Environment> for what’s coming next.
<Environment
    background
    preset="sunset"
    resolution={ 32 }
>
    {/* <color args={ [ '#000000' ] } attach="background" /> */}
    {/* <Lightformer
        position-z={ - 5 }
        scale={ 5 }
        color="red"
        intensity={ 10 }
        form="ring"
    /> */}
    {/* <mesh position-z={ - 5 } scale={ 10 }>
        <planeGeometry />
        <meshBasicMaterial color={ [ 10, 0, 0 ] } toneMapped={ false } />
    </mesh> */}
</Environment>
Note that the resolution attribute isn’t affecting the environment map since there is nothing to render inside the <Environment>.
Let’s remove or comment the resolution too.
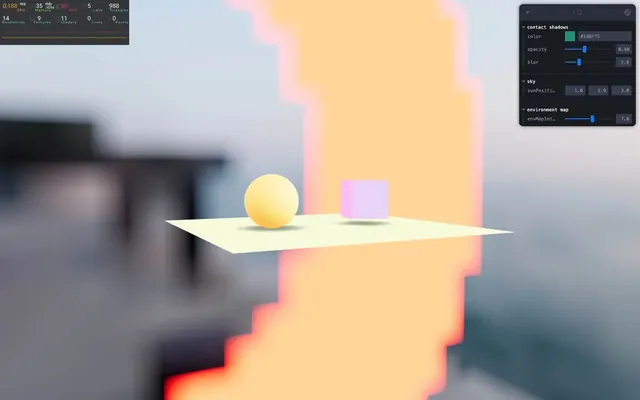
Ground
When using an environment map as a background, we have the feeling that objects are floating because the image is infinitely far.
By adding a ground attribute, the projection of the environment map will make it look as if the floor underneath the objects is near.
Add the ground attribute to <environment> with the following parameters instead of the background attribute:
<Environment
    preset="sunset"
    ground={ {
        height: 7,
        radius: 28,
        scale: 100
    } }
>
    {/* ... */}
</Environment>
That ground is considered to be at the 0 elevation of the scene. This means that, in theory, our object are inside the ground. We can fix that by moving them up a little with their position-y attribute:
<mesh castShadow position-y={ 1 } position-x={ - 2 }>
    {/* ... */}
</mesh>

<mesh castShadow ref={ cube } position-y={ 1 } position-x={ 2 } scale={ 1.5 }>
    {/* ... */}
</mesh>

<mesh receiveShadow position-y={ 0 } rotation-x={ - Math.PI * 0.5 } scale={ 10 }>
    {/* ... */}
</mesh>
We can actually remove or comment the green floor plane and move the <ContactShadows> up with its position attribute:
<ContactShadows
    position={ [ 0, 0, 0 ] }
    scale={ 10 }
    resolution={ 512 }
    far={ 5 }
    color={ color }
    opacity={ opacity }
    blur={ blur }
/>
The settings of the ground are a bit confusing and the best solution is to add some controls in order to find the perfect values.
Add the following parameters to the existing useControls of the environment map:
const { envMapIntensity, envMapHeight, envMapRadius, envMapScale } = useControls('environment map', {
    envMapIntensity: { value: 7, min: 0, max: 12 },
    envMapHeight: { value: 7, min: 0, max: 100 },
    envMapRadius: { value: 28, min: 10, max: 1000 },
    envMapScale: { value: 100, min: 10, max: 1000 }
})
And use them on the <Environment> ground:
<Environment
    preset="sunset"
    ground={ {
        height: envMapHeight,
        radius: envMapRadius,
        scale: envMapScale
    } }
>
</Environment>
Stage 01:55:49
We have been doing a lot of configuration in this lesson. Although it wasn’t too complicated, sometimes, we just want a default good looking setting with minimal configuration.
And this is what the Stage helper does.
Stage will set an environment map, shadows and two directional lights for us. It’ll also center the scene. If you want a quick and easy setup, it’s a good solution.
To make things simple and not lose our previous setup, we are going to comment everything in the JSX except for the <OrbitControls> and <Perf> (even the <mesh>).
Then we are going to duplicate the sphere <mesh> and the cube <mesh>:
<Perf position="top-left" />

<OrbitControls makeDefault />

{/* <BakeShadows /> */}
{/* <SoftShadows size={ 25 } samples={ 10 } focus={ 0 } /> */}

{/* <Environment
    background
    // files={ [
    //     './environmentMaps/2/px.jpg',
    //     './environmentMaps/2/nx.jpg',
    //     './environmentMaps/2/py.jpg',
    //     './environmentMaps/2/ny.jpg',
    //     './environmentMaps/2/pz.jpg',
    //     './environmentMaps/2/nz.jpg',
    // ] }
    // files="./environmentMaps/the_sky_is_on_fire_2k.hdr"
    preset="sunset"
    resolution={ 32 }
    ground={ {
        height: envMapHeight,
        radius: envMapRadius,
        scale: envMapScale
    } }
>
</Environment> */}

{/* <AccumulativeShadows
    position={ [ 0, - 0.99, 0 ] }
    scale={ 10 }
    color="#316d39"
    opacity={ 0.8 }
    frames={ Infinity }
    temporal
    blend={ 100 }
>
    <RandomizedLight
        amount={ 8 }
        radius={ 1 }
        ambient={ 0.5 }
        intensity={ 3 }
        position={ [ 1, 2, 3 ] }
        bias={ 0.001 }
    />
</AccumulativeShadows> */}

{/* <Sky sunPosition={ sunPosition } /> */}

{/* <directionalLight
    ref={ directionalLight }
    position={ sunPosition }
    intensity={ 4.5 }
    castShadow
    shadow-mapSize={ [ 1024, 1024 ] }
    shadow-camera-near={ 1 }
    shadow-camera-far={ 10 }
    shadow-camera-top={ 5 }
    shadow-camera-right={ 5 }
    shadow-camera-bottom={ - 5 }
    shadow-camera-left={ - 5 }
/> */}
{/* <ambientLight intensity={ 1.5 } /> */}

{/* <mesh castShadow position-y={ 1 } position-x={ - 2 }>
    <sphereGeometry />
    <meshStandardMaterial color="orange" envMapIntensity={ envMapIntensity } />
</mesh> */}

{/* <mesh castShadow position-y={ 1 } ref={ cube } position-x={ 2 } scale={ 1.5 }>
    <boxGeometry />
    <meshStandardMaterial color="mediumpurple" envMapIntensity={ envMapIntensity } />
</mesh> */}

{/* <mesh receiveShadow position-y={ 0 } rotation-x={ - Math.PI * 0.5 } scale={ 10 }>
    <planeGeometry />
    <meshStandardMaterial color="greenyellow" envMapIntensity={ envMapIntensity } />
</mesh> */}

{/* <ContactShadows
    position={ [ 0, 0, 0 ] }
    scale={ 10 }
    resolution={ 512 }
    far={ 5 }
    color={ color }
    opacity={ opacity }
    blur={ blur }
/> */}

<mesh castShadow position-y={ 1 } position-x={ - 2 }>
    <sphereGeometry />
    <meshStandardMaterial color="orange" envMapIntensity={ envMapIntensity } />
</mesh>

<mesh castShadow ref={ cube } position-y={ 1 } position-x={ 2 } scale={ 1.5 }>
    <boxGeometry />
    <meshStandardMaterial color="mediumpurple" envMapIntensity={ envMapIntensity } />
</mesh>

They should look completely black because there is currently no light or environment map.
Import Stage from @react-three/drei:
import { Stage, Lightformer, Environment, Sky, ContactShadows, RandomizedLight, AccumulativeShadows, SoftShadows, BakeShadows, useHelper, OrbitControls } from '@react-three/drei'And now wrap the two <mesh> in <Stage>:
<Stage>
    <mesh position-y={ 1 } position-x={ - 2 }>
        <sphereGeometry />
        <meshStandardMaterial color="orange" />
    </mesh>

    <mesh ref={ cube } position-y={ 1 } position-x={ 2 } scale={ 1.5 }>
        <boxGeometry />
        <meshStandardMaterial color="mediumpurple" />
    </mesh>
</Stage>
Convenient, right?
We can still control the shadow by sending an object to the the shadow attribute and we can choose between the accumulative shadow and the contact shadow with the type property on the object we send to shadow.
Let’s use the contact shadow:
<Stage
    shadows={ { type: 'contact' } }
>
We get the same result since the contact shadow is the default one. But now we can pass more properties to the object in order to tweak the shadow:
<Stage
    shadows={ { type: 'contact', opacity: 0.2, blur: 3 } }
>
We can also choose a different environment map preset:
<Stage
    shadows={ { type: 'contact', opacity: 0.2, blur: 3 } }
    environment="sunset"
>
Change the directional lights preset ('rembrandt', 'portrait', 'upfront', 'soft'):
<Stage
    shadows={ { type: 'contact', opacity: 0.2, blur: 3 } }
    environment="sunset"
    preset="portrait"
>
Finally, we can change the intensity of the lighting. Since, internally, Stage updates the scene.envMapIntensity like we did earlier, let’s remove or comment the part where we update it ourselves with useThree and useEffect:
// const scene = useThree(state => state.scene)
// useEffect(() =>
// {
//     scene.environmentIntensity = envMapIntensity
// }, [ envMapIntensity ])
And send the envMapIntensity to the intensity prop of <Stage>:
<Stage
    shadows={ { type: 'contact', opacity: 0.2, blur: 3 } }
    environment="sunset"
    preset="portrait"
    intensity={ envMapIntensity }
>
It’s not the exact same thing because intensity will also update the directional lights in Stage, but it’s handy, so let’s keep it that way.
You can tweak much more, but we are going to stop here.
Going further 02:00:59
We’ve covered the most famous and useful solutions to improve the environment of your scene, but there is a lot more where that came from.
Go check out the Staging section in drei for inspiration https://github.com/pmndrs/drei#staging