Introduction 00:00
Let’s continue our process of repeating the original lessons with R3F.
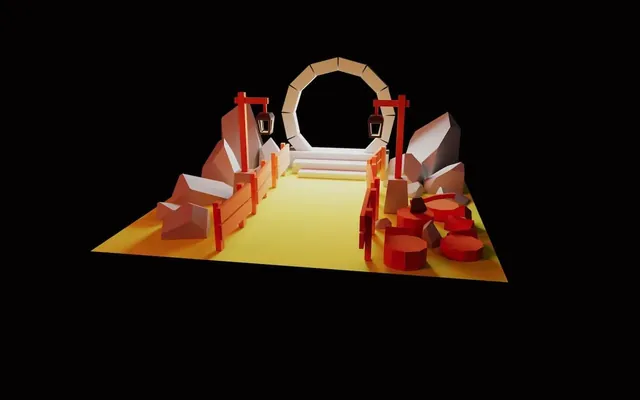
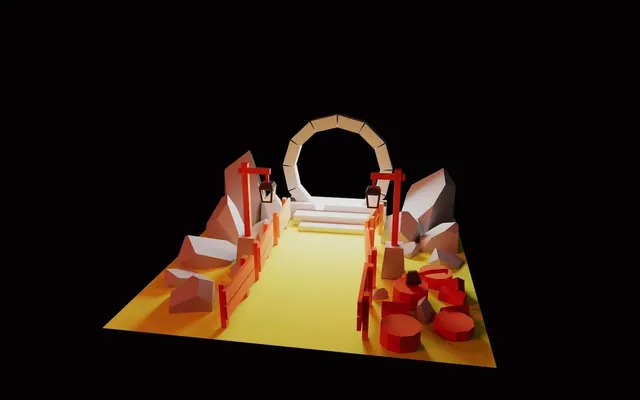
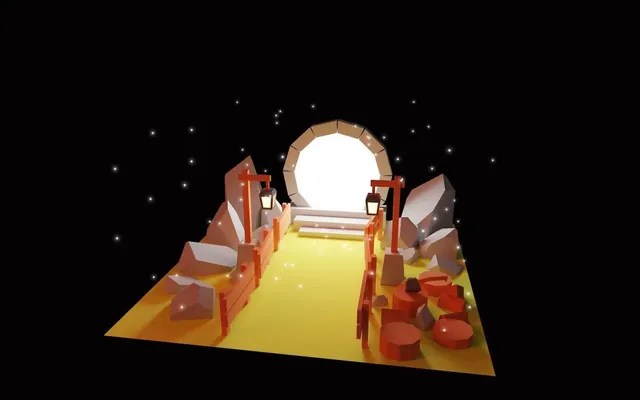
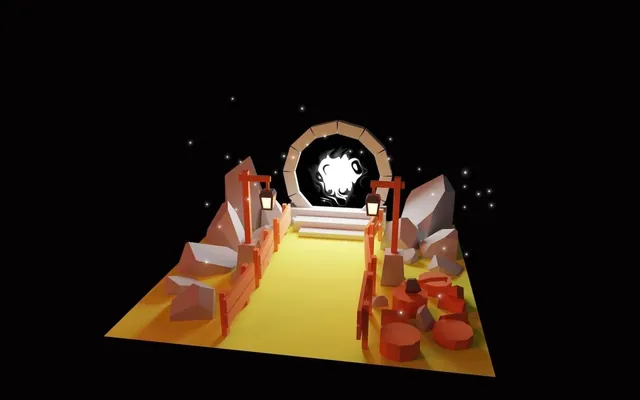
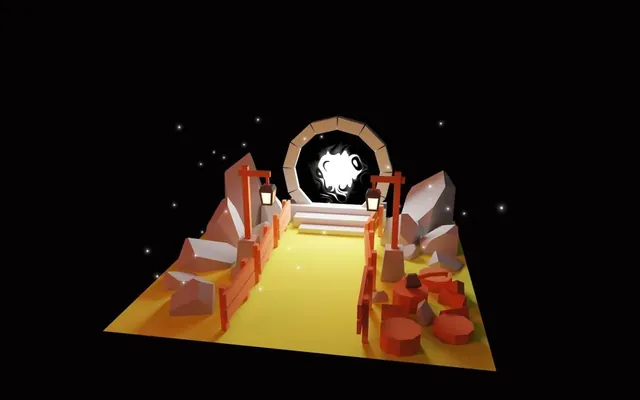
This time, we are going to recreate the portal scene.

We are not going to re-do the whole modelling, baking, and exporting, since those steps aren’t related to R3F.
You can use your own portal if you followed the previous lessons or you can use the one provided with the lesson’s starter.
Setup 01:22
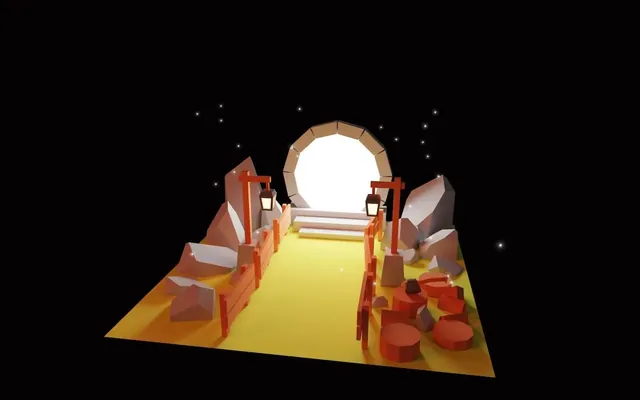
The starter setup is the same as in the previous lesson:
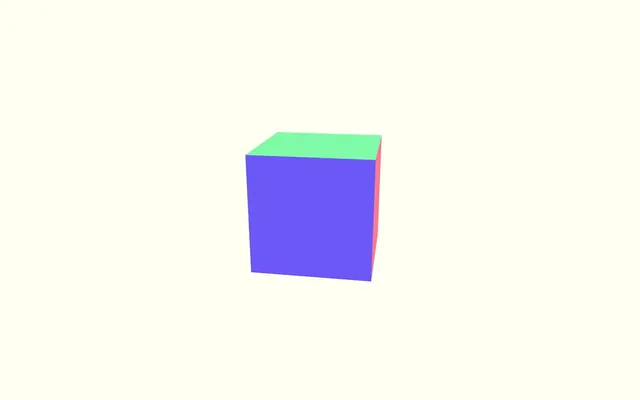
We have one cube at the center of the scene and OrbitControls so that we can rotate it around.
We didn’t use Perf because we shouldn’t have any performance concerns, but feel free to add it if you want.
The shaders of the portal (vertex and fragment) are already located in /src/shaders/portal/ . Why the fireflies shaders are missing, will become clear later in the lesson.
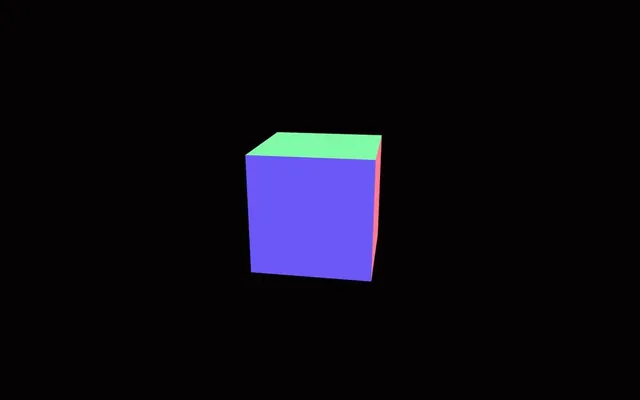
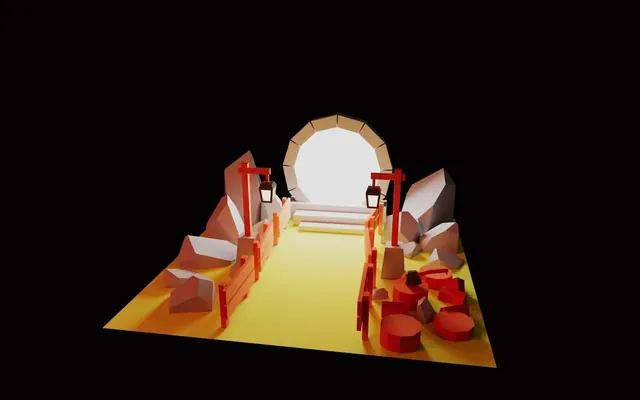
Dark background 02:32
This time, we are going to keep the colors of the original lesson. This means that we need a darker background. There are multiple ways of doing that as we saw in a previous lesson.
Let’s use the <color> that we attach to the scene technique.
In Experience JSX, create a <color>:
export default function Experience()
{
    return <>

        <color />

        {/* ... */}

    </>
}
Send it an array containing the color using the args attribute:
<color args={ [ '#030202' ] } />And attach it to the scene background with the attach attribute:
<color args={ [ '#030202' ] } attach="background" />
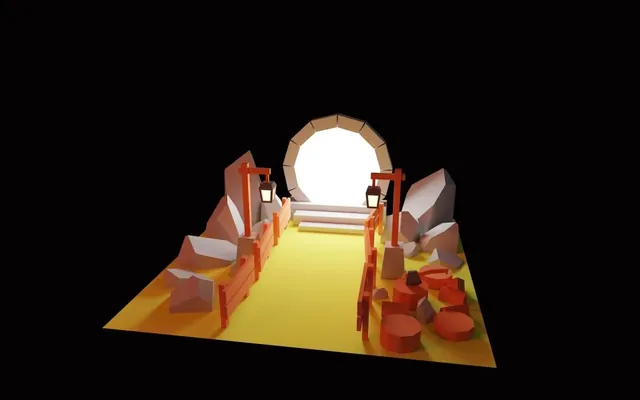
The model 04:30
It’s time to add our model.
Loading
The model file is named portal.glb and is located in the /public/model/ folder. Feel free to replace it with your own model.
We are going to use useGLTF.
Import useGLTF from @react-three/drei:
import { useGLTF, OrbitControls } from '@react-three/drei'And load the model (don’t forget that we don’t need to write public/:
export default function Experience()
{
const model = useGLTF('./model/portal.glb')
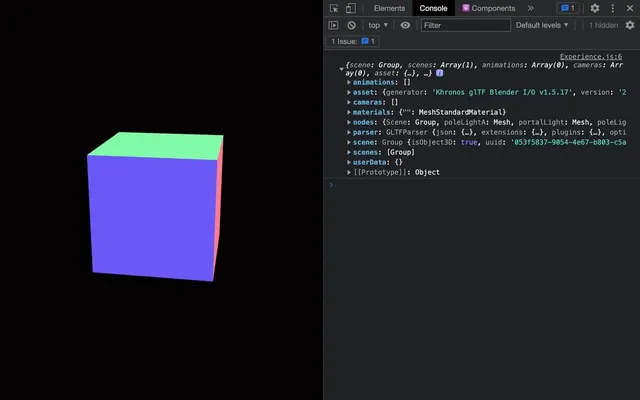
console.log(model)
// ...
}
If you remember the lesson in which we created and imported the model, it is composed of multiple parts:
- The baked model to which we need to apply a
MeshBasicMaterialwith the baked texture. - Two pole lights
Meshesto which we need to apply aMeshBasicMaterial - The portal to which we need to apply a
ShaderMaterial
Because of that, we are not going to add the whole model at once to the scene.
Instead, we are going to add each element separately in order to have more control over them.
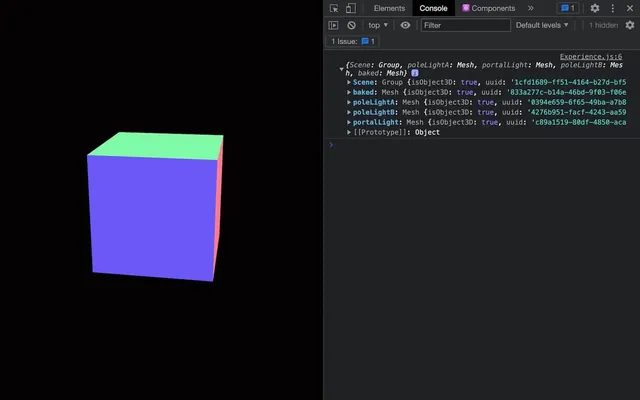
And those elements are already available in the nodes property:
const model = useGLTF('./model/portal.glb')
console.log(model.nodes)
Those names correspond to the name we chose in Blender. If you are using your own model, make sure to adapt to your configuration.
And again, we can destructure it:
const { nodes } = useGLTF('./model/portal.glb')
console.log(nodes)
Baked model
The baked model node is named baked and we can now access it with nodes.baked.
This time, we are not going to use <primitive> because we want to apply our own material to the Mesh. But we do need the geometry.
In the JSX, create a <mesh> and set its geometry to nodes.baked.geometry:
export default function Experience()
{
    // ...

    return <>

        {/* ... */}

        <mesh geometry={ nodes.baked.geometry } />

    </>
}
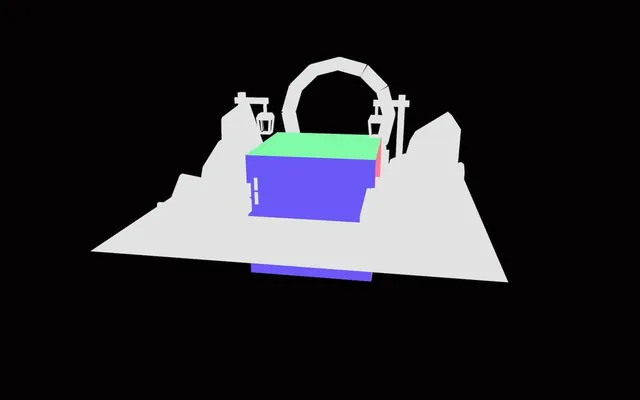
We now have our model and we can get rid of the cube:
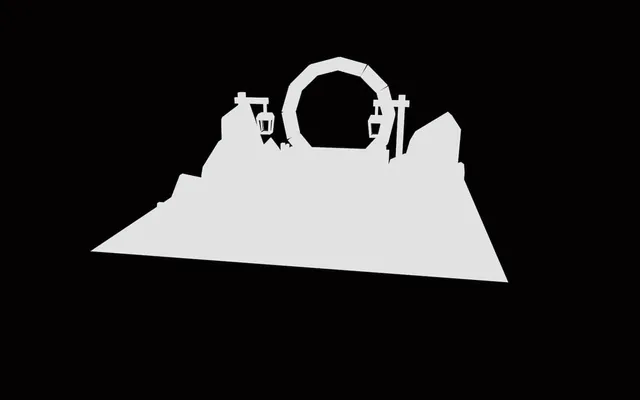
By default, a MeshBasicMaterial is applied to the <mesh> which is why we can see something.
We are going to add our own material, but first, we need to load the texture.
To load the texture, we can use the useTexture helper from drei.
Import useTexture from @react-three/drei:
import { useTexture, useGLTF, OrbitControls } from '@react-three/drei'Now use it to load the texture located in '/public/model/baked.jpg' (remember that we don’t need to write public/):
export default function Experience()
{
    // ...

    const bakedTexture = useTexture('./model/baked.jpg')
    console.log(bakedTexture)

    // ...
}
And this is the actual texture ready to be used.
We can now create the <meshBasicMaterial> in the <mesh> and use our texture on the map attribute:
<mesh geometry={ nodes.baked.geometry }>
    <meshBasicMaterial map={ bakedTexture } />
</mesh>
Oops, something went wrong.
Don’t worry, it’s not a model nor a texture issue. It’s simply the texture y coordinates that need to be flipped.
And since the texture is immediately returned when calling useTexture, we can flip it immediately with the flipY property:
const bakedTexture = useTexture('./model/baked.jpg')
bakedTexture.flipY = false
Much better.
Centering
Our model is a little high.
We can move the controls/camera up, or we can move the scene down.
Let’s move the scene down with the Center helper from drei
Import Center from @react-three/drei:
import { Center, useTexture, useGLTF, OrbitControls } from '@react-three/drei'Then wrap the <mesh> in a <Center>:
<Center>
    <mesh geometry={ nodes.baked.geometry }>
        <meshBasicMaterial map={ bakedTexture } />
    </mesh>
</Center>

Pole lights
We can now add the pole lights similarly to how we did for the base model.
Inside <Center>, add a new <mesh> with the geometry set to nodes.poleLightA.geometry:
<Center>
    {/* ... */}

    <mesh geometry={ nodes.poleLightA.geometry } />
</Center>
Where is our pole light?
Watch the floor of the scene closely:
The reason for this issue, is that we are creating a brand new <mesh> and lose the initial position, transformation and scale.
To fix that, we can implement the position from nodes.poleLightA.position again:
<mesh geometry={ nodes.poleLightA.geometry } position={ nodes.poleLightA.position } />
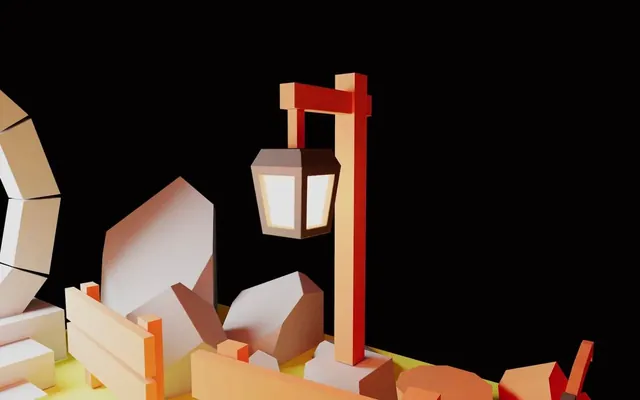
And now, we can add the <meshBasicMaterial> with the #ffffe5 for its color attribute in the <mesh>:
<mesh geometry={ nodes.poleLightA.geometry } position={ nodes.poleLightA.position }>
    <meshBasicMaterial color="#ffffe5" />
</mesh>

The other pole light works exactly the same way. All it takes, is duplicating the whole <mesh> and changing poleLightA to poleLightB:
<Center>
    {/* ... */}

    <mesh geometry={ nodes.poleLightB.geometry } position={ nodes.poleLightB.position }>
        <meshBasicMaterial color="#ffffe5" />
    </mesh>
</Center>

Portal
Like we did for the base model and the pole lights, we can add the portal whose node name is portalLight (because it was generating light):
<Center>
    {/* ... */}

    <mesh geometry={ nodes.portalLight.geometry } position={ nodes.portalLight.position }>
        <meshBasicMaterial color="#ffffff" />
    </mesh>
</Center>

In this case, we also need to add the rotation from the initial node:
<mesh geometry={ nodes.portalLight.geometry } position={ nodes.portalLight.position } rotation={ nodes.portalLight.rotation }>
    <meshBasicMaterial color="#ffffff" />
</mesh>
We now have all parts of our model.
Colors 21:08
You might have noticed something strange with the colors, especially when we added the material to the pole lights. The color should be much brighter.
The reason is that R3F, by default, sets a toneMapping.
This toneMapping is usually welcome and colors look better with it, but, in our case, we don’t want it because our scene has been baked from Blender and Blender already applies tone mapping with its color management system.
We want to get the exact same color as the one we baked in Blender.
Be prepared: fixing this issue is very complicated!
In index.jsx, add flat to the <Canvas>:
<Canvas
    flat
    camera={ {
        fov: 45,
        near: 0.1,
        far: 50,
        position: [ 1, 2, 6 ]
    } }
>
    <Experience />
</Canvas>
And that’s it.
Setting flat on the <Canvas> will set the toneMapping to THREE.NoToneMapping.
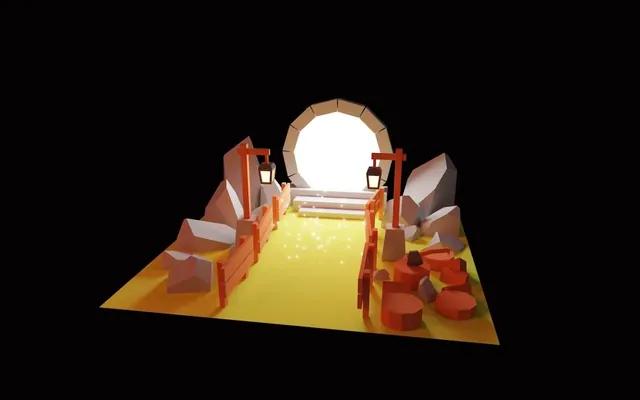
Fireflies 23:00
It’s time to add the little fireflies represented by glowing particles that float around.
During the original lesson, we created those with a custom shader.
As we said earlier, the shaders for the portal are already available in the project, but not for the fireflies.
Why, you might ask? The reason is that there is a drei helper called Sparkles that does exactly what we need.
In Experience.jsx, import Sparkles from @react-three/drei:
import { Sparkles, Center, useTexture, useGLTF, OrbitControls } from '@react-three/drei'Add it to the JSX in the <Center>:
<Center>

    {/* ... */}

    <Sparkles />

</Center>
You can barely see them, but there are some particles near the floor.
We can make them bigger with the size attribute:
<Sparkles
    size={ 6 }
/>
We can change the area with the scale attribute:
<Sparkles
    size={ 6 }
    scale={ [ 4, 2, 4 ] }
/>
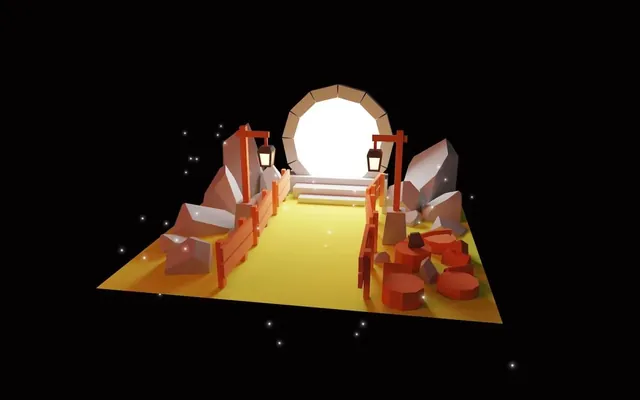
It’s an object, so we can move it up with the position-y attribute:
<Sparkles
    size={ 6 }
    scale={ [ 4, 2, 4 ] }
    position-y={ 1 }
/>
We can also slow down the movement with the speed attribute:
<Sparkles
    size={ 6 }
    scale={ [ 4, 2, 4 ] }
    position-y={ 1 }
    speed={ 0.2 }
/>
And finally, we can reduce the number of particles with the count attribute:
<Sparkles
    size={ 6 }
    scale={ [ 4, 2, 4 ] }
    position-y={ 1 }
    speed={ 0.2 }
    count={ 40 }
/>
Portal 25:56
We are almost done. All we have to do is add the custom shader material we had on the portal.
Since we already did it in the original lesson, we are not going to rewrite the shaders again. You can find them in the /src/shaders/portal/ folder.
Basic shader
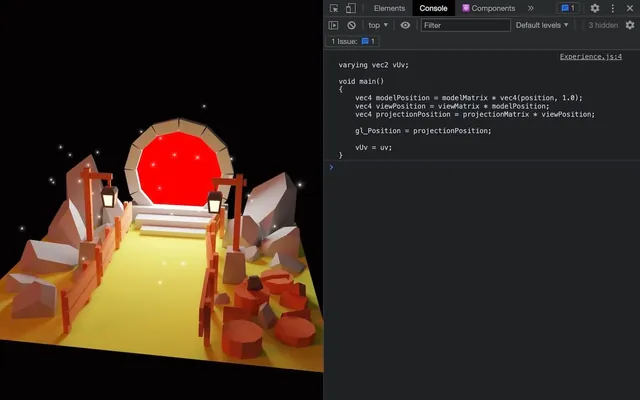
First of all, we can replace the <meshBasicMaterial> with a <shaderMaterial>:
<mesh geometry={ nodes.portalLight.geometry } position={ nodes.portalLight.position } rotation={ nodes.portalLight.rotation }>
    <shaderMaterial />
</mesh>

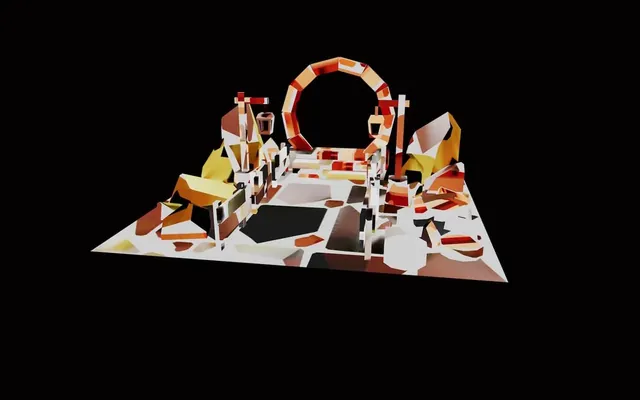
We can still see the portal as red because Three.js provides default vertex and fragment shader.
Importing the shaders
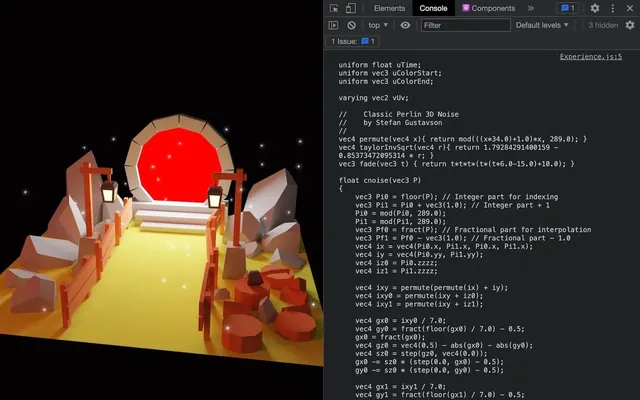
Importing the shaders works just like we did in the previous lessons. The Vite plugin named vite-plugin-glsl has already been added to the project and we can import .glsl files.
Import ./shaders/portal/vertex.glsl as portalVertexShader and log it:
import portalVertexShader from './shaders/portal/vertex.glsl'
console.log(portalVertexShader)
Also import the fragment shader and log it just to make sure it’s working:
import portalVertexShader from './shaders/portal/vertex.glsl'
import portalFragmentShader from './shaders/portal/fragment.glsl'
console.log(portalFragmentShader)
Implementing the shaders
We can now use our shaders on the <shaderMaterial> with the vertexShader attribute and the fragmentShader attribute:
<shaderMaterial
    vertexShader={ portalVertexShader }
    fragmentShader={ portalFragmentShader }
/>

The portal is gone, but it’s because we are not sending the uniforms needed in the fragment shader.
There are 3 uniforms that we need to send:
uTimeuColorStartuColorEnd
We need to provide those uniforms as a uniforms attribute of <shaderMaterial>.
For uTime, it’s easy because it’s a number. But for uColorStart and uColorEnd, we need to provide Three.js Color instances.
First, import THREE from three:
import * as THREE from 'three'Then provide the uniform attribute to <shaderMaterial>:
<shaderMaterial
    vertexShader={ portalVertexShader }
    fragmentShader={ portalFragmentShader }
    uniforms={ {
        uTime: { value: 0 },
        uColorStart: { value: new THREE.Color('#ffffff') },
        uColorEnd: { value: new THREE.Color('#000000') }
    } }
/>
We have our portal shader (although it’s not animated) but there is an easier way to do what we just did.
The shaderMaterial helper
As always, drei provides a helper called shaderMaterial that creates a ShaderMaterial that we will then make available in the JSX. It also simplifies the process of creating and updating uniforms.
Import shaderMaterial from drei:
import { shaderMaterial, Sparkles, Center, useTexture, useGLTF, OrbitControls } from '@react-three/drei'Then, call it before the Experience function and assign the result in a PortalMaterial variable:
const PortalMaterial = shaderMaterial()

export default function Experience()
{
    // ...
}
On top of that, we need to provide 3 parameters to it.
The first parameter is the uniforms, but without the value property:
const PortalMaterial = shaderMaterial(
    {
        uTime: 0,
        uColorStart: new THREE.Color('#ffffff'),
        uColorEnd: new THREE.Color('#000000')
    },
    // ...
)
The second and third parameters represent the vertex and fragment shaders:
const PortalMaterial = shaderMaterial(
    {
        uTime: 0,
        uColorStart: new THREE.Color('#ffffff'),
        uColorEnd: new THREE.Color('#000000')
    },
    portalVertexShader,
    portalFragmentShader
)
Now, to convert it to an R3F tag that we can use in the JSX, we are going to use extend like we did when we implement the OrbitControls ourselves at the beginning of the chapter.
Import extend from @react-three/fiber:
import { extend } from '@react-three/fiber'Then call it after creating the PortalMaterial and send an object with the property and value being PortalMaterial:
const PortalMaterial = shaderMaterial(
    // ...
)

extend({ PortalMaterial })
Doing this makes a <portalMaterial> available in our JSX.
Now, replace the <shaderMaterial> with <portalMaterial>:
<mesh geometry={ nodes.portalLight.geometry } position={ nodes.portalLight.position } rotation={ nodes.portalLight.rotation }>
    <portalMaterial />
</mesh>
This solution might not look much easier, but it integrates better with R3F, we can use the <portalMaterial> in multiple <mesh> and the uniforms are easier to update.
Animating
All there’s left to do, is to update the uTime uniform and using the shaderMaterial helper has made that easier.
First, we need a reference to the material.
Import useRef from react:
import { useRef } from 'react'Then, create a portalMaterial reference:
export default function Experience()
{
    // ...

    const portalMaterial = useRef()

    // ...
}
Afterwards, associate it with the <shaderMaterial> using the ref attribute:
<portalMaterial ref={ portalMaterial } />Now import the useFrame hook from @react-three/fiber:
import { useFrame, extend } from '@react-three/fiber'Call it in the Experience function:
export default function Experience()
{
    // ...

    const portalMaterial = useRef()
    useFrame((state, delta) =>
    {

    })

    // ...
}
Finally, use the delta to update the uTime of the portalMaterial reference:
useFrame((state, delta) =>
{
    portalMaterial.current.uTime += delta
})
As you can see, we didn’t have to specify uniforms or value.
And we have completed the portal with a mere 70 lines of code (not counting the shaders)!
Going further 41:14
This lesson was quite easy, but you now have access to all the helpers available in drei.
Maybe you could try to add some of them.